Welcome to my Photo Blog!
Leica M3
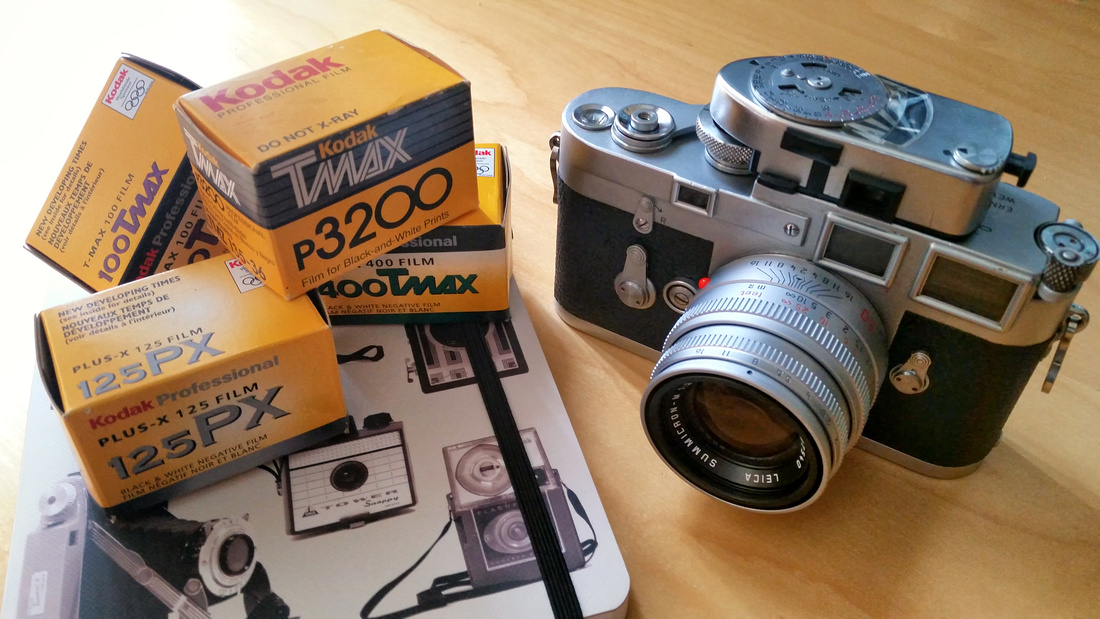
In the past few years I explored Leica M rangefinder film cameras, but most recently I was able to get hold on an excellent looking double-stroke Leica M3 produced in 1957. It came with the original Leica light meter MR which sits on the hotshoe connected to the exposure dial of the camera. Unfortunately both camera and light meter were starting to malfunction shortly after I bought the combo. The light meter was not working reliable at all, and also a change of the meter's battery did not help either. I opened up the MR device after finding online a description how to clean the contacts, reassembled it - with the same unreliable result. My recommendation: don't bother with it, not worth to have it fixed either. In fact I found a much better use of the hotshoe position by using an external viewfinder for my 35 mm lens which I describe in detail below (the M3 has no 35 mm frame lines - the successor model, the M2, does - and yes, the M3 is older than the M2!).

Leica M3 with original Leica Light Meter MR
The Camera Body
The camera body is simply to fall in love with - rigid hard metal base in brass chrome with a good weight. I don't want to ever experience it, but I am quite certain that this camera can drop on solid ground from a handheld position without suffering damage of the body itself. Beautiful also the nicely engraved Leica name on top of the camera which I like much better than the much more attention grabbing Leica red dot on the front in later models. The camera sits very stable on a flat surface with chrome 50/2 lens attached. The center of gravity is on the camera housing and not moved towards the lens! The eyepiece of the viewfinder has no rubber gasket to protect eyeglasses from scratches caused by the metal ring. No biggie for me at the moment since I don't wear glasses while shooting, but I can see this is an issue for other fellows. On the back the camera has two flash synchronization cable sockets for electronic flash and flash bulbs. The latter ones are probably not in use anymore. So far I also never used any electronic flash with this camera either. The film indicator on the back plate is fairly useless IMO but nice to look at. It allows to select the ISO/ASA speed of the inserted film but has no function within the camera itself. It is just a reminder which kind of film speed is used.
The M3 also came in "trim" versions depending on its manufacturing date. Biggest difference between versions is double-stroke (DS) or single-stroke (SS) advance lever. Which one is better? I am pretty undecided about this since all my other film cameras have a single-stroke lever. But I was surprised how quickly I got used to the double-stroke lever. You need to twist the right hand thumb less with each stroke compared to a single-stroke lever (which turns further). I would not make DS or SS as selection criteria for a used M3 camera - both do the same job. Leica later abandoned the DS advance lever which might make a DS based M3 a bit more "unique" and vintage.
This feature might not be often used with Leica Ms, but I really like that the M3 has a shutter self-time release which was unfortunately abandoned by Leica in later models. It's a nice feature and comes handy for group shots where the photographer wants to be included. The shutter click is very silent. Compared to the shutter of my M6 - which I already consider silent - the M3 shutter is even less noisy.
One bad surprise with the M3 was once for me its a bit unusual tripod bushing - it does not fit to the more common 1/4" but is instead made for 3/8" bolts. You need a tripod reducer bushing - good to be aware of this before planning to shoot a sunrise or a sunset with the M3!
The M3 has no light meter within the camera - something seemingly backwards when using this camera in the digital age. You can fully ignore any kind of metering and estimate exposure by following the sunny f/16 rule. I personally find the latter a bit too uncertain since the sunny f/16 rule depends also on the latitude location - in more northern zones it is more like a f/11 sunny rule. With changing weather conditions (sunny/cloudy sky etc) it gets quite tricky sometimes using this rule, especially when taking photos of high contrast scenes. But there is a simple and nearly as convenient workaround - use a free light meter cellphone app. Some apps even distinguish between reflective and indirect lighting by using either the back or the front camera of the cellphone. I found that my light meter cellphone app - I am mostly using an app named LightMeter on my Android phone - is nearly as accurate as my Gossen light meter - instead of carrying cellphone and external Gossen meter, I now only use my cellphone app. In its reflective mode, it also allows some sort of spot metering which works well.
After I shot two films with my M3, suddenly the winder and the shutter were stuck. I read that this is quite common with older Leica rangefinder cameras which haven't been used for a while. Unfortunately, there is no easy homemade fix for that issue: You have to send the camera for a CLA which stands for Cleaning-Lubrication-Adjustment. The US-based Leica repair service in NJ never even replied to my inquiry if this camera could be fixed and how long it would take. Best solution is to contact one of the few independent Leica specialists which you can find online instead which are also very price-competitive and more responsive. My M3 was fixed in less than two weeks, only lubrication and readjustments of shutter speeds were needed as well as cleaning of the rangefinder system. It is working perfectly since!
How To Insert Film
The film insertion into the M3 might appear a bit sketchy in the beginning. The take-up spool is removable - make sure that it the spool is included when you intend to buy a M3! It is an essential part - in case it is missing, you can't insert any film in the camera. To use film, you have to remove this spool from within the right side of the camera after opening the base plate. Then you insert the beginning of the film into a thin slot within the spool. If done right, a dotted arrow will show up against the inserted greyish beginning of the film. Now both film cartridge on the left and take-up spool on the right are inserted into the camera. I find this the most tricky part since the spool has to click into place, but most often the film is not horizontally aligned yet behind the shutter. You might have to move the spool or the film cartridge winders a bit that the beginning of the film aligns with the gear rim of the transport spool which sits next to the inserted take-up spool. Or in other words: the lobes of the gear rim have to grab into the film sprocket. If this isn't done right, the film won't move! After you close the flap and adjust the base plate, take two shots and make sure that the two-dotted rewind knob turns every time you use the advance lever to transport the film. Then you are good to go! Removal of the take-up spool resets the frame counter of the camera to zero.
Rangefinder System and Viewfinder
The Leica M3 is considered to have the best rangefinder system of all Leica Ms even to this date. My experience with the M3 confirms this. The viewfinder is larger than on later M series cameras, and it comes with a bigger magnification finder of 0.92x (standard is now 0.72x and largest size offered is 0.85x). This is especially useful for 50 mm and longer focal lengths of 90 and 135 mm where this camera really shines with. To focus my 90/2.8 M-lens on my M6 is much harder due to the much smaller finder view than with my M3. Another benefit of the M3: no rangefinder patch flaring which appears sometimes in later models as seen in the M6. The M3 viewfinder has a bit of a bluish tint by looking through which does not matter at all. Later M series models like my M6 don't have this tint anymore.
The most frustrating to me is the lack of 35 mm frame lines - especially since 35 mm is my go-to focal length normally. Yes, probably the M2 would have been a better choice here, but simply this M3 worked out for me in a decent deal. Work-around is to use an external viewfinder which I mentioned in the first paragraph, but most of them - even used - are very pricey. I didn't want to vest more than $150-200 for this kind of viewfinder when my M6 already included frame lines for 35 mm lenses. After a bit of searching and waiting, I came across a good deal for a Braun Paxette 38 mm viewfinder in chrome - which fits perfectly on the camera's hotshoe and in its color. The 3 mm focal length difference is small enough that adjusting a composition with the Paxette viewfinder doesn't make a big difference compared to the final 35 mm lens-based photo. Best is that I was able to get it in excellent condition for its age for about $25.
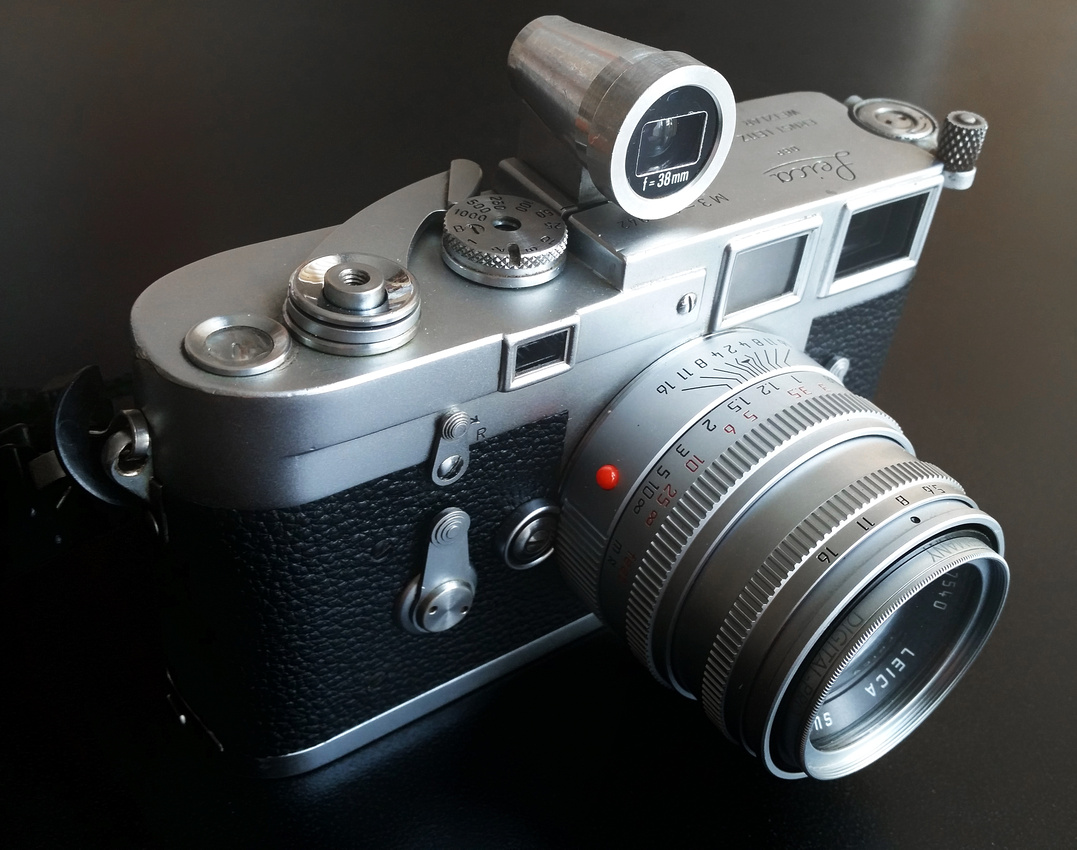
Leica M3 with Braun Paxette 38 mm External Viewfinder
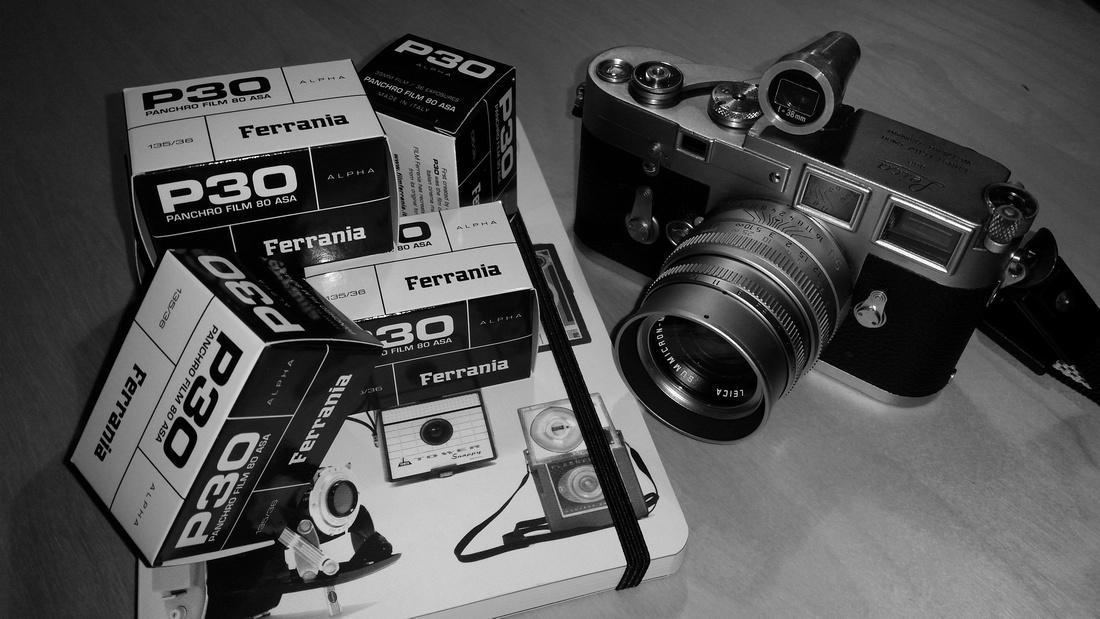
The M3 also requires a pretty good estimate which film ISO to use for an upcoming shooting. You never want to be stuck with a slow film ISO at 100 or below if there is no sun or it is getting slightly dark outside - especially if the camera is handheld. With fast film speeds more modern Leica film Ms also only can go up to 1/1000 seconds same as the M3. With an ISO 400 and a fast lens open at f/2 to allow some shallow depth of field, you might exceed the 1/1000 sec on a sunny day easily. Only way out then is to use a neutral density (ND) filter. I find myself most often using an ISO 125 film which I can push to ISO 200. With a f/2 lens, this allows me to shoot without ND filter and avoiding also too slow shutter speeds for most scenes outside.
Certainly a keeper camera for me - fully mechanical without need of battery, it will work the same with minimum maintenance needed for many years to come.
Wide Angle Rangefinder Lenses with Sony A7R
My previous blog described the general use of rangefinder M lenses on the Sony A7R mirrorless camera. This is part II which focuses on the use of wide angle rangefinder lenses with this camera.
After I bought my A7R, I found myself with a small, compact, and powerful high resolution mirrorless camera but still had to rely on bulky wide angle lenses for landscape and scenery photography. I am using the Canon 17-40/4 L and the rectlinear Canon 14/2.8 II L on my Canon DSLR cameras (also the 8-14/4 fisheye lens, but this is not a typical landscape lens). Those lenses are quite bulky especially when used in combination with the Metabones adapter on the A7R. So I started to look for alternatives which would facilitate size and weight of lenses which could be used for travelling and hikes. I already bought the Leica 50/2 Summicron-M rangefinder lens which amazed me by its sharpness and overall quality.
From experience I knew that I rarely use very wide focal lengths like 14 and 17 mm for landscape photography. Since I already had the 17-40/4 L lens, I also imagined to get something faster which pointed towards a prime lens. Zeiss also makes the very good Distagon 21/2.8 lens which comes with a (D)SLR mount - both price and size of this lens made me disregard this option. This Zeiss lens also exists in rangefinder ZM mount, but reportedly suffers form color shifts and vignetting on the A7(R) sensors. Alternatively, there is another option - the Cosina-Voigtlander (CV) 21/1.8 Ultron lens with Leica M mount. I liked that it is one stop faster than the Zeiss lens and came with a better price tag; also some reviews were positive to use this lens on the A7R. I found one con of the CV 21/1.8 lens - the fixed and not removable lens hood which would make it a pain or impossible to use this lens with graduated ND filters.
I didn't find a good deal for a used CV 21/1.8 lens, so I bought it new. It arrived in the unopened original box. The lens was mint, but when I fist used it, I instantly recognized sort of scratching noise when moving the focus ring back and forward. It didn't sound right because my CV 35/1.2 II lens is very smooth when moving the focus ring. For my first test shots, the CV 21/1.8 lens performed extremely well and with sharp images even wide open, so I kept it. On my first hike with this lens, I had to demount the lens from the camera, when suddenly a metal flake fell out of the lens mount. It turned out that this was the reason for the scratching noise - after the flake fell out of the inner lens barrel, everything worked smoothly with the focusing ring! I was lucky it came off and didn't hit the sensor when the lens was mounted on the camera!
This lens is very well built, metal lens case and engraved clearly visible scales. The aperture ring clicks slightly and stops at half and full apertures. The lens has a 58 mm outer diameter with filter ring. I also decided to get a 3-stop full ND filter with 58 mm size to allow for longer exposure times (especially useful for waterfall photography or in sunny conditions).

When taking photos with blue or grey sky in it, I observed some purple fringing and vignetting in the corners of the frame with the CV 21/1.8 Ultron lens (and independent on the aperture used). I couldn't tell from photos where the whole frame was filled with objects (for example inside a forest or more close up). Likely this isn't caused by the lens itself, more by the combination of this lens with the A7R. The A7 series has a thicker sensor stack than other rangefinder camera sensors have which might cause this. You can remove this fringing and vignetting in post processing, but I found it rather cumbersome to do and to get it right in the RAW file. Fortunately, Sony offers a very good tool to facilitate this - it is called "Lens Compensation" app for A7 and NEX cameras. It costs $9.99, but it is worth the investment especially when using several MF lenses. Leica M cameras use coded M lenses to determine which lens is attached to do this kind of compensation internally.
The Sony "Lens Compensation" tool lets you change peripheral shading (reduces vignetting and purple fringing), chromatic aberration (reduces reddish or blueish borders, and distortion separately for different lens profiles. It is a bit try&error to get the best outcome by changing the settings here - for the CV 21/1.8 Ultron lens, I am using +15 for vignetting suppression, -3 for red, -10 for blue fringing, +4 for red chromatic aberration, and +2 for blue chromatic aberration, no changes for distortion. This nearly removes all fringing, vignetting and aberrations which makes the post processing much more easier. This tool is extremely useful for third party MF rangefinder lenses on the A7 series - highly recommended! Also I should point out that this tool works both for RAW and JPF files!
In general, wide angle rangefinder lenses can be tricky or some even impossible to be used with the A7 camera series. I recommend reading reviews for a M mount wide angle lens with the A7 series before purchasing one. Unfortunately, this information is very scattered and sometimes hard to find in the internet - sometimes even with conflicting reviews. But there are still a few decent rangefinder wide angle lens options out there which work out great on the A7(R) especially when lens profiles are being used.
Rangefinder Lenses on Sony A7R - Is Small Size Better?
My previous blog from March this year described my first impressions of the Sony A7R mirrorless camera. I have used it intensively since, and shot nearly 4000 photos with it (since I am not doing sports/wedding/birding photography, this number is quite a lot for a hobbyist like me). I found that all my Canon EF lenses work well on the A7R with Metabones III adapter - same is true for a variety of MF lenses with Minolta MD, Canon FD, and Pentax M42 SLR camera mounts. A few of my older and cheaper MF lenses from Soligor and Tokina showed more distortion in the full frame corners and chromatic aberrations. But most others worked either well or in my opinion excellent.
There is only one issue - the combined size of camera body and lens. Sure, I was (and still am) used to carry my bulky DSLR with up to 82 filter diameter lens gear, but seriously - who really wants to do this? Especially when you are on photo trips or do some hiking, size and weight counts a lot. Attaching my 24 and 90 mm TSE lenses with adapter to my A7R is still heavy and bulky in size - but smaller TSE lenses are simply not available. But what about the "normal" focal length like 50 mm, small wide angle (35 mm) and wider (21 mm)? Regarding my shooting style, I am leaning more towards the wide side up to 50 mm, and only rarely use 100 mm and above for other than macro shots with a 100 mm macro lens.
I read that the Sony A7R can be equipped through suitable lens adapter with Leica rangefinder M mount lenses. This caught my attention since rangefinder lenses are much smaller than SLR lenses but deliver outstanding image quality. There are three manufacturers which produce rangefinder lenses: Leica, Zeiss, Cosina/Voigtlander. All of them are MF lenses. AF does not exist in the rangefinder world - I suspect it would increase the lens size if equipped with AF. In times before mirrorless cameras, rangefinder lenses were mostly used on Leica M series cameras (hyper expensive but excellent rangefinder focus system). Now with mirrorless cameras like the A7R, the same lenses(?) can be mounted on the A7R. This is at least what I thought in the beginning.
I first checked on available lenses, and was shocked about two things: (a) the price tag, and (b) the variety and naming conventions of rangefinder lenses. It took me hours to familiarize myself online about this. First I started looking for a rangefinder lens in the 50 mm FL range. My eye was caught by the Leica 50/2 Summicron-M lens which accidentally a friend of mine offered me for sale if I would be interested. In Leica terms, this lens is one of the most affordable Leica lenses and also one of the most reliable and proven/used ones. I decided to give it a try and bought this lens in the chrome brass version. It is a bit heavier, but still very small and compact in size, built like a tank. I am using a cheap Fotasy M-mount/E-mount adapter which is very small, too - I did not encounter any problems with this adapter so far.
I have some good experience with 50 mm lenses - but this Leica one is by far the sharpest I ever owned. The word razor-sharp comes in mind when looking at the taken photos on my 27" LED screen. Wow. Also the colors appear very natural, none or only slight post processing is needed here. Focus peaking and magnification tools of the A7R camera make sure that the focus point is accurate even at f/2. Fast apertures are ideal for portraits or shallow depth of field effects. f/11 and f/16 make an ideal landscape lens with the Cron-50 lens.
A7R, Leica 50/2 Summicron-M II lens @ f/16: Smallest aperture delivers still razor-sharp results ideal for landscapes
A7R, Leica 50/2 Summicron-M II lens @ f/2.2: still very sharp, allows to capture good portraits
This got me hooked to further explore rangefinder lenses for my A7R. I was now looking in something wider, in the 35 mm range. Photographers often use a combination of 35 and 50 mm lenses which is also my experience. I landed a good deal for the Leica 35/2 ASPH (stands for aspherical) lens. Quite an investment, but since I was so satisfied with the Cron-50, what could go wrong having a killer Leica prime rangefinder lens combo. Of course I read reviews, and the 35/2 lens is described as performing extremely well - on Leica M series bodies.
I received this lens and mounted it with adapter on my A7R - and was shocked. The lens performed well in close focus distances, but at infinity it was the worst I had ever seen - totally blurry corners, uneven focal plane in the middle of the frame also. What was going on here - a $2500 lens sucks? In one other thread online I found a Leica blogger describing similar issues of this lens with the A7 camera series. The explanation given is that the thicker glass on top of the A7 sensor leads to unwanted refraction especially visible in the corners of the frame. This didn't explain the uneven focal plane (I assumed some decentered lens) but after shooting many test shots providing me always with the same disappointing outcome, I decided not to keep this lens. I started digging for more information online about issues of rangefinder lenses on the A7 series, and found more hits. Unfortunately this information is very dispersed online in many blogs and forums. But in summary, rangefinder lenses can have issues at focal lengths shorter than 50 mm with Sony's mirrorless full frame sensor. In Leica terms, only the faster 35/1.4 ASPH lens seems to work decently well on the A7R in the 35 mm range - I excluded this one since its price tag was just too unreal for me. The Zeiss Biogon 35/2 might be an alternative, but I found something better:
By reading about 35 mm rangefinder lenes, I came across a short note mentioning the Cosina-Voigtlander C/V 35/2.5 lens. But it was a bummer - again issues in the corners with some color cast were reported here. Somebody mentioned that the more expensive C/V 35/1.2 Nokton II lens is a great performer on the A7R, so I tried to find out more about it. After seeing several positive reviews about this lens and its A7(R) performance, I decided to give it a try and bough a mint used one for a decent price.
In my opinion this lens is a hidden gem - I never had a lens so small and compact, well built and sharp even at f/1.2 if focused accurately. This lens was another keeper for me fairly soon after I fired some test shots. This impression got confirmed after taking more photos at the Zombie Walk event in Asbury park and during some photo trips afterwards. This lens shines for portraits but is also stellar in landscape performance. And the best, you get a light sucker as a lens - you can shoot handheld in fairly dark indoor areas with ISO 6400. It can deliver wide open an outstanding bokeh caused in part by the 12 aperture blades used in this lens!
A7R, C/V 35/1.2 Nokton II lens @ f/1.4 (left) and f/1.2 (right): Fantastic blur-out effect, sort of 3D effect and simply amazing bokeh!
A7R, C/V 35/1.2 Nokton II lens @ f/1.4: with ISO 6400 and still 1/40 sec you can shoot handheld in dim areas.
A7R, C/V 35/1.2 Nokton II lens @ f/11: What else can you expect from a good landscape lens?
In summary, going forward with rangefinder lenses proved the right thing for my style of shooting. I compromise in AF but don't mind at all focusing manually. Rangefinder lenses have a much better MF ring and "play" to focus accurately in combination with the focusing tools provided by the A7R. I also like the built-style of the rangefinder lenses with metal lens body - I trust it more than the commonly made of plastic lenses nowadays. Overall the combination of two rangefinder lenses and the A7R is still a lot more compact and less heavy than my Canon 5D MkII with 35/1.4 and 50/1.2 lenses. One thing which I am not sure about yet is the performance of rangefinder lenses in infrared. I am very curious about this application since my intention is at some point to convert a second mirrorless body to full spectrum or infrared. So far I did not find any information how those lenses will perform in infrared - likely a matter to test at some point.
PROS of rangefinder lenses:
+ Size and image quality/sharpness if suited for the A7 series
+ Metal lens body
+ Better MF ring to focus accurately
+ Smaller lens filter threads allow to use smaller/less expensive filter sizes
+ Lower weight compared to DSLR lenses at similar lens speeds
+ More inconspicuous to use in public
CONS of rangefinder lenses:
- Price (there is no free lunch)
- Limited amount of rangefinder lens manufacturers
- Especially wide angle lenses can have issues with the A7 sensors (unsharp corners, color casts)
- Hard to find out about specs of older lens versions and their realistic market value
- High addiction potential (seriously!)
Sony A7R - Is It Really Better?
I am well vested in Canon camera and lens gear which obviously makes it hard to consider another brand for photography. But times have changed after Sony released a novel class of mirrorless cameras equipped with latest in technology Exmor full frame sensor - the A7 and A7R. Especially the A7R kept my interest since it offers 36 MP of resolution with high dynamic range without the usage of a low-pass filter. Another advantage of mirrorless cameras is their ability to use all kind of lenses ranging from rangefinder to SLR and DSLR lenses with suitable adapters on them. Since I own a few older Canon FD and some M42 lenses, this was an additional plus. I decided not to purchase an A7R camera instantly after it was released end of 2013 but to wait a few months to read reviews and find out more about its potential drawbacks.
A few weeks ago, I finally grabbed a decent deal for the Sony A7R camera. I am still keeping both of my Canon 5D MkII DSLRs - one is for IR light anyway, the other one would function as second camera body in addition to the A7R later. I also bought the Metabones III Sony camera E-mount to Canon EF lens mount adapter. This adapter is not cheap (unfortunately $399) but the best option currently on the market to allow to use Canon EF lenses with AF or MF together with the A7 camera series.
Sony's A7 cameras arrive in a box with (very short!) USB cable to connect to a PC or Mac, and also to charge the battery plugged into the camera with the included USB plugin charger. Unfortunately Sony decided NOT to include a battery charger in the package - many complain about this in my opinion rightfully. Would it hurt Sony to include a new $50 battery charger for a camera around $2300? (A7R list price - Update: prices have come down, now in 06/2014 you can get the A7R for about $1800 or less). I don't think so. So I still need to get the Sony battery charger plus one additional battery - both items are currently back-ordered at most online retailers. Also interesting that you won't be able to use any transparent cellphone cover to protect the OLED display of the A7 series camera - it simply wouldn't stick. You are better off purchasing additionally for $14 the Sony screen protect semi hard sheet. Counting all of this - plus Metabones adapter, charger, additional battery, you will be paying about $2800. For this price, you can buy easily a Canon 5D MkIII camera or - if you intend to switch - the Nikon D800. So is it really worth it to go with Sony? Here is my summary and subjective impression:
PROS:
1. Weight&Size: amazing! The whole camera body fits by its length into my hand. It is very light-weight which makes it a perfect travel camera. The size fits in a small camera bag.
2. Operations: Some criticize that the buttons of the A7 series are too small or to cumbersome to use. I find it the opposite - I never had a camera which made it so easy to change aperture, exposure time, ISO, magnification, and exposure settings all in one hand and by looking through the viewfinder while doing all the changes! Other than the bit cumbersome C2 function button, the camera's button and wheel locations are well thought of and designed. I am a big fan of the EVF in the A7R - the display is bright and the functions can all be seen very well to make changes. Much better than in any Canon DSLR which I operated so far. The EVF is 100% field of view coverage! After a photo is taken, I also prefer to review it through the viewfinder - I can see details better in the EVF viewfinder than on the display especially when shooting outside.
3. Focus Peak Area: Part of camera operations, but I find it so important that I created a separate bullet point. It is one of the "must use" features for me in this camera. It makes MF a pleasure to use quickly and accurately. The outline of objects in focus is enhanced with a specific color (can be customized, I use red) when focusing manually. This can be combined with the MF Assist function which displays an up to 14x enlarged image. It is hard to miss a manual focus even at wide open fast apertures when applying those two functions.
4. LCD Display and OLED EVF: very crisp and clear LCD display which can be tilted according to the user's position to the camera. The OLED based electronic viewfinder is superb in resolution and reveals very well photo details.
5. Sensor: the heart of every digital camera - the Exmor CMOS sensor without optical low pass filter leads to a very high resolution with low noise and rich tonal range.
6. Image processor: BIONZ X image processor allows fast recording speed with 14-bit RAW for high detail and tonal range processing.
7. Wireless connectivity: comes with pros and cons, but overall it is a good thing to have. So far I used it rarely and rather prefer to download the RAW image files from the SD card directly through card reader to my PC.
8. Third party lenses: ideal camera for this. It even allows to use cropped sensor lenses and jumps then automatically into the APS-C size capture of the full frame sensor (similar function has the Nikon D800(E) series). The A7 series works will all kind of photo lenses most ideally made for 35 mm full frame. This opens a broad field of lens accessory which can be used with the A7(R) camera. The camera's mirrorless design allows not only use of SLR but also of rangefinder lenses with fewer lens elements which are smaller and often better in quality.
9. Camera body built: the A7R has a magnesium alloy body which is more resistant than the plastic body of the A7 model.
10. Camera balance: no issues so far - I am mostly using the Metabones adapter tripod mount or the lens tripod mount instead of attaching the tripod plate directly underneath the A7R camera.
CONS:
1. Manual: it simply sucks and develops into a patience test to learn about the camera. It just provides you with a very quick overview about its main functions but does not tell you how to operate the camera or which custom settings are best to apply. It took me a few days to dig through the menus and functions plus settings. I found most of my questions answered by googling it - I found that everything was already at least once asked in one of the many photo forums out there. Sony definitely needs to improve there. I wouldn't be surprised if people are unsatisfied with this camera because they don't understand the functions or how to use them.
2. Charging: without external battery charger, you need to rely on the charging of the battery inside the camera through USB cable. It takes 310 minutes to fully charge an empty battery this way. Also, the battery arrives uncharged in the box, so you need to wait about five hours(!) before you are able to use the camera fully charged. Again, Sony could have avoided this by adding the external battery charger into the package.
3. Battery consumption: is high. Because display or EVF view is always turned on, it drains the small battery rather quickly. Currently I only have one battery, but fully charged it lasted me for a day trip of photography so far. But it is better to have at least one spare fully charged battery with you.
4. Menu structure: needs to be improved. Some functions are hidden in sub-menus where you don't expect them to be. HDR is one example - the manual HDR option is conveniently located in the display view where you can select up to 5 photos taken in a row with a given range of under- and overexposure stops. This works fine with RAW files. There is another Auto HDR mode in the settings menu which only works with JPG files in the camera. I personally find this option rather useless. I am not convinced that users of this professional A7 series camera need in-camera JPG files anyway.
5. Remote Control: Oh well, Sony. You got me badly with this one - I tried for hours to get it to work with my Samsung Galaxy S3 Android cell phone via wireless or NFC connection. It didn't work. It is one of the worst documented features in the manual, too. I had no trouble connecting the A7R to my wireless router, and I also was able to directly connect my cell phone to the wireless transmitter of the camera. But Sony relies on the "PlayMemories Mobile" cell phone app to use the smartphone as remote control of the camera. When opening this app on the phone, it will disconnect any wireless connection first, but is then in my case unable to connect to the camera (it goes in an endless connection trial loop). NFC did not work at all either even my smartphone has this function. Currently I am hoping that a firmware update will fix this issue.
Update: I solved the issue to connect my cellphone to the camera. The mobile data plan of the cell phone has to be turned off first, and all old former DIRECT-tcE0:ILCE-7R wireless connection memorized in the smartphone WiFi log have to be erased in case you experience problems. This is more an Android issue with the connection than it has to do with the camera. When the connection between camera and cellphone is established through the PlayMemories Mobile app, it works really fine.
6. Commercial in-camera Apps: principally a good idea to have apps for specific camera functions similar to apps on a smartphone. Some apps come for free, and Sony allows you to download them through their support website either through your connected PC/Mac or directly through wireless connection of the camera (that's what I did). But the better apps cost you something - I really like the multiple exposure app for this camera since I enjoyed doing double exposures with film. What I didn't like here is that the "Multiple Exposure" app only allows me to take two exposures (no multiple as the name says!). I had to pay $5 for it. There are other useful apps e. g. for time lapse photography for the same price. Again Sony tries to squeeze out more bucks from you after you already purchased this camera plus Sony accessories. Those functions are included as standard in a more professional Canon camera like the 5D MkIII.
7. Light Leak: A7 camera series users described that light leaks through micro gaps between E-mount and attached lens or adapter in 4, 8, and 12 o'clock positions at very long exposure times. So far I did not experience this issue on my A7R camera. Nevertheless, I found a very simple and efficient solution to resolve this potential issue: I used a rubber band which USPS uses to wrap up stored mail when I am traveling. This white/yellowish 6 mm wide rubber band exactly covers the gap between orange colored mount on the A7(R) and adapter or lens attached.
8. Copyright info in RAW files: is missing. Currently there is no simple way to add your name into the saved RAW camera files EXIF extension automatically. I hope Sony will implement it later in one of their freeware software updates for the "Image Data Converter" program or in an in-camera menu option. The software itself works fine but has a some basic look and is much less sophisticated than for example Canon's DPP freeware RAW converter program.
9. Shutter noise: loud. So far no problem for me, I even like the feeling of an old camera shutter noise. But if someone wants to take photos in an unsuspicious way, you can be sure that this shutter will cause attention. It might be an issue for street photography or in concert halls for example.
10. AF: I have no experience with Sony E-mount lenses, they might focus well in AF with the A7R. But third party lenses like Canon EF lenses focus very slowly after being attached to the Metabones III EF adapter. The A7R uses a different AF system than commonly used in DSLRs, too. So far I decided mostly to use MF with EF lenses attached via adapter - I am simply faster by doing this and more accurate by using the focus peak area and the zoom magnification tool to focus. If you rely on fast AF with existing Canon or Nikon lenses, I would not recommend the A7 series to you. You are then better off with a good DSLR of one of the camera manufacturers instead.
Additional Comment after firmware 1.0.2 release: AF speed has improved. Still slower than directly on a Canon DSLR body, but definitely better than before. I still prefer to use my A7R simply in MF through the excellent focus peaking feature!
11. Weather-sealing: somehow questionable especially when using adapters and no Sony lenses. Even lenses and adapters sit tightly, I am not sure how much humidity still can creep in between the mounts. Under wet/rainy/humid conditions I would likely rather use my 5D MkII than the Sony A7R.
12. Compressed RAW files: Sony developed its own compression algorithm for RAW data which supposedly is lossless. It is unclear if still some recorded information could potentially be removed by this compression, but so far nobody including me has seen any disadvantage of this method. Still it might be a good idea at least to offer A7 series users to have files either saved as uncompressed RAW or slightly compressed.
WHO IS THE A7(R) COMPETITION?
Sony started a very interesting approach with the release of the A7 series last year - it is certainly a game changer especially in the full frame camera market. Principally, the A7 series competes with every DSLR manufacturer, but I believe it is mostly Canon which might suffer most of the A7(R) impact. Nikon already uses Sony's Exmor sensor in the D800(E) series - for most Nikon users the A7(R) only makes sense to allow third party lenses to be used or to limit weight and camera size. Canon on the other hand still sells older type of FF (full frame) sensors built into the 1Dx, 5D MkIII, and 6D cameras. Consumers unsatisfied with Canon's current approach to neglect or delay the release of a high MP/high DR sensor definitely will consider the A7R as alternative - I can count myself to this group. I like my Canon lens gear, but Canon does not offer me currently a camera with novel FF sensor in which I could be interested in. People who are shooting wedding/sports/events, or bird photography likely won't be attracted to the A7R due to its slower fps rate and slower AF. The A7R is predominantly made for landscape/architecture/fine art photographers who can make use of the higher sensor resolution and dynamic range by giving up on fast AF especially with existing lens gear other than Sony lenses. I doubt that many buy the A7(R) cameras to use them just with Sony lenses.
Also, the A7(R) competes with the Leica rangefinder market. Leica users can attach many of their existing Leica rangefinder lenses easily on the A7(R). Since those lenses are MF lenses anyway, it is only the camera body which changes (some Leica lenses work better than others on the A7 series due to different lens entrance pupils and thicker glass on top of the A7's sensor). Leica's electronic features in M series cameras are limited compared to what Sony's A7 series offers. Still the MF system between Leica M-series and Sony A7 series is very different. But seeing how quickly and accurately I can focus manually with my A7R, I can imagine that some Leica users think to use an A7 camera as alternative to the rangefinder-based M-series.
You don't need the Sony A7 camera series if:
1. You already have a Nikon D800(E) camera and have no other MF lenses
2. You rely on fast fps (frame per seconds) and AF only
3. You don't like small cameras with smaller-sized buttons
4. You are not interested in manual focusing or in any third party MF lens
5. Especially for A7R with 36 MP photo file size: You dislike having larger RAW and image files in post-processing
WHERE DOES THIS LEAVE US - SUMMARY:
The Sony A7R camera is not for everyone. Beginners will be overwhelmed by its functions, others might find the lack of fast AF and fps in this camera a deal breaker. Street photographers will dislike the loud shutter. I see the camera not as a replacement of a DSLR but as a great addition to have. I am mostly into landscape and fine arts photography, so this is a camera I was waiting for since a while. I am not only intrigued by its sensor, but even more so by its capability to be used with all kind of lenses. You might have old MF lenses which can't be used on a modern DSLR, or you see a good deal somewhere for a MF lens - no worries, guaranteed you will find an adapter which makes this lens work on A7 series cameras. The metal MF adapters cost less than $20 per piece! The small size of the camera comes handy and is ideal to take with me on travels. If weight is an issue, I can simply take a small and older MF lens with me to be used in combination with my A7R. I will review the quality of photos taken with third party MF lenses with the A7R in one of my future blogs, stay tuned!
The full frame sensor of the A7R is simply amazing. The difference to other existing sensors e. g. in Canon full frame DSLRs is huge. I didn't expect to see this difference when I bought the A7R. But the photos posted here in my blog didn't need post processing nor a graduated ND filter to take them - impossible if I had taken those with my 5D MkII. The shadows come with a lot more detail instantly, the colors appear richer and more natural as my eye sees them. There will be more for me to test, but after a bunch of first test shots this difference is more than obvious. To me it is the perfect combination of excellent electronics and very good glass which I own. The advantages of the A7R outweigh the cons mentioned above.
Consider that you will need to vest an additional $500 for adapters and accessories after you purchased the A7R. This does not make it a cheap full frame camera deal - in fact you need to ask yourself what you will need the A7 series camera for. I hope my blog facilitates your decision-making process. Furthermore, I am looking forward to the first Sony firmware update of the A7 series cameras due on March 19th.
B&W Film vs. Digital Infrared
Second part of my film project is testing B&W film. I decided to use Ilford XP-2 ASA 400 B&W film since it can be developed in any regular color film developer which uses the C-41 development process. It is cheaper and gives me more flexibility of locations to choose for the film development. I used my Canon EOS 500 film camera with this film. At home, I digitized the developed negatives by photographing each of them with my DSLR camera and 1:1 macro lens. I post-processed the RAW files in PS afterwards (reducing noise and adjusting contrast levels).
I chose a variety of architecture, scenery/landscape, and closeup motives. Especially for the landscape photos I added a Wratten #15 yellow filter on top of my lens to increase the contrast of clouds in the sky and to highlight some light green tones from grass and foliage. Part of my photo tour to explore this B&W film led me to the pier in Keyport/NJ where I took infrared (IR) photos last year before hurricane Sandy devastated the NJ coastline. The pier in Keyport was destroyed by Sandy, too. When I came back there in July 2013 to take the B&W film photos, most of the pier was already rebuilt. I walked to the same positions at the pier where I remembered myself being in 2012 and decided to take similar photos at this place. This allows me now to compare the newer film and the older IR photos with each other. As I mentioned in my blog about IR photography earlier, I convert my infrared photos in B&W during post-processing.
The two photos below show the same boat located at the pier - the left photo was taken in infrared in 2012, the right photo with Ilford B&W film in 2013:
As expected, the IR photo shows better contrast and reveals clouds better and more dramatic. The Wratten #15 yellow filter helps to see the cloud structure in the film photo, but a read filter might have been the better choice here, too. The US flag stands out better in the B&W film photo.
The boathouse on the pier was newly re-constructed after Sandy had destroyed it. The left photo in IR shows the old structure, the photo on the right is the new B&W film photo taken one year later with the new house. Main difference is the rooftop and the new ladder:
The IR photos is richer in contrast while the film photo is more evenly leveled. The IR photos were taken with the Canon 14/2.8 L lens on full frame, while the B&W film photos were taken with the 17-40/4 L zoom lens.
The photos below (left in IR, right B&W film) show the structure underneath the main pier. I got a more contrast-rich B&W shot in IR with the old pier but also the film photo with the rebuilt pier has something going for:
The Ilford XP-2 film has an amazing tonal range in B&W which can't be beaten easily with a conventional DSLR camera. The film is definitely a good addition to digital camera gear.