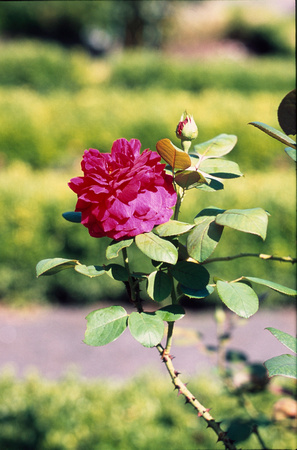
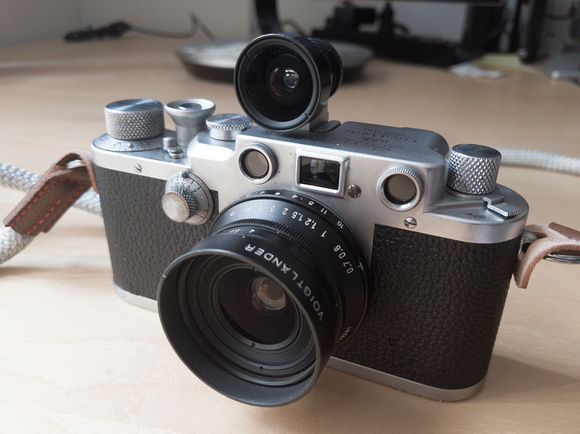
The Leica 21/2.8 Elmarit-M lens line is no longer produced by Leica. There are not many reviews written about the pre-ASPH version of this lens - it is similar to my earlier blog review of the Leica 28/2.8 vers. IV a hidden gem in the Leica lens line. It was only succeeded by Leica's 21/2.8 Elmarit-M ASPH version produced from 1997 until 2011. At this point, Leica only makes the very expensive and much more bulky f/1.4 lens in the same focal length. The Leica 21/2.8 Elmarit-M was manufactured from 1980 to 1997 with my copy made 1989 in Canada. During this time, the lens only changed its minimum focus distance (MFD) going from originally 0.3 m to 0.7 m to fit the rangefinder MFD - plus the filter size changed from originally E49 to E60 (it later went back to E55 in the ASPH version). I bought my 21/2.8 Elmarit-M lens version as mint used lens copy ($1235) and purchased afterwards additionally the quite unique fitting E60 hood ($230). This hood has metal clips to fix it into position outside the front part of the lens. It also allows to be mounted vice-versa on the lens for easier transport and storage. The hood has become a collector item since it is no longer easy to get.
I often shoot ultra-wide in focal length, and I used for many years the faster and heavier Voigtlander 21/1.8 Ultron-M lens. Stopped down, there is no easily noticeable difference between both lenses - but the big advantage of having in addition the Leica 21/2.8 M-lens is its lighter weight of 290 grams and much smaller size.
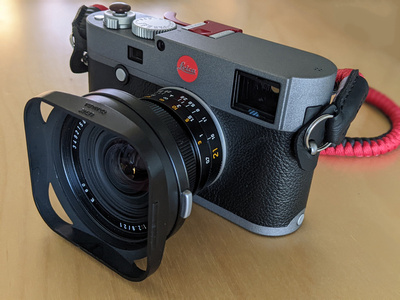
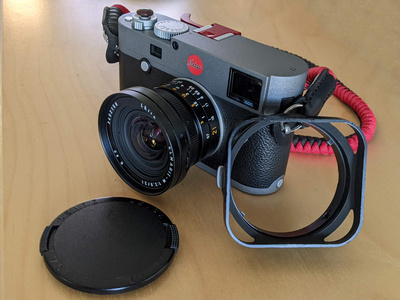
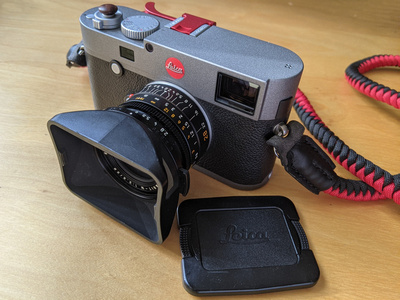
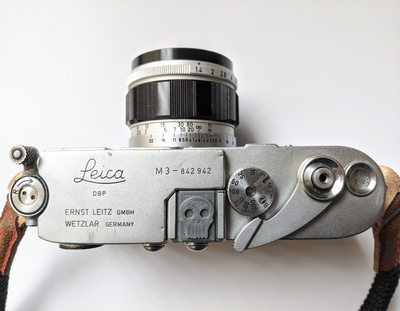
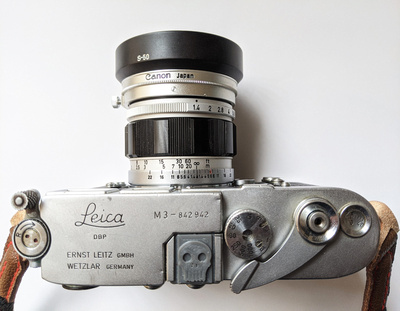
Left: Leica 21/2.8 Elmarit-M E60 lens with hood and attached to Leica M-E 240 camera; Right: Lens with separate lens hood and lens cap
The lens is sharpest between f/4.0 and f/5.6. It only has slight vignetting wide open at f/2.8 - similar even in the successor ASPH version. Personally, I don't object a bit vignetting in ultra-wide lenses especially when taking photos wide open - it provides a bit of a vintage look focusing the viewer's eyes towards the center of the image. Contrast and sharpness of the 21/2.8 Elmarit-M lens are very good - the later ASPH version is slightly better corrected to provide a notch better contrast towards the corners of the frame. I have not seen any issue regarding contrast nor loss of sharpness with this earlier lens version either. Regarding size, weight, built, and optical quality it is a great deal for a Leica-M lens when you have an opportunity to get hold of one. It is also a pretty cool looking lens with its very wide E60 lens hood attached.
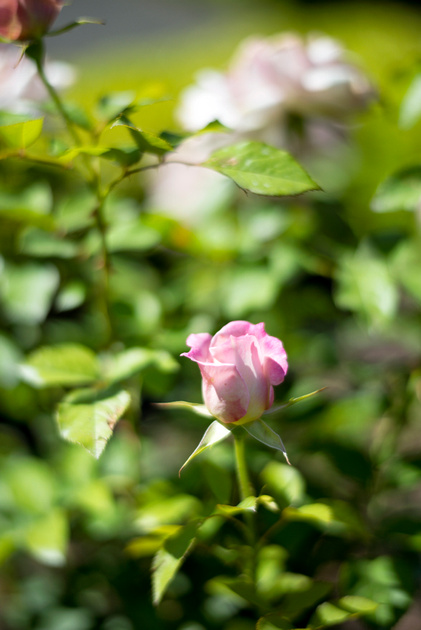
I have used this lens predominantly for landscape and architecture photography. The Elmarit version f/2.8 lens speed is no culprit here since most often I shoot between f/8 and f/11 anyway. Images are very sharp and rich in detail - the lens works both very well on my film M cameras as well as on my digital M. As always with any kind of untra-wide lens, it is beneficial to use leading lines and foreground elements to compose the photo scene well.
Pros:
+ Price/quality ratio
+ Very well built, rigid feel
+ Contrast and sharpness already wide open at f/2.8
+ No flare issues with hood attached
+ Well sitting E60 lens hood and hood cap
+ Forms nice looking 8-blade sun stars at f/8 and f/11
Cons:
- Larger filter size of 60 mm making it impossible to use smaller rangefinder filters
- Not the fastest lens - make sure f/2.8 is sufficient for your shooting style
- Slight vignetting in the corners at f/2.8
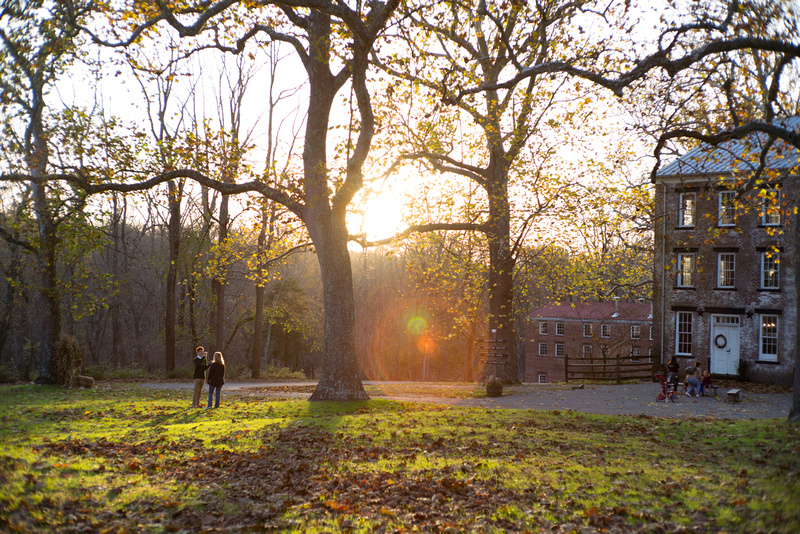
Top: Digital photo taken with Leica 21/2.8 Elmarit-M lens at f/8.0, ISO 400
Top: Digital photo taken with Leica 21/2.8 Elmarit-M lens at f/8.0, ISO 400. This time the photo was taken in portrait frame and using foreground elements.
Top: Digital photo taken with Leica 21/2.8 Elmarit-M lens at f/11, ISO 200
Top: Film photo taken with Leica 21/2.8 Elmarit-M lens at f/11.0, ISO 125. The sun star appears in the sun itself here.
Top: Film photo taken with Leica 21/2.8 Elmarit-M lens at f/2.8, ISO 125.
The Leica 28/2.8 Elmarit-M version IV lens is barely mentioned in online reviews - most reviews focus on its direct Leica ASPH successor lens version instead which is better known. This lens was focused to be used on Leica M film cameras which was also the usage of the first owner who sold me the lens. I instantly tested this lens on my digital Leica M-E 240 camera, and I can already tell upfront that it falls nothing short of being perfect with the digital sensor, too. There is no corner unsharpness, severe vignetting, nor color aberration seen wide open at f/2.8 which can potentially be an issue with older wide angle rangefinder lenses. This lens has its maximum of sharpness at f/4.0 and keeps it the same at smaller apertures. Smaller aperture only changes the depth of field but doesn't improve sharpness! Typical for a Leica Elmarit-M lens, it provides excellent contrast already at f/2.8.
Left: Leica 28/2.8 Elmarit-M E46 lens version IV without hood attached to Leica M-E 240 camera; Right: Lens with lens hood and lens cap
I also have the smaller but also very good Cosina-Voigtlander 28/2.0 Ultron ASPH M-mount lens version I which is more modern than this Leica 28/2.8 lens. I bought this lens several years ago for $450 used in mint condition. The Voigtlandner lens is a stop faster but has approximately the same lens size and also 46 mm filter diameter. Wide open it shows more vignetting and lower contrast than this 28 mm Elmarit-M lens at f/2.8. Stopped down, the Voigtlander lens performance is then very similar in quality, but differences in the image background blur remain.
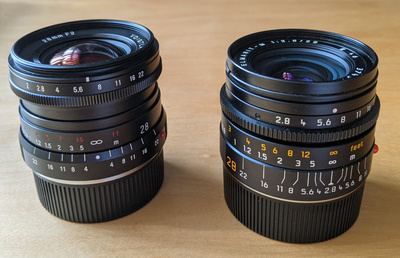
Left: Cosina-Voigtlander 28/2.0 Ultron-M lens version I; Right: Leica 28/2.8 Elmarit-M E46 lens version IV. Both lenses have about the same size. The Voigtlander lens has a protruded convex front lens element. Both lenses have 46 mm filter diameter size and weigh the same (253 grams without hood).
The 28/2.8 Elmarit-M E46 lens comes only in anoidized black finish. No chrome version exists to my knowledge. This lens is described as being as good as the 28/2.0 Summicron ASPH version I which makes the Elmarit an excellent bargain. The MFT carts of both Leica lenses look very similar in performance just that the Summicron version is obviously one stop faster at f/2.0 than the Elmarit. The lens I describe in this review is also called Leica 28/2.8 E46 lens due to its version-specific lens diameter size of 46 mm. It originally comes with the fitting Leica lens shade #12547 including the clip-on Leica cap #14013 (made of thick rigid plastic!). Both - lens hood and shade together - go now online for about $200. This plastic cap sits well on the hood and doesn't fall easily off like other Leica lens hood caps tend to do - for example the flimsy one on the earlier mentioned Leica 35/2.0 Summicron-M version IV lens hood which I nearly lost twice. The lens shade/hood of the 28/2.8 clamps with click on the outside of the M-lens easily and sits tightly. It has an opening in the upper corner allowing to look through when composing through the viewfinder of a Leica M rangefinder camera. Even this hood appears bulky on my first impression, I got very quickly used to it. There is still some lower right corner blockage of the viewfinder from the front of the lens but practically I didn't see it as a problem when composing my 28 mm shots. I always have used this lens with its hood attached and have never observed any kind of flare issue so far.
The aperture ring is a riffled full ring and has click-stops. Apertures range from f/2.8 to f/22 in half stops. When moving this ring, the finger can easily hit the attached rim of the attached lens hood - there is not much distance between them. Focus ring comes with standard Leica focus tab ranging from 0.7 meters to infinity focus. Scale is both in meter (white color) and feet (yellow color). The focus ring moves below the 0.7 meter mark with its hard end stop which is important to remember since it might offset the minimum distance focusing with the rangefinder patch focus. There is a hard stop set correctly at infinity. Make sure to have it set at the 0.7 meter mark and not below for minimum focus distance with rangefinder focusing - not an issue with LiveView or EVF attached on digital M cameras.
Both photos taken with Leica 28/2.8 Elmarit-M version IV lens at f/8.0. The left handheld at 1/45 sec (ISO 400), the right photo with tripod camera support at 1 sec (ISO 200).
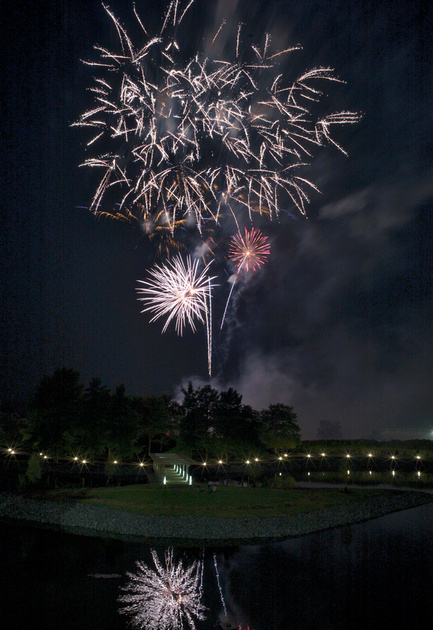
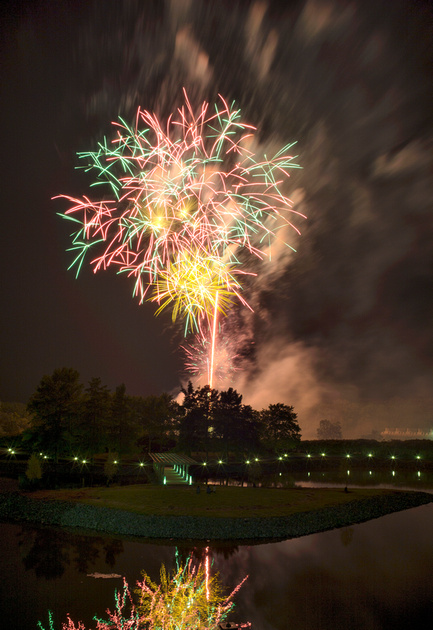
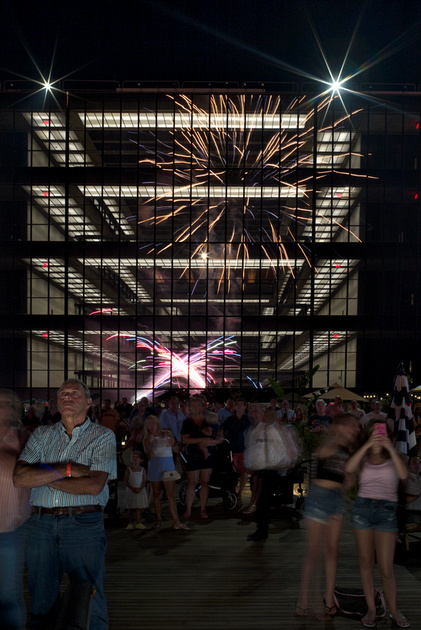
Fireworks photos taken with Leica 28/2.8 Elmarit-M version IV lens at f/8.0 and 2 sec exposure time at ISO 200.
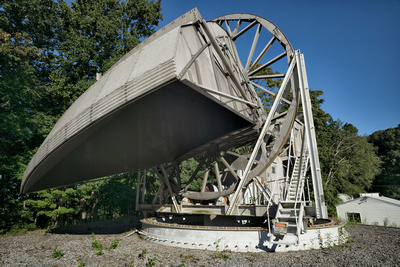
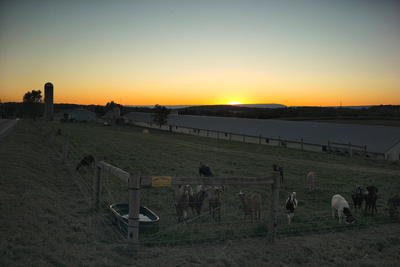
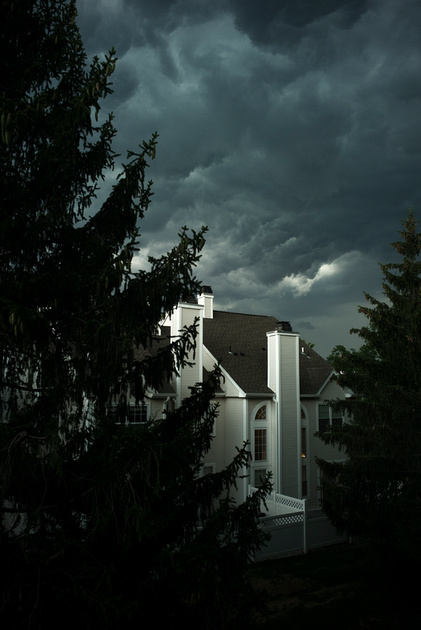
Holmdel Horn antenna (left, f/8.0) and sunset (right, f/4.0) taken with Leica 28/2.8 Elmarit-M version IV lens.
A direct comparison of Cosina-Voigtlander 28/2.0 Ultron and the Leica 28/2.8 Elmarit version IV lenses is shown in the photos below. Both photos were taken with camera mounted on tripod at f/8.0 and with circular polarizer in the same position. Sharpness and contrast-wise, both lenses perform exactly the same. But the Leica 28/2.8 Elmarit lens is a tiny bit wider on its wide end compared to the Voigtlander 28/2.0 Ultron. It is visible in the position of the end of the tree branch in the upper left corner of the frame. The Leica lens hood does not fit well over the third party circular polarizer 46 mm filter - I attached it loosely on the filter to give at least the flare protection without sacrificing image quality. No problem with this filter on the CV 28/2.0 Ultron lens - the thin screw-in lens hood fitted around it perfectly.
Top: Photo taken with Leica 28/2.8 Elmarit-M version IV lens and circular polarizer at f/8.0, ISO 400
Top: Photo taken with Cosina-Voigtlander 28/2.0 Ultron Version I M-lens and circular polarizer at f/8.0, ISO 400
Pros:
+ Price/quality ratio (bit of hidden gem in Leica's lens line)
+ Very well built, rigid feel
+ Contrast and sharpness already wide open at f/2.8
+ No flare issues
+ Well sitting lens hood and hood cap
+ Forms beautiful 8-blade sun stars
Cons:
- Less compact than other Leica 28/2.8 lens versions
- Larger protruding lens hood
- Tiny space between aperture ring and attached lens hood
- No hard stop at minimum focus distance of 0.7 meters
- Lens hood does not fit well over third party 46 mm filters
- Hard to find as used lens currently
What's in the Box:
The lens comes in a quite typical Voigtlander lens box with styrofoam padding. Inside are both the lens and the lens hood separately in plastic bags. As usual, Voigtlander does not provide a lens pouch for the lens which would have been a nice-to-have here regarding the value of this fast lens. A very crude lens information card is supplied in the lens box lacking any kind of specific technical details of the lens built. No warranty card was included. But at least Cosina finally included the lens hood in the package which was always a complaint in the past with other CV lenses that the hood was sold separately for quite an expensive amount, or that the hood was fixed on the lens which limited usage of filters to the exact filter diameter of the lens.
Lens Built:
First, some technical specs of the lens: the lens weights only about 350 grams, has 7 lens elements in 6 lens groups including one aspherical lens element. It has 12 aperture blades to allow for smooth circular and oval bokeh circles.
The lens built is excellent and fits to the style of other well built Voigtlander lenses: all metal with clear and precise distance and aperture scales. The scales are in black on my silver lens version and very easy to read. The distance metering scale is very accurate to focus between 0.7 and 5 meters. Between 5 meters and infinity the focus turn is very short, so here you need to be careful to turn just the right amount for getting the focus wide open correctly. No focus tab is supplied with this lens which is not needed either in my opinion since the focus ring is wide enough itself. The aperture ring does half-stop clicks between f/1.5 and f/16. The distance between each aperture stop is equal throughout the aperture range which I prefer to have.
The lens hood with black paint inside has no thread itself but is placed instead with lock screw onto a black plastic-coated metal ring. This ring is screwed into the lens filter thread. Unfortunately this black lens hood attachment ring does not fit well to the rest of the silver lens design - I wish it would just be a silver metal ring fitting the rest of the silver lens design. With the black lens version, this is no issue at all obviously. Any kind of standard 58 mm filter can be placed inside this hood ring before the hood is attached. If no hood is needed, the filter can be directly placed into the lens thread instead of the hood ring. The black plastic Voigtlander lens cap sits either directly on the lens, on any attached filter, or on the hood ring. The dual lens cap clamps make the cap sit well on either of them.
With the attached lens hood, the rangefinder camera's viewfinder blockage is about 15% in the lower right corner of the 75 mm frame lines with about 0.7x viewfinder magnification. When the lens is attached to the Leica M3 with 50, 90, and 135 mm frame lines available, only the 50 mm frame lines are shown. Best is to manually move the M3's frame line level to 90 mm to compose then in between the visible 50 and 90 mm frame lines to estimate 75 mm focal length.
Leica M-E 240 with silver version of the Voigtlander 75/1.5 Nokton lens. The engraved black scales accentuate well on the silver built.

The removable black hood ring with 58 mm filter thread does not fit well to the silver lens design. It will be fully hidden when the silver lens hood is attached though. The original lens box is shown in the background.
Leica M3 with silver version of the Voigtlander 75/1.5 Nokton lens attached. Compare the look of the lens without black hood ring in the former image!
Lens Focus:
This lens uses two kind of ways to focus: Between 0.7 and 5 meters focusing is very precise with the focus ring which is ideal for portraits. With 0.68x to 0.72x rangefinder patch magnification, focusing wide open at f/1.5 can be challenging. You might need to take a few shots with slight change in focus to have one with best focus, or you use LiveView or external EVF with magnification tool to adjust the focus. Alternatively, the Leica 1.4x viewfinder magnifier will help for rangefinder focusing for sure here. Between 5 meters and infinity the lens focus turn is very short and might be difficult to allow precise focus in this distance range.
For minimum focus distance (MFD) at 0.7 meters, the lens can be a bit tricky: the focus actually turns a bit closer than 0.7 meters which will lead to misfocus with the rangefinder which is limited to 0.7 meters (like the M 240 for example - it is only 1 meter with the Leica M3!). I always need to remind myself to set the distance scale first to exactly 0.7 meters for close-up shots and then adjust my distance to the subject accordingly to focus with the rangefinder. This is common with Voigtlander lenses, some I have go even further down in focus distance like my CV 35/1.2 II which has a MFD of 0.5 meters. It's a no-brainer when the focus is taken with EVF or LiveView because the limitation to 0.7 meters doesn't play a role here.
When taking some photos at MFD of 0.7 meters, the lower left corner of the rangefinder focus window shows a bright silver reflection in my M-E 240 camera which derives from reflected sun on the silver lens hood. It is like a reverse viewfinder corner blockage just this time within the focus patch window. I am still able to focus but the silver corner patch blockage is something I didn't observe before. By removing the lens hood, this blockage disappeared (therefore I was able to exclude any camera issue). Also the issue isn't seen at longer focus distance above 0.7 meters. Not sure if the same occurs with the black lens hood.
I did not see any focus shift when the lens is stopped down.
Photos taken with Leica M-E 240 and Voigtlander 75/1.5 Nokton lens wide open at f/1.5. For the first five photos a 3-stop ND filter was used to accomplish f/1.5 at available shutter speeds. Focus was done with the 0.68x rangefinder.
Bokeh, Bokeh and Image Quality:
Main reason to get such fast short tele lens is to shoot wide(r) open to achieve beautiful out-of-focus blur this lens is known to deliver. I can only confirm this property from my experience sop far - I love the smooth bokeh available between f/1.5 and f/2.8. The bokeh circles tend to be more oval towards the borders and corners of the frame leading sometimes to a smooth circular bokeh pattern in the background. This circular bokeh is by far not as obvious as in my vintage Leica 50/2 Summitar lens, but it definitely adds to the vintage look achievable with this 75/1.5 lens. Image quality is superb - this lens combines well modern sharp lens properties with good micro contrast and vintage looking depth-of field. I did not observe much of chromatic aberrations wide open which is likely mostly avoided due to the aspherical lens element. The lens doesn't seem to flare much with the hood attached - shooting against the sun wide open can cause some purple flares. There is some slight corner vignetting at f/1.5 which I actually like for many of my wide open compositions. Stopping down the lens a bit will reduce the vignetting significantly.
At f/8.0, the Voigtlander 75/1.5 Nokton lens astonishes with excellent sharpness throughout the frame without any vignetting in the corners of the frame. Color rendition is typical for Voigtlander lenses providing a warmer look and rendering. The lens achieves excellent sharpness beginning at f/2.8. Wider open, the lens has more classic rendering qualities compromising between modern sharpness look and vintage rendering.
Photos taken with Leica M-E 240 and Voigtlander 75/1.5 Nokton lens at f/2.0 (top) and f/2.8 (bottom). Painterly bokeh with beautiful depth of field transition even when stopped down a bit.
Sunset photos taken with Leica M-E 240 and Voigtlander 75/1.5 Nokton lens at f/8.0
Lens Competitors closest in Price:
No longer made, the Leica 75/2.4 Summarit lens is a suitable competitor to this Voigtlander lens (the f/2.5 version is not as good in performance as the newer f/2.4 version which is also represented by the prices they are going for). About $1500 more expensive in the current used market, the f/2.4 Summarit lens has supposed to have more micro contrast wide open making it feel more like a f/2.0 lens.
Also the Leica 75/1.4 classic Summilux lens no longer in production comes very close in performance to the Voigtlander 75/1.5 lens. But it costs at least about 4x as much.
The 7Artisans 75/1.25 lens is the cheapest alternative in the bundle but does not achieve the optical image qualities of the CV 75/1.5 lens. Other test reviews state it is less well corrected optically and less sharp; also it is much bigger and heavier. Its bokeh wide open might be a good alternative though.
Below my summary with pros and cons which I experienced with this lens so far. Overall a great value for the price and likely one of the best Voigtlander M Nokton lenses available.
Pros:
+ Very well balanced lens when mounted on camera
+ Sharp wide open in the center with correct focus applied
+ Amazing and smooth bokeh
+ Bokeh circles can in specific situations lead to some vintage-like circular background rendering
+ Smooth focus ring which allows precise focusing between 0.7 and 5 meters.
+ Excellent built
+ Combines modern lens characteristics with vintage lens properties
+ Comes with removable hood in vintage look
+ Available in two color versions (black and silver) for the same price tag
Cons:
- Thin lens rim to attach and detach the lens on and from the camera (you can easily turn the focus ring instead!)
- Too thin red line to mount lens on camera (better visible red dot on the lens mount side would have been better)
- Very short focus turn for distances between 5 meters and infinity making it hard to focus correctly in this range
- Weird lens hood reflection in lower left corner of rangefinder patch in sunlight at MFD with silver lens hood
- Lens allows a bit shorter than 0.7 meters MFD which can easily lead to misfocus with rangefinder focusing when not keeping the lens exactly at the 0.7 meter distance scale set point.
- No lens pouch supplied and no details on the lens info card about lens built or specifics.
- Black lens hood ring does not fit well optically to the rest of the silver lens design
1. Weather and Time
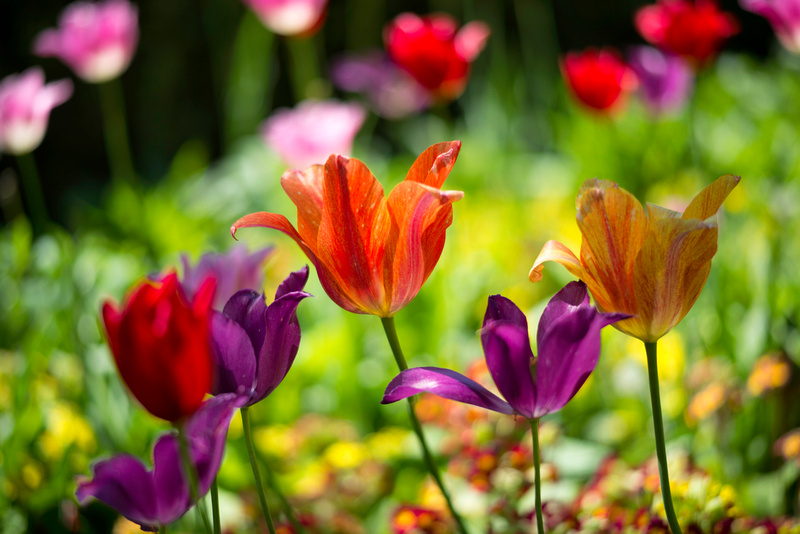
This is a very critical factor to make a suitable choice: during which season, and at which time of the day. I found that spring definitely benefits from color photography with blooming flowers everywhere for a couple of weeks. Combine this scenario with sunlight - better in the morning or afternoon sun to provide more yellowish glow with backlit flower petals to the scene - and you will benefit from vibrant photographs. Both media are fine to use here - digital will surely do a good job here, and it is the safest bet to get home with excellent results. But for photos to stand out in regard to color saturation combined with blues sky, you might also consider grabbing either a Kodak Ektar 100 color negative film or a daylight color slide film. The latter forces you to expose very accurately, better slightly underexposed half a stop to avoid clipped highlights with the slide film. With negative film, always overexpose a bit to avoid too dark shadows without any detail. Slide film will provide you instantly with the "real" film colors whereas negative film needs to be adjusted according to the film back white balance which can be tedious. There is a difference between digital and film - but with good post processing, someone can make digital files look like a close match to the film shots. A circular polarizer is recommended to be used both with digital and film. The colors will be a bit more saturated and especially the sky will look more blueish in contrast - great with yellow/red flowers!

Left: Leica M7 with Fuji Provia 100F color slide film with 35 mm lens, Right: Digital Sony A7R with 90 mm lens
Outdoors in summer, colors tend to fade quite a bit or are overpowered by lots of green. In summer, I often tend to shoot mostly B&W for this reason. Scenes tend to be contrasty and filled with highlights and shadows bringing out patterns well. Related to B&W photography is infrared (IR) photography which is best to do during the mid of the day when the sun is brightest. Foliage will turn out bright white in IR with sun reflecting from the leaves or needles. For B&W, my preferred choice is film - I have the choice of multiple B&W films which provide me either with larger grey gamut or with high contrast. During bright sun conditions, I normally choose either Ilford PanF+ 50 or Ilford FP4+ 125 since I prefer wider grey tonal range over very contrasty looking results. A digital camera can be set to monochrome mode which will save the JPG file in B&W but keeps the hopefully also saved RAW file in color (exemption are Leica monochrome cameras which only see in B&W). I find it nearly impossible to reproduce B&W film photos with digital files - both work of course but with different outcome. Same is true for IR: film infrared photos look different than post-processed digital IR files in B&W. Try both in parallel - either just B&W or for IR - to see what you prefer and if film is worth the effort for the difference seen. A well taken B&W (or IR) negative will shine when printed from it in the darkroom on photosensitive paper - impossible to reproduce with an inkjet printer.

Left: Leica M3 with Fuji Provia 100F color slide film, Right: Digital Sony A7R, both with 50 mm lens

Left: Leica M6 with Rollei Infrared 400 B&W negative film with 25 mm lens, Right: Digital IR-converted Canon 5D MkII with 50 mm lens
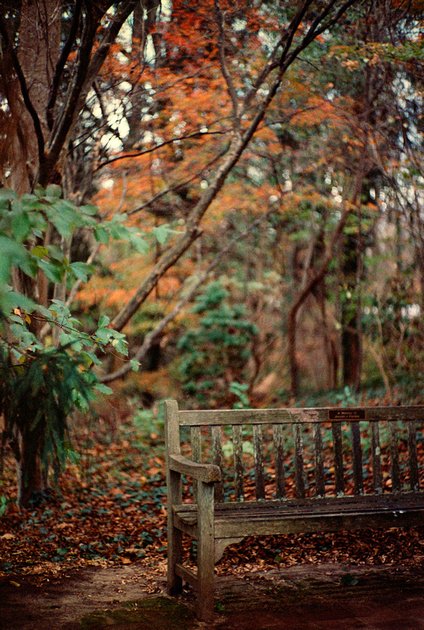
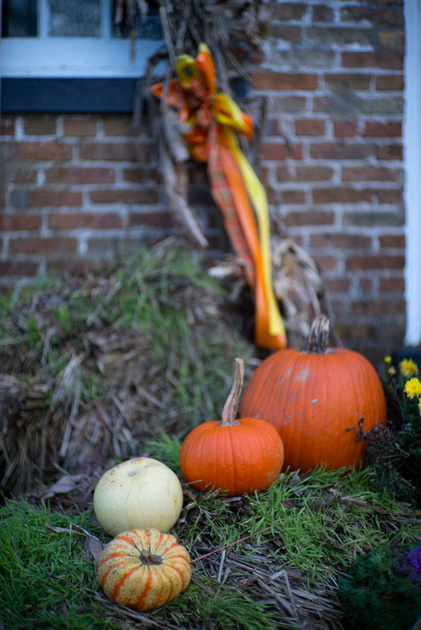
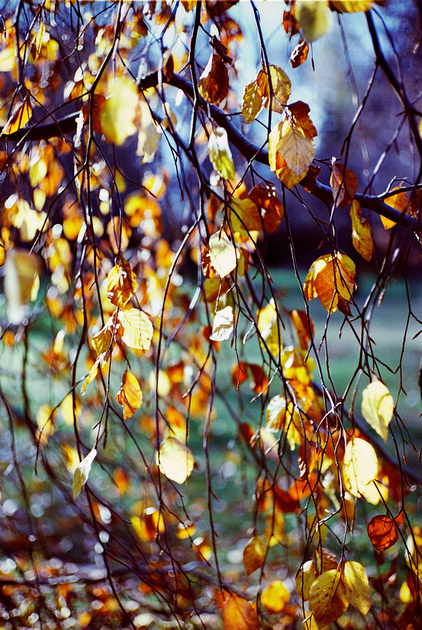
Fall is a great time to go again with color - only this time yellow-orange/red tones will be dominant. Any vibrant color film will work here as well as digital. A great time in late fall also to take photos of sunrises/sunsets - I love taking those with Fuji Velvia 50 slide film. The film brings out orange/red colors in a very unique way, very different from other films and especially digital. ISO 50 allows longer exposure times and negligible grain. Best time also to take photos in the fog early in the morning - overexpose about one third or half a stop in this kind of scenes.

Left: Leica M3 with Fuji Provia 100F color slide film with 50 mm lens, Right: Digital Sony A7R with 21 mm lens
Left: Leica M7 with Kodak Porta 400 NC color slide film, Right: Digital Sony A7R, both with 35 mm lens. Circular polarizer was used in both cases.
Winter is clearly the best time for B&W photography but can also provide good opportunities for color. Snow will always make the reflective meter underexpose - make sure to overexpose scenes with snow on the ground at least half a stop or better one stop.

Left: Leica M3 with Kodak Ektachrome 100 color slide film with 50 mm lens, Right: Digital Leica M-E 240 with 28 mm lens
Left: Leica M6 with Kodak TMax 400 B&W negative film, Right: Digital Sony A7R, both with 21 mm lens
2. Events
I prefer taking photos of events with people present with lots of changing light situations - for example both outdoors and indoors - in B&W. Film is the more forgiving medium here due to its lower 35 mm film resolution compared to digital full frame format: in case the camera shakes a bit indoors at wider open aperture but with 1/15 sec, the photo will still look okay even if it is a bit blurry. With digital you have the option to go higher with ISO to avoid slow shutter speeds but only with Auto-ISO option in the camera - otherwise you likely will lose the moment when trying to change to higher ISO manually and doing the reverse when heading outdoors again. Clipped highlights in an indoor environment taken with digital are very common - but can be fully avoided with film. I am more focused on capturing a moment when using my 35 mm film camera whereas I feel more distracted by my digital camera to review the taken photo directly afterwards on the LCD camera screen.
Left: Leica M6 with Ilford FP4+ 125 film and 35 mm lens
3. Street Photography
All in for film here! In street photography, you need to be fast, and I often found it beneficial to take photos from my hip instead of wasting time to focus. Zone focusing is critical - best use a 35 mm manual focus lens between f/5.6-8.0. In sunny weather, an ISO 125 or 200 film suffices, in cloudy conditions definitely go with an ISO 400 film which can be pushed up to ISO 1600. This guarantees fast enough shutter time to take the shot with movement. The smaller and less conspicuous the camera, the better - best is a rangefinder camera which can be easily be seen as a modern Fuji mirrorless camera. There are many suitable digital camera options which are also preferred by street photographers - one is the Leica Q series - but the higher sensor resolution compared to film allows for less error margin while taking photos. And a bit of film grain make film street photos stand out from the rest, too!

Leica IIIc with Ilford FP4+ 125 B&W negative film and 35 mm lens
Leica M7 with Kodak Ektar 100 (left) and Kodak Porta 400 (right) color negative films, 28 mm lens
4. Portraits
Both media work well here - it comes down to personal choice. Digital offers the big advantage here to see directly after the shot if light, aperture, and exposure were selected correctly, or if something should be changed. Film keeps you in the dark until the film is developed - long after the subject has left the studio. For B&W portraits, I still prefer film over digital for reasons mentioned earlier. I might even use a larger format film camera to decrease depth-of-field and get for example the medium format look. But even with 35 mm and a faster lens, you can create some great artistic work in portraiture. You could try shooting both digital and film, but this takes more time - okay if you have a patient and understanding model. If you do it commercially, stick to digital here. The workflow is faster and more reliable. You can also show the customer the photos using the camera back with the screen.
Leica M6 with Kodak Ektar 100 color negative film (left) and Leica M7 with Ilford FP4+ 125 B&W negative film (right), 50 mm lens
5. Fine Arts
I prefer nearly 100% film when it comes to fine art photography. Why? Because I don't need to hurry here, it is mostly a static scene where I take either time to prepare the scene (still life) or walk the scene to find the right angle to a subject. Film helps me to be totally focused on the composition and immersing into the scenery. I select the surprise in the outcome on film over the gratification of success with digital. The simpler the better here from my experience. But it is a subjective feel - somebody else might just do as well with digital.
Leica M6 with different kind of B&W negative films and lenses between 21 to 50 mm
6. Decoration and Macro/Close-Up
Without doubt, do yourself a favor and do it digitally! Even I love film shooting, this is not the situation to use it - it will only lead to frustration. You better have an electronic viewfinder (EVF) to ensure correct focus applied before releasing the shutter. Film rangefinder cameras can normally only go down to 0.7 meters as minimum focus distance top the subject. With digital, there is no limit - with the right tools (for example diopter lens, extension tube, or macro lens) you can get as close as needed to the subject. It is a huge benefit over film. Since the focus is very shallow in macro photography, review the taken digital photos to determine if another shot should better be taken with improved focus.


Digital close-up photos taken with Sony A7R (first three photos) and Leica M-E 240 with VF-2 (last photo)
7. Sports
I am not a sports photographer, but this is another area where film simply can't compete with digital. Formerly professional sports photographers were highly paid by magazines to take the fast photos needed in sports - everything had to be quick from taking the photo to the fastest possible development time for film. Nowadays even amateurs can take breathtaking sports photos with an average tele zoom lens. This is due to the improvement in digital cameras regarding shutter speed, shutter priority and Auto-ISO modes, image stabilization, and excellent AF capabilities. Any kind of film camera remains an underdog at best here.
]]>Before 2020, Leica M users were out of luck finding any M-mount based fisheye lens on the market: workarounds were necessary like adapting a SLR-based fisheye lens to any Leica camera. Assuming the (D)SLR lens had an aperture ring or was at least attached with fixed aperture to the camera, the photographer still had to estimate the field of view on a film camera or digital camera without display/EVF. Newer and better corrected fisheye lenses in general are also expensive - the Canon 8-15/4 EF fisheye lens still goes for approx. $1200. Attaching a larger SLR-based fisheye lens to a Leica M camera is quite a bit front-heavy setup.
Since a few years, several Chinese lens manufacturers are penetrating the M-lens market with better and better manual focus lens quality for very reasonable prices. The companies started out competing with high in demand Leica and Zeiss M-mount lenses. This strategy seems to work - the Chinese lens manufacturers started to add additional M lenses (and other MLC-based mounts) where they see a lack in the market. One Chinese company - TTArtisan - released a novel 11/2.8 fisheye lens in different mounts including the M-lens mount in 2020. the aperture of f/2.8 is fast for a fisheye lens - even more surprising was its fairly low introduction price of $215 for MLC mounts and $370 for the M-mount versions. The quite significant difference in price for the M-mount version remains sort of a mystery.
I recently ordered this lens - I haven't tested one of the newer Chinese M-lenses before, so this was my first Chinese M-lens. Honestly, I was sceptic thinking this is too good to be true and kept my expectations quite low. I found a good deal online for a mint version of this lens in M-mount which as bonus came together with the 11 mm external viewfinder (normally an accessory which needs to be purchased separately). For the amount of money I spent to purchase, I could easily resell it to give me peace of mind. So I gave it a try.
The lens arrived in a white cardboard box - inside is another beautiful white hard case plastic box with black printed lens group design of the 11/2.8 lens on top of it. The lens sits securely inside a beautiful red padding. As technical person it is hard to impress me just by an exterior look, but I admit I was very impressed by it. This is well designed and marketed - and c'on, not even Leica's latest Noctilux 50/1.2 version comes in a red padded box ;)! Next I took the lens out of the box and instantly felt the weight - but in a positive way. This lens is extremely well built only with metal housing and lots of glass elements - but still comes ins a fairly small size for the focal length and the fast aperture. The lens cap is another impressive feature - made of metal and sits tightly around the front lens. Aperture and focus rings move smoothly. The labels on the lens are in white or yellow color and easy to read. Clearly this lens is made to imitate the Leica look. And it achieves this! I became very curious about its optical performance after being so impressed by its built.
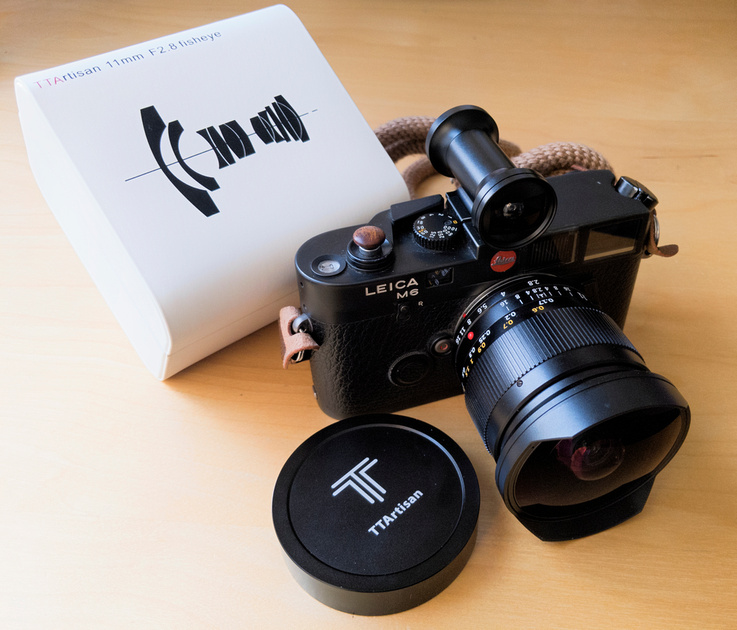
TTArtisan 11/2.8 M-lens with Leica M6 camera and external TTArtisan 11 mm viewfinder. The lens is delivered in a white plastic box including the lens design (behind camera).
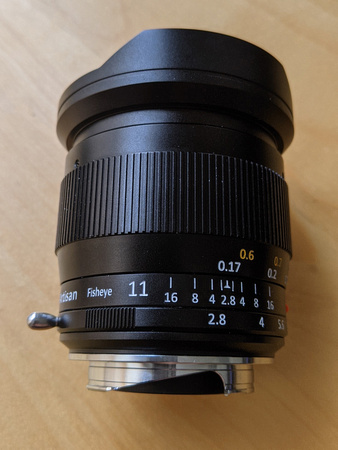
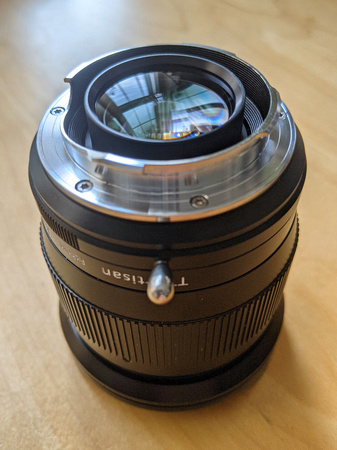
TTArtisan 11/2.8 M-lens from top with focus ring at MFD of 0.17 m and metal focus tab for the aperture ring (left). The back of the lens shows the M-mount with protruding back lens element (right).
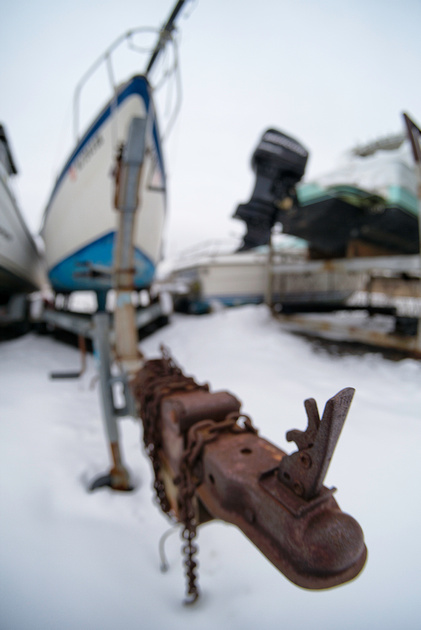
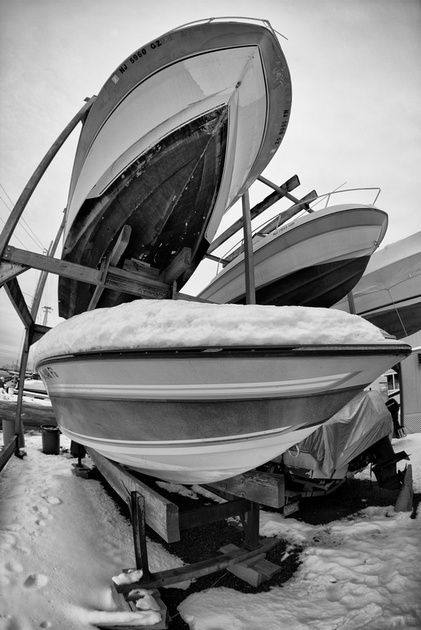
First I attached this lens to my digital M-E 240 camera which I used for testing with the hotshoe-based VF-2 EVF. This way I wanted to make sure that I nail the focus to determine image sharpness by looking through the EVF. Since the lens is not rangefinder-coupled, I had to manually press the camera's focus button to magnify the focus image when moving the lens focus ring. I ventured outdoors on a cold winter day to take a couple first ultrawide photos of boats and a forklift nearby. I took them wide open at f/2.8 and stopped down to f/5.6, also at close focus about 0.17 m and more than one meter distance. I was impressed by looking at the EVF screen with my first results. Later I reviewed both the DNG and JPG files on my large monitor screen only confirming my initial impression. Not only is this lens very sharp wide open in the center, it provides a fantastic out-of-focus blur of the background. It is something I did not expect from a f/2.8 lens. This kind of blur I am used to see with faster f/1.4 lenses normally. Difference is that this fisheye lens does not show bokeh circles often - instead it blurs out image parts in a painterly smooth way. I would describe it as 3D effect which this lens provides wide open. Stopped down, the corner-to-corner sharpness improves significantly and is already very good at f/5.6. Aperture f/5.6 is a good choice to keep the viewer's eye focused on the extended main part of the image but leaving infinity background a bit blurry. At f/8.0, all image elements are super sharp including the corners of the frame. I observed some very slight blue and greenish chromatic aberration far out in the corners against the light source when magnified to 200% - easily to be corrected in post-processing. And honestly, this is normal for any kind of such ultrawide fisheye lens and nothing to worry about. Not much post-processing had to be done with the photos - just adding a bit contrast and saturation which I normally do with digital files anyway no matter which lens I am using.
TTArtisan 11/2.8 M-lens with Leica M-E 240 camera: wide open at f/2.8 (left) and stopped down to f/5.6 (right)
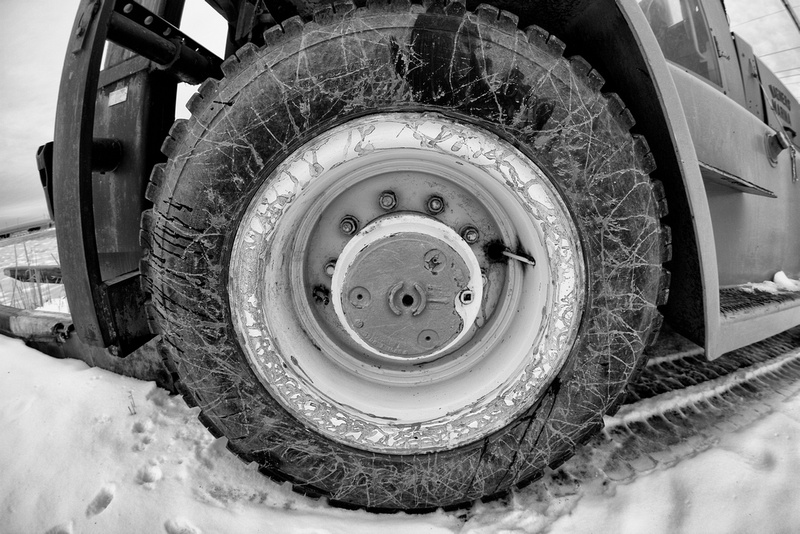
The 180 deg field of view and getting close to the tire in the photo above includes the tracks in the snow behind it. Monochrome digital photo taken at f/4.0
The M-mount version comes with a handy metal aperture ring tab which other MLC mount versions don't seem to have. I am normally not a big fan of tabs, but here it is really helpful. The aperture ring is slim, and the tab allows easy handling. What I found as debit during practical use in this lens' construction is the lack of aperture click stops. By having the camera dangling from my neck, I found that the aperture ring started after a while moving on its own forcing me to check my aperture setting before taking another photo. No aperture click-stops might be beneficial for video usage though. The focus ring has a good size and moves easily. Using this lens in colder outdoor temperature stiffened a bit the movement of the focus ring. No concern but I could clearly tell the difference. The required movement of the focus ring is longer at minimum focus distance (MFD) - allowing better precision focus at close-up distance.
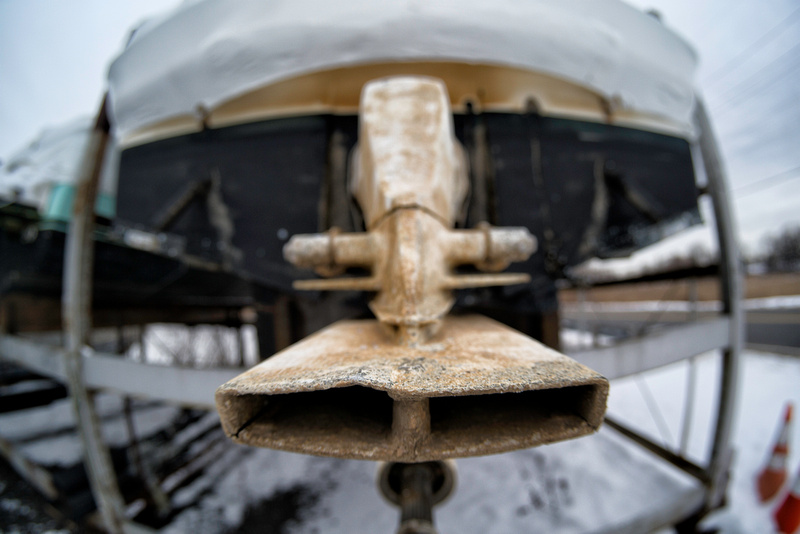
Lack of rangefinder focus coupling worried me first, but I learned quickly that it is not needed with this lens. This can be easily performed by zone focusing to one meter or infinity and a mid-size choice of aperture. More critical focus is needed for distances below 0.5 m - and rangefinder focusing doesn't work anyway below 0.7 m! Here either EVF/LiveView is required for best accurate focusing, or a good estimate. I figured that the MFD of this lens at 0.17 m is just about a hand length of mine - so I estimated quite well the distance between subject and lens with my hand at MFD and then released the shutter. This method proved very useful with film and using a wider lens aperture.
Best close-up focus can be obtained with EVF or LiveView display. Taken with M-E 240 camera and VF-2 EVF at f/2.8.
Accurate close-focusing can be challenging at times without EVF or LiveView display as in these two cases above taken with my Leica M6 film camera and 11 mm external viewfinder mounted on the hotshoe. Closest focus distance is about 17 cm which corresponds to about a hand length. Still a bit out of focus (left) at f/2.8, stopping down makes it easier to focus accurately at f/4.0 (right).
After seeing this lens' performance on digital in color, I was curious to see it performing on film - especially B&W film. Main reason was also to test the 11 mm external TTArtisan viewfinder which I received together with the lens but which is normally an accessory to purchase separately. The 11 mm viewfinder is also fully made of metal with glass element(s) inside representing the ultrawide 11 mm view. The hotshoe mount sits well on my Leica M6 but loosened itself once in the camera bag and fell off. Reason for this is that the viewfinder mount doesn't fully insert onto the M6 camera's hotshoe mount - it hits the pin on the mount and sits a couple mm short of inserting fully on the hotshoe plate. This does not affect functionality though - The external viewfinder is quite long with > 5 cm in length. I personally like that the lens element to look through is protruded inside the barrel, so you will never touch and smear it. The shown view fits very well to the one in the final photograph. It is a great tool to compose with especially on film cameras. To me it has become quickly a must-have accessory in combination with this lens. I also tested if this viewfinder could be used to resemble the 12 mm view of my Voigtlander 12/5.6 M-mount rectlinear lens - but the 1 mm difference in focal length makes a big difference in frame size! This means the 11 mm viewfinder remains dedicated to this one lens only.
TTArtisan 11/2.8 M- lens with Leica M6 and Ilford FP4+ 125 film: fisheye landscape photos compress some elements and stretch others out at the same time. The curved horizontal line with the houses adds uniqueness to the image. Taken at f/8.0.


Lens curvature with this fisheye lens can add drama and show common forms from a different perspective. Film photos taken at f/2.8 (left) and f/5.6 (right)
Low light performance of the TTArtisan 11/2.8 lens is very good. The film photos were taken handheld at f/2.8 and 1/8 sec exposure time with ISO 125 film.
The lens allows for very close focusing distance - It was only a hand length apart from the window. The lens has a 180 degree field of view. Film photo taken at f/8.0
My film photos using the TTArtisan 11/2.8 lens fell nothing short of coming out perfect. I only lost a few frames when estimating the focus at closer focus distance wrongly. Here clearly digital with EVF is the much easier choice which guarantees accurate focus. But zone focusing at 0.5 meters up to infinity turned out well at different apertures. I found myself this day in a situation shooting indoors in dim light - f/2.8 was just right with my ISO 125 film and 1/8 sec exposure time to get the handheld shots (I was never able to get sharp photos at 1/8 sec with my (D)SLRs but it is doable with my rangefinder cameras!). The lens is fairly flare resistant - I used it with light sources in the center and one the side and didn't see any flares or undesired reflections.
The lens makes your brain work a bit harder and also be more creative in your compositions. You can't use this lens like any other rectlinear lens - if you do, all you get are boring and/or too distorted lines in the image. I found it key to get close with this fisheye lens - much more dramatic compositions are possible this way. This lens combines fisheye with close-up features which makes it even more interesting. Often I found myself in shooting from low ground upwards with this lens to increase dramatic view in the composition. The lens can be used for indoor shots with creative input - for example closer objects on the side of the 11 mm fisheye view appear bigger than they are, and objects which are in the center appear less distorted but smaller. There are ways to remove the typical curved fisheye distortion from the image yielding in a rectlinear look-alike. But where is the fun with this? If I want straight lines, I would rather grab my Voigtlander 12/5.6 lens instead. When shooting fisheye, I embrace the distortions!
I quickly decided that this lens is a keeper lens for me! It is very unique and is optically IMO miles better than what you would expect from the lens price. That it comes with f/2.8 stop is an additional benefit for low light situations, great for shallow depth of field effects, and when shooting with film. I mentioned earlier the price difference of this lens in different mounts with M-mount being the significantly more expensive one. Since the flange distance of rangefinder camera is smallest, likely some difference placing the lens groups into the corresponding lens housing helps to overcome potential culprits with rangefinder cameras. Some additional extra feature like the aperture tab adds to the increased price for the M-lens - other than potential higher demand for the M-mount lens in the first place. This being my first experience with a Chinese M-mount lens, I am actually curious now about others they have in their program.
I summarized my main findings in bullet points below, but the cons are minor issues which shouldn't stop anybody going for this lens.
Pros
+ Extremely well built lens with metal body delivered in a beautiful padded box
+ Still compact lens size for the f/2.8 aperture speed and the number of lens elements used
+ Well-made metal lens cap which sits securely on the front lens
+ High optical quality of the lens
+ Manual focus ring allows for accurate focusing at closer focus distances
+ Painterly 3D effect wide open and with close focus subject
+ Suitable to shoot in dark environments wide open
+ Aperture metal tab on otherwise slim ring
+ 11 mm External viewfinder available as accessory
+ Excellent price/quality ratio
Cons:
- No aperture click-stops: aperture ring can accidentally move on its own while carrying the camera
- No rangefinder focus coupling even it is not really needed with this lens. But It would be a nice-to-have!
- Stiffer lens movements (aperture and focus rings) in cold temperatures
- 11 mm External viewfinder doesn't fully insert into the Leica M6 hotshoe making it a bit loose (but not severely, it won't fall off easily)
- No paper manual provided - only a card with links to the TTArtisan website (no manual there either!). But who reads lens manuals?!
- M-lens mount of this lens is much more expensive than other MLC-based mounts
]]>
1. Leica makes the best lenses
This saying derives from the earlier days in photography especially when Leica actually developed and marketed one of the first 35 mm based rangefinder film cameras. Leica had lots of knowledge in optical design from building microscopes and objectives. Their lenses remained "gold standard" for many years to come with a very unique character. Things started changing when Japanese manufacturers entered the market with alternatives to Leica screw-mount L39 lenses. A race started in keeping rangefinder lenses small but making them faster in maximum lens aperture - often Leica stayed ahead of the competition. SLRs changed the game another time significantly in the late 50s where predominantly Japanese camera manufacturers successfully entered. Leica also entered later the SLR market (and then stopped making them) but kept focusing to this day on rangefinder cameras. In the past few decades, (D)SLR lenses have become optically excellent, and even Leica lenses kept their reputation as one of the best, regular users can get nearly undistinguishable image quality from a Japanese camera brand for a much smaller cost. Many Leica lenses have become collector items driving further up used as well as new Leica lens prices. So even Leica lenses are still technically excellent, they are now much more comparable to competitive lens products than > 30 years ago. But the name has developed into a luxury brand reputation, and there are not few who purchase Leica lenses as investment option to sell it even for a higher price later. Trick is to find Leica lenses which are reasonably priced, have an outstanding built and image quality, and fit the photographer's need. When I get such "gem", I don't let it go!

The vintage Leica 50/1.5 Summarit LTM or M lens (it came in both mounts) is such gem in Leica's lens line.
Two Leica 50 mm versions which are 60 years apart from each other: On the left, the Leica 50/2.0 Summitar LTM lens attached to my Leica IIIc camera, on the right the modern Leica 50/2.0 Summicron pre-ASPH lens attached to my Leica M3.
2. Leica means luxury
One the first look this is the case. I don't even go into well advertised reasons why Leica gear supposedly needs to be expensive - German manufacturing with highest standard in quality control etc. Certainly all good reasons but still won't explain the huge jump in price compared to highly reputable Zeiss lens gear for example. Leica keeps purposely prices high by making gear only in limited amount. Since demand seems always high, prices remain high and never drop. So far I have not seen any Leica lens which has dropped in value. If a lens is made as new item in larger quantity for regular consumers, the lens price might stay constant over multiple years after introduction. But for many other Leica lenses, the price rather increases significantly over time. Depreciation occurs with digital Leica camera gear. But used lens prices won't drop significantly from the original introduction price for quite a while. You can get now in 2021 a used standard Leica M 240 for about $2500-2800. The camera was introduced 2012 for approx. $7000. If you compare this to the drop in value of other digital camera brand gear, Leica cameras hold their value much better. This is one benefit when buying into Leica gear - you can often resell it easily and for a smaller loss in value compared to the purchasing price. Debit remains to make the first plunge into the Leica eco-system. IMO best option is to buy Leica gear used - instead of going after the latest and most expensive "luxury" priced gear, better go for a camera one generation earlier and inform yourself about older Leica lens versions to buy used. You might not shoot with the latest digital sensor on the market by doing so, but it won't stop you from taking remarkable photos with the gear.
My Leica M6 with 35/2.0 Summicron IV lens sitting on the 7th edition Leica pocket book with the corresponding 35/2 MFT charts. The photo itself was taken with my Leica M-E 240 camera and 50/2.0 Summicron pre-ASPH lens.
3. Leica has a huge used gear market
From my experience this is definitely the case and one big benefit combined with the brand. Even the latest camera gear is backwards compatible with lenses made in the 1930s! A simple screw-mount/M-mount adapter is enough to use the big majority of vintage lenses on modern digital (or film) Leica rangefinder cameras. It is a personal decision to use vintage lens gear and/or newer lenses. Leica has released so many different lens versions just in one focal length that it will take time for a new Leica user to familiarize just with the basics and differences between versions. This is definitely a challenge I struggled also with for quite some time when I started with Leica. I was forced to crosslink given serial number and lens version to determine how this corresponds to performance. It is important to vest this time since lens versions can be very different in price for multiple reasons. If you are lucky, you might find a Leica lens which is priced much lower than it should be for this specific lens version. Likely the lens was grouped into the wrong lens version category by the seller. It doesn't happen often though - I only experienced it once which saved me a good amount of money when I purchased this lens. In general patience is a virtue when looking for used Leica gear - good stuff tends to move fast, but with patience you can simply wait for the right opportunity. I waited about 3 years to finally find a nearly mint Leica 35/2.0 version IV lens for a price below my upper limit for it. The pandemic has driven used Leica prices up due to limited supply because less people were selling. I found times in the past that the used market had good choices to purchase from and others where I decided to rather wait. It is rather unpredictable, so it is a good idea to keep an eye out if interested in something to purchase used. Some stores/websites are better than others to purchase used Leica gear from my experience, but I am not disclosing here my preferred sources. You will figure it out yourself when you did your homework first! Make sure to avoid accidentally going after collector lens items if you want to use regular camera gear.
4. Leica community
Leica takes good effort to maintain a community of users. There is the fee-based LHSA membership program and the free online Leica forum just to name two. I don't want to over-generalize, but Leica seems to attract enthusiasts who are embedded with the name Leica and people who like technology excellence. There is also a large group of collectors and resellers. Be aware of this in discussions because it seems generally open for criticism when bringing up gear price and competitiveness to other brands. But the Leica forum can be a good resource to get specific help when looking for a photography or Leica gear based solution. The forum has quite good discussion threads about analog gear, too. You will find multiple Leica-based or Leica-associated YouTube channels. I benefitted a lot in gaining technical knowledge about camera and lens versions from Leica Store Miami videos and photography-wise from a series named Leica Conversations.
5. Das Wesentliche
Means in English "The Essential". Leica uses this slogan to advertise ease of use and lack of high tech controls in their cameras as benefit over more advanced competitive cameras which tend to have more bells and whistles. Leica purists applaud this, and for many this is an important reason to use Leica. On the other hand, I find myself conflicted with this. I can see that having too many options in a camera can be confusing and distracting from focusing on the composition and just at focusing, aperture, and exposure time to take the shot. This is probably because I am using multiple brands with different kind of cameras in parallel. And sometimes more options to have in a digital camera are a benefit! I can always choose not to use an available menu option, but I can never use it if it is not available in the first place. Video in my Leica M-E 240 camera is such example for me - I rarely use video, but it is a nice option to have if it is actually needed. IMO it doesn't make the menu more cumbersome if there are one or two video options designated to select from the main menu. Good thing is that Leica now offers different variations of the main camera version - versions with limited and with more functions.
6. Leica gear is less intrusive
Yes. But it depends what camera is used within this description and to which other systems it is compared with: Leica LTM/M and the Leica Q cameras are generally small that they can be easily carried around in an inconspicuous camera bag or just carried around the neck or with the hand strap. M lenses are small that the overall camera plus lens size is similar to a Fuji mirrorless camera (MLC) system. Since MLCs are more common in the market, people often mistake Leica M cameras for a MLC. This is good because it is even easier now as Leica shooter to blend in. The red Leica dot can be detrimental for inconspicuous shooting but never actually happened to me in the US where the brand is less known (but I experienced it once to be a big eye catcher when shooting with my Leica M6 in Germany a few years ago). Taping the dot and name labels helps but can harm the paint when the sticker is removed. Really small in size are older Leica II and III series film cameras with L39 (or LTM) screw-mount. I love to use my IIIc for travelling when I need to keep my film photo gear as minimal in size as possible. Those pre-M series rangefinder film cameras don't have a red dot and only carry the Leica name on the top plate. Other Leica cameras and lenses like the newer SL and S-series are much larger in size and much more rarely used for example for street photography.
7. Leica's rangefinder system is best for manual focus lenses
This is true from my experience. Hitting the focus with any of my Leica rangefinder cameras is faster than using the same manual lens attached to my Sony A7R MLC with focus peaking or focus magnification. But rangefinder focusing can be cumbersome also in specific situations - for example when the composition includes lots of repeating patterns like a blind or brick wall for example. In this case it is better to estimate the distance to the subject and adjust slightly with the rangefinder after some zone focusing. Focus tabs on lenses can be helpful even it took me a long time to get used to them: when focusing with the left pointer finger and holding the camera to the eye, the more the finger is extended on the focus tab, the further away the subject is and closer to infinity. When the pointer finger is pulled back, the lens is focused to closer distance. A tab position in the middle and vertical underneath the lens is about 1.5 meters (5 ft) which is the standard distance for street or portrait photography with some zone focusing to create sufficient depth of field. I find the focus spot much easier with any rangefinder camera than I can do it with a SLR and split focus screen.
Also keep in mind that Leica made and makes different viewfinders. The smaller the magnification number, the smaller the middle rectangle (finder image) gets to align both of the image parts for focusing. Probably one of the best viewfinders is in the Leica M3 especially when shooting 50 mm and longer M lenses: this camera has a unique magnification of 0.91x which is no longer made. With more shallow depth of field at longer focal lengths, this magnification ensures much better focusing especially also for faster lenses. Debit of larger magnification is that wide frame lines like 35 and 28 mm get too hard to see in the viewfinder. Standard magnification in most Leica M cameras is around 0.68x or 0.72x. Sometimes you might see one with 0.58x magnification which is made predominantly for using the camera with wide lenses.
Debit of rangefinder focus systems is that they might require recalibration after many years of usage. In some cameras like the Leica M6, a reflection phenomena in bright light can occur which is called patch flare. Then the finder image window turns reddish and doesn't move anymore when trying to focus. Only way to to resolve this hiccup is by shaking the camera body carefully a bit back and forward. This might take a few seconds, and I had it happen that by then the moment was gone where I needed to take a picture of. The M3, M2, and M4 cameras as well as the ones starting with newer versions of the M7 and later camera versions don't suffer from this.
The minimum focus distance (MFD) of rangefinder cameras is at least 0.7 or 1.0 m. Leica lenses normally don't offer a focus scale below this MFD. But other M lenses like some Cosina-Voigtlander lenses do - when using them on a Leica M camera without LiveView, make sure only to focus down to 0.7 m (or 1.0 m with the Leica M3 for example). Otherwise you will misfocus and get a blurry photo - happened to me multiple times! Digital M cameras can make use of shorter MFD lens focus with either LiveView or electronic viewfinder attached. Both methods circumvent the rangefinder focus system.
View through the Leica M3 viewfinder with 50 mm frame lines. The rectangle in the middle is the finder image to focus by overlaying the viewfinder area with the rangefinder patch view.
For wider focal lengths, an external viewfinder is needed to compose the image. Focusing still needs to be applied through the rangefinder. Here shown the Cosina-Voigtlander 21/25 external viewfinder to be used with the 25/4 Snapshot-Skopar LTM lens on the Leica IIIc.
With digital Leica M cameras starting with the M 240 series, external electronic viewfinders (EVFs) can be used to work with any attached lens. The VF-2 EVF allows vertical composition, too. Here shown in combination with the Leica M-E 240 and 35/2 Summicron-M lens Vers. IV.
8. Leica M and long lenses?
Biggest limitation of the Leica M system is using the rangefinder system with longer lenses. 135 mm already gets difficult to focus within the rangefinder patch (better to do this with an external viewfinder on the hotshoe), and even less common 200 mm lenses are the maximum what is available for this system. I believe most Leica M photographers use lenses generally only up to 90 mm focal length myself included. This limitation in tele lenses is a debit when a longer reach is needed for sports/race events, and wildlife. For action photography, Leica M cameras are limited to 1/4000 sec in the most modern ones - film Leica M cameras only shoot up to 1/1000 sec. For longer focal lengths, either another camera brand system is better, or the Leica SL which offers longer lenses.
Photos above: Taken with my longest M lens, Leica 135/4.5 Hector lens on my Leica M3. Internal rangefinder focusing was applied.
9. Shooting wide with Leica rangefinder cameras?
Leica rangefinder cameras only offer frame lines down to 28 mm but not wider (older cameras are limited to 35 mm like the Leica M2 and 50 mm in the Leica M3). I love shooting wide, and it is not uncommon for me to use 21 mm for landscapes or indoor photography. In such case, I need to use either an external 21 mm based external viewfinder which is then mounted on the hotshoe. Even there is some parallax between external viewfinder and the view through the lens, it is small enough for wide lenses that it doesn't matter. Alternatively, I can make use of LiveView or an external electronic viewfinder (EVF) on a digital Leica M where the image is exactly what the sensor sees. I believe the widest available rectlinear M lens is the Cosina-Voigtlander 10/5.6. Only one fisheye lenses is currently available in M mount - the TTArtisan 11/2.8 lens (stay tuned for my review!). Zone focusing works very well with ultra-wides on Leica film cameras. It is especially easy with digital M cameras and using LiveView or EVF.
Photos above: Taken with my widest M lens, Cosina-Voigtlander 12/5.6 lens on my Leica M6. I used the Voigtlander 21/25 external viewfinder which provides approximately a 12 mm field of view outside the frame lines.
10. Leica Service
A needed but unfortunately expensive option to be aware of when buying in this system! Most common service with Leica M cameras and lenses is the so-called CLA: Cleaning-Lubrication-Adjustment. Prices for this service vary significantly between Leica service centers and third party Leica-focused repair shops. Leica service centers tend to take a longer time with service and repairs. For repairs of older Leica M film cameras I recommend from personal experience third party shops. I sent in my Leica M3 twice to a third party repair facility after I bought it used: first for CLA and then a few years later again after the shutter broke. I also had a CLA done with my Leica IIIc and a 50/2 Summitar LTM lens which I won at a local auction. Not all Leica M cameras are accepted by third party repair facilities - often their possibilities are limited in case electronic parts of older M cameras have to be replaced. Make sure you send in your gear as certified package where a signature is required when delivered.
]]>This vintage Canon 50/1.4 LTM lens is much less known and hyped than its closest counterpart, the Canon 50/1.2 LTM lens which is nearly twice as expensive than this f/1.4 version. I tried twice to get a good copy of the Canon 50/1.2 LTM lens which both turned out to be failures: one copy was in excellent shape, no scratches and no haze, but the aperture ring was misaligned - when the lens was fully open, it showed f/2.8 as fastest f-stop on the aperture ring. I returned it to the store where i bought it from and asked for a repair which was refused - instead I got my money back to purchase another copy from a different domestic seller. Also an excellent lens copy, but I instantly realized when testing it on my digital mirrorless camera that one lens element was reversed not allowing me to focus to infinity. I again had to return the lens - the seller confirmed the issue and returned the money. Then prices went to the roof for this 50/1.2 LTM lens, and I gave up looking for another copy - instead I found a good deal for a Leica 50/1.5 Summarit lens which is great (link to another of my photo blogs: Leica Summarit 50/1.5 review).
Coming back to the Canon 50/1.4 LTM lens: I used to shoot with a Canon 50/1.4 EF lens on my DSLR many years ago which I traded in for a Canon 50/1.2 L EF lens at the time and never looked back. Therefore I never really looked closely at the Canon 50/1.4 LTM version until found an excellent copy. Before I purchased, I read a few reviews of this lens and watched some YouTube videos which mentioned it - not too much information is available describing this lens in detail regarding the performance both digital and with film. I found that all reviews mentioned its good center sharpness wide open at f/1.4 in opposite to the Canon 50/1.2 LTM version which is all about bokeh but doesn't provide sufficient sharpness even in the center wide open. I could also tell from photos shown as examples in other review articles that the 50/1.4 bokeh is smooth and much different from the Leica 50/1.5 LTM Summarit counterpart. This made the Canon 50/1.4 LTM an attractive alternative to test.
LENS HISTORY
This lens has an interesting history, and good thing is that nobody ever has to compete with collectors and collector prices for this lens since Canon made millions of it from 1957 until 1972. The Canon 50/1.4 LTM got the nickname "Japanese Summilux" since it hit the market in 1957 before Leica was able to offer the first Summilux f/1.4 lens to the market in 1959. Leica felt the pressure from Canon and its success with the Canon 7 rangefinder camera plus 50/1.4 lens. Even the Canon f/1.4 lens is nicknamed "Japanese Summilux", the lens design is different from its Leica successor. The Canon 50/1.4 LTM is a Planar lens design, 6 elements in 4 groups. Canon made two identical versions of the 50/1.4 LTM lens - version II starts around SN 29700. Optics of both versions are exactly the same. The lens I got and review is version II.
OBSERVATIONS
The 50/1.4 LTM lens is not bulky like its 50/1.2 counterpart - the lens does not interfere with the viewfinder. It's fully made of metal but only weighs 250 grams. Regarding the design, there are few limitations to be aware of: Like most other LTM lenses of this time, minimum focus distance (MFD) is 1 meter. The filter thread is an unusual one which makes it difficult to find suitable filters for this lens: 48 mm. When I bought my lens copy, it came with a 48 mm UV-skylight filter. Often the original lens hood has to be purchased separately - I saw the metal Canon S-50 lens hood going on ebay for up to $40. If you are lucky, you might find a deal of a good one for less than $15 which sounds much more reasonable. The hood clamps on the outside lens barrel but will sit on top of an attached filter. I would be cautious with filter plus hood placement since the hood barrel is pushed out a couple of mm in such combination depending on filter thickness. This can potentially lead to vignetting. Therefore I am using this lens without filter when attaching the S-50 lens hood.
The S-50 lens hood blocks some part of the lower right corner of the viewfinder but which is still well workable. If better view for composition in the viewfinder is needed, the hood needs to be removed from the lens. The lens itself won't intrude a lot into the corner of the viewfinder.
Photos above: Front and top view of the Canon 50/1.4 LTM lens without and with hood attached to Leica M3 with LTM/M adapter.
Partially blocked Leica M3 viewfinder with part of the lens and lens hood
The Canon 50/1.4 LTM lens (version II) is not as sensitive to lens flares like many other LTM lenses are from this time period. I was able to shoot without lens hood with the sun high up and only getting few flares when actually shooting directly into the sun. The photo below was taken at f/5.6 and providing a nice artistic looking circular shaped flare. I did not experience lens flares when the sun came from the side independent on aperture used.
Canon 50/1.4 LTM lens @f/5.6 against the afternoon sun and observed sun flare. The flare provides a special artistic look into the landscape.
The lens copy I received was a bit stiff regarding turning focus and aperture rings after I received it. It might not have been used for a while. Just working the rings back and forward, made the turning much easier again. The aperture ring clicks into the f-stops and makes a bit of a different metallic sounding click when opening to f/1.4. The aperture can be closed to f/22 - so far I have only used the lens between f/1.4 and f/11. I suspect you will run into lens diffraction issues at apertures f/16 and f/22. The focus ring has a click-stop at infinity which needs to be released to be able to focus closer. Focusing with this 50/1.4 LTM lens is very precise due to the long focus path the ring has. This can be a pro or con depending on the user of the lens: if quick refocusing is needed, the lens is not ideal because the focus ring has to be turned a much longer way from one distance end to the other. If you have time to spend for precise focusing, this ring is ideal. Personally I got very quickly used to it, and it is not an issue for me at all. The focus ring is able to turn a bit further below 1 meter MFD - not an issue with more modern rangefinder cameras which focus down to 0.7 meters MFD. But it is something to keep in mind when using an older Leica LTM or M camera (for example Leica III series or Leica M3) where the rangefinder focusing path is limited at 1 meter MFD. If you overturn the focus ring below one meter in such older camera arrangement, you will misfocus on the film.
The lens shines wide open - that's the aperture where it should be used most of the time in my opinion. Not mentioned anywhere else to my knowledge and to my full surprise, it provides a circular bokeh effect which I really like in vintage lenses. Reason for its smooth bokeh is its 9 blade diaphragm. Closest in similar performance here is the Leica 50/2 Summitar lens which has 10 blades. But both circular bokehs are very different - the Leica one has much more expressed bokeh circle rings whereas the Canon lens is much more smooth in this effect. The center focus at f/1.4 is sharp even on the Leica M-E 240 digital 22 MP sensor. Sometimes it can be a bit challenging with a 0.72x rangefinder magnification to focus this lens accurately wide open especially with repeating patterns present in the center of the image.
Photos above: Canon 50/1.4 LTM lens @f/1.4 on digital Leica M-E 240 camera. Circular bokeh pattern on the left and smooth out-of-focus blur on the right
Photos above: Canon 50/1.4 LTM lens @f/1.4 on Leica M3 camera with Kodak Ektar 100 film. Beautiful bokeh pattern at f/2.0 in both photos.

Photos above: Canon 50/1.4 LTM lens @f/1.4 on Leica M3 camera with Fujicolor Super HQ 200 film. Beautiful bokeh effects at f/1.4 in both photos.
Stopped down, the lens is sharp throughout the frame at f/8 and already delivers impressive sharpness at f/5.6 with slight corner blur. B&W photos look great with high contrast provided by the 50/1.4 LTM. But also the color rendition is fantastic - tones are a bit more on the warmer side compared to modern Canon lenses. Especially blue sky and tones in yellow/orange/red tones appear very natural but well saturated. The contrast of this lens is worthwhile pointing out since it provides sharp looking photos with depth. JPG files out of the camera barely need any additional post processing.
Photos above: Canon 50/1.4 LTM lens on digital Leica M-E 240 camera @f/2.0 (left) and f/8.0 (right)
SUMMARY
If you are in the market of a fast regular focal length vintage lens for relatively low budget, this lens should be seriously considered. Even named "Japanese Summilux", it certainly is not a competitor of a more modern aspherical lens element based Leica Summilux 50/1.4 lens. But if you are in for a vintage photo look with dreamy and sometimes circular bokeh, the Canon 50/1.4 LTM provides this all. This lens is IMO at least as well built as the Canon 50/1.2 LTM counterpart, maybe even better. The lens is made to be shot wide open and will perform in situations where shallow depth of field is used as artistic element in the image composition, for portrait work, or in low light photography. Risk of sun flares is significantly reduced with the lens design and some lens coating and can be further avoided with the optional Canon S-50 hood. The relatively low weight for a lens with metal housing and small size for a f/1.4 lens makes it very attractive for inconspicuous photography and low weight travel. The lens has its limitations regarding minimum focus distance (MFD), unusual and less practical filter diameter size, and longer focus path of focus ring. In my opinion no really big dealbreaker for the interested semi-professional amateur using this lens. In a short period of time, this lens has become one of my favorite 50 mm rangefinder lenses to use in digital and on film.
Pros:
+ Sharp in center at f/1.4
+ Some nice corner vignetting at f/1.4 further emphasizing blur-out effects (disappears when stopped down)
+ Circular and soft bokeh effect wide open with 9 aperture blades
+ Low sun flaring issue with sun hitting the lens without hood from the side
+ Rigid metallic lens built
+ No focus shift and very low/negligible field curvature
+ Very sharp throughout the frame at f/8 and f/11
+ Excellent low light performance
+ Great for B&W photos due to the higher contrast provided by the lens.
+ Price for a f/1.4 lens able to be mounted on LTM- or M-cameras
Cons:
- Focus and aperture rings are not as easy going as on Leica and CV lenses
- Longer focus ring turn needed from one focus end to the other (potentially a con depending on need)
- Unusual filter size of 48 mm and hard to find low cost filters of this size
- S-50 lens hood doesn't work well with lens filters
Additional Examples:
Photo above: Canon 50/1.4 LTM lens on digital Leica M-E 240 camera @f/1.4 with single focus point on the tiny bred berry in the lower right. Busy but smooth circular bokeh in the background
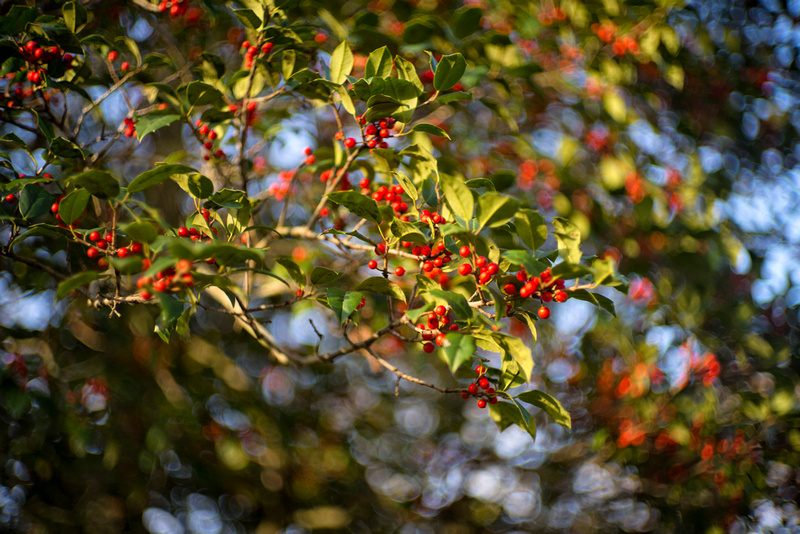
Photo above: Canon 50/1.4 LTM lens on digital Leica M-E 240 camera @f/1.4. Some clearer formation of bokeh circles which get more oval shaped towards the corners of the frame. This provides a vortex bokeh effect.
Photos above: Canon 50/1.4 LTM lens on digital Leica M-E 240 camera @f/1.4 (left) and @f/8.0 (right)
Photos above: Canon 50/1.4 LTM lens @f/1.4 on digital Leica M-E 240 camera in a dim light shooting scenario after sunset. The photos were taken handheld at ISO 400.
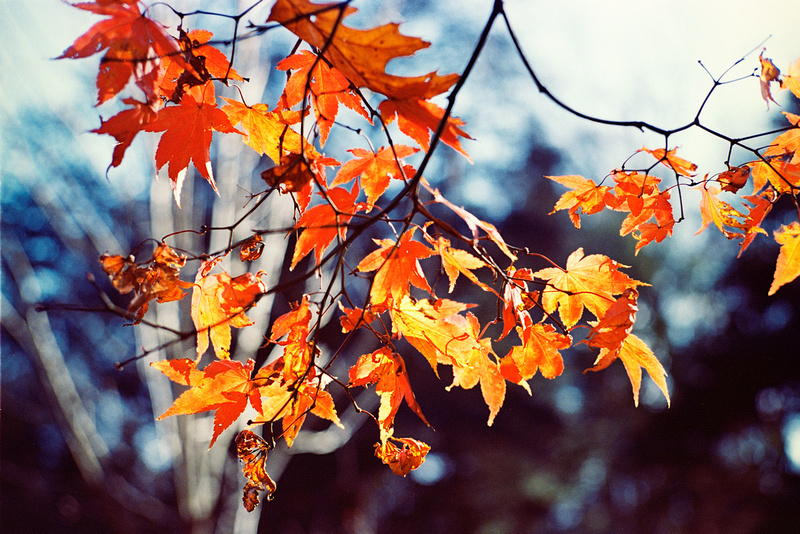
Photo above: Canon 50/1.4 LTM lens on Leica M3 camera with Kodak Ektar 100 film @f/2.8. Even stopped down a bit, the bokeh is still great.
Photo above: Canon 50/1.4 LTM lens on Leica M3 camera with Kodak Ektar 100 film @f/2.8.
Photos above: Canon 50/1.4 LTM lens on Leica M3 camera with Kodak Ektar 100 film @f/2.8 (left) and f/5.6 (right).

Photos above: Canon 50/1.4 LTM lens on Leica M3 camera with Fujicolor Super HQ 200 film @f/1.4.
The lens is tiny - without hood and caps only 35 mm from rear to front. The lens fits conveniently 39 mm filters - standard diameter size of many Leica M lenses. The small lens size comes with one debit - it has no rangefinder focus coupling. Instead the lens allows quick focus with a click-stop focus ring applying zone focusing: it has stops at 0.7, 1, 1.5, 3 meters, and infinity. I was skeptical when I first tried this lens and afraid to have many out of focus photos - but the opposite is the case - it is very hard NOT to focus correctly with this lens. The wide angle of 25 mm allows a good wide range to be in focus - therefore the lens does only supply a very simple hyperfocal distance scale. More is simply not needed - already at f/4 and a rough estimate of the focus point will nail the focus. Aperture f/8 is a guarantee to have everything in focus. I never used this lens at an aperture smaller than f/11 (meaning f/16 or f/22). I am used to the metric system, so having the distance scale in meters is a benefit to me. It might be a culprit for somebody used to the ft distance scale though which is not printed on the focus ring.
I also like the lens design a lot - both focus and aperture rings are small but can be easily moved. The focus ring has a tiny metal focus tab which has to be used to turn the focus ring. The focus ring does not allow to be turned directly on the ring itself. I personally prefer turning focus rings just on the checkered ring pattern instead of using the focus tab. But I got quickly used to turning this ring by using the tab. The distance locations from minimum focus distance (0.7 m) to infinity are very close next to each other which makes it very easy to quickly move from minimum distance to infinity quickly.
The aperture ring has click half stops from f/4 to f/22 and contains 10 aperture blades.
The lens comes with a small round metal hood which seems to be sufficient to avoid flares from my experience with this lens so far. The round hood can be screwed into the outside lens thread. It has one debit - if a 39 mm filter is attached before the hood ring is mounted, the hood often does not fit outside the attached filter. I sometimes simply push the round hood loosely onto the outside of the filter to allow some flare control.
The Voigtlander metal front lens cap sits both on the metal hood ring or directly on the lens itself. The cap sits a bit better and tighter on the hood ring. The lens has a quite long rear plastic lens cap to allow for the protruding back lens element. Important to hold on to this cap because it is unique for this lens.
The lens is built very well with full metal housing. Only debit as in all of my other Cosina-Voigtlander lenses is the too easily removable black paint. The paint starts to loosen first at the aperture and lens holding rings. The silver metal starts shining through - it does not affect functionality of course but will certainly affect the used lens value just for viewing reasons. None of my black Leica lenses experiences the same issue. I wish Cosina would do a better job with the black paint on their lenses.
The lens performs very good optically. B&W photos turn out crisp and sharp with good contrast. Colors appear with excellent tonality. There is barely any corner vignetting wide open and certainly not at f/5.6 and smaller. Big and often overlooked benefit of this lens is its capability to perform excellent in infrared light. There is no IR hot spot seen at f/8.
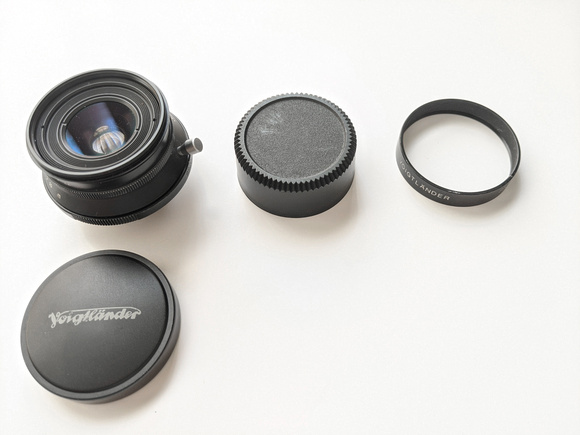
Photo above: Cosina-Voigtlander 25/4.0 Snapshot Skopar LTM lens with caps and round lens hood

Photos above: Cosina-Voigtlander 25/4.0 Snapshot Skopar LTM lens from side and rear view
The lens was discontinued over 10 years ago but can still be found as used copy online. The name "Snapshot Skopar" likely refers to its potential usage in street photography due to its fast zone focusing capability. But the lens can be used in far more situations other than street photography. It's a perfect small and light travel companion to get the wide shot (85 grams weight). Cosina made a similar 25/4.0 M-mount lens without the click stops of the focusing ring. There is also the discontinued Cosina-Voigtlander 25/4.0 Color-Skopar M-mount lens which has rangefinder coupling and focusing. It is a bit heavier with 144 grams. Both lenses have 7 elements in 5 groups.
I haven't tested my CV 25/4.0 Snapshot Skopar in combination with my digital Leica M-E 240 yet but will add photos taken in this combination when available. I have only seen that this lens doesn't work well when attached to my Sony A7R - severe corner vignetting with purple colors.
A few example photos of the CV 25/4.0 Snapshot Skopar lens mounted on my Leica M6 with LTM/M adapter and Rollei Infrared 400 film:
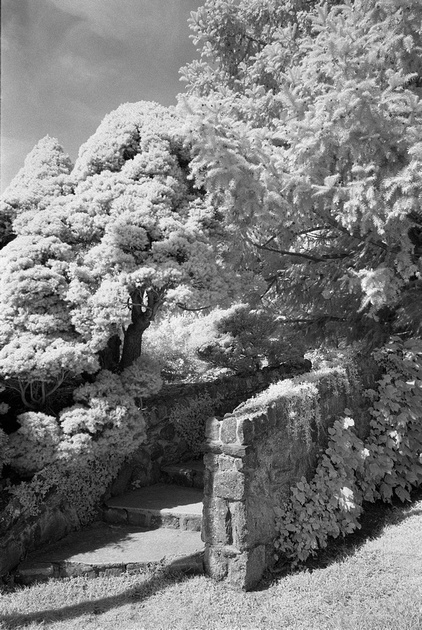
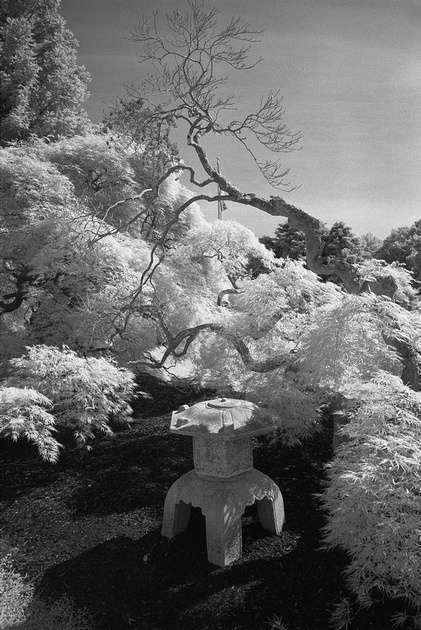
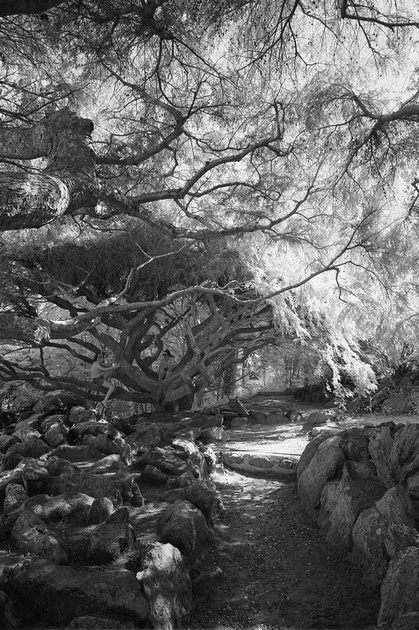
Taken in combination with Leica M3, LTM/M adapter, and Ilford PanF+ 50 film:
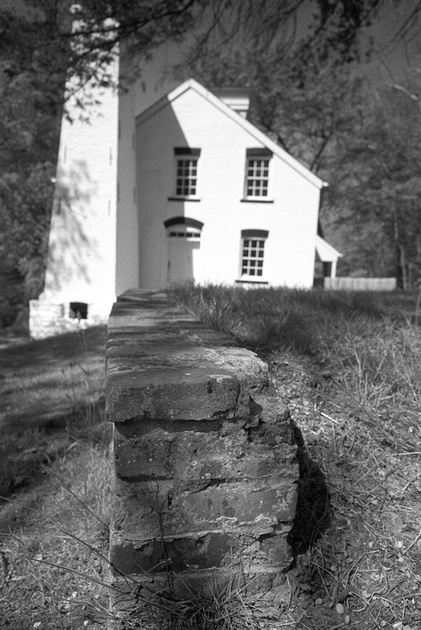
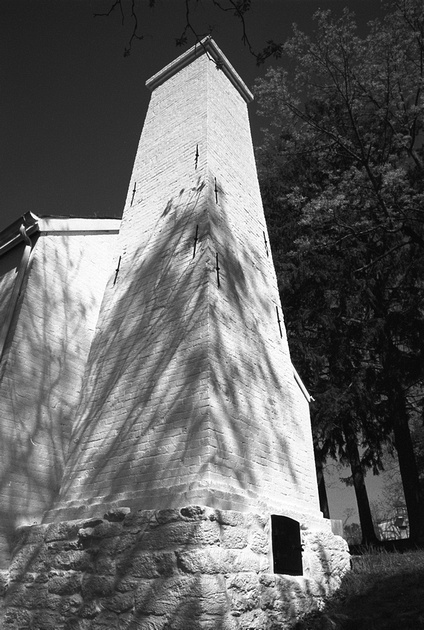

Taken in combination with Leica M6, LTM/M adapter, and Kodak Porta 160 film:
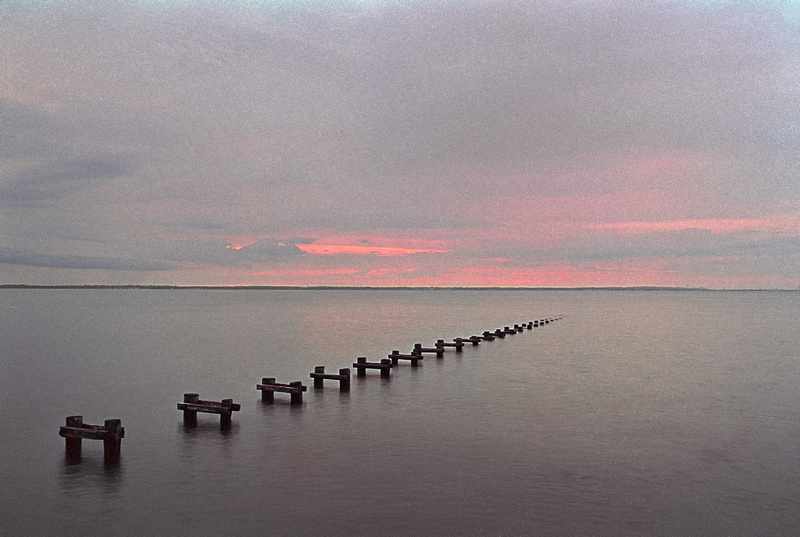 Cliffwood Beach, NJ - Kodak Porta 160 film
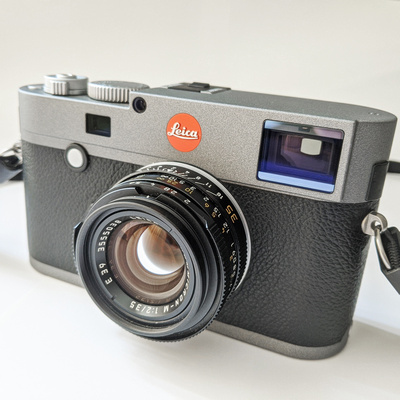
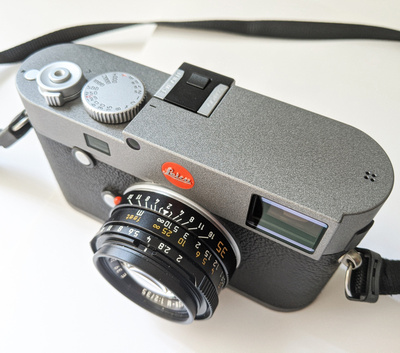
Photos above: Leica M-E 240 with Leica 35/2 Summicron-M vers. IV (pre-ASPH) lens
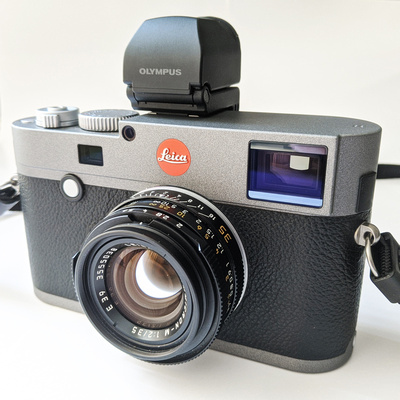

Photo above: Leica M-E 240 with optional VF-2 EVF. It can be flipped into vertical position. Olympus VF-2 and Leica Viscoflex EVF2 are exactly the same model and only different in price.
PROS:
- 99% of options as the twice as expensive M 240: The M-E 240 was sold by Leica for a very short time in 2019 as entry model likely to attract new customers and to empty stock of existing M 240 bodies before all production moved to the M 10. The original sales price of the camera was $4K and therefore 42% below the original M 240 sales tag. Leica took the original M 240 model from 2013 but doubled the image buffer size to 2 GB. The M-E 240 has no internal speaker as the M 240 series if this is of any importance (I doubt it). The M-E 240 menu and sensor/viewfinder specs are otherwise mostly the same as in the other M 240 models.
- Buffer size: The buffer size of the M-E 240 was doubled to 2 GB from 1 GB in the original M 240 series. This is helpful for long burst shooting which I rarely if ever do. But it's nice to have it as option at least.
- Weight and built: The camera is heavy - 680 g, 1.5 lb. The M 240 series including this M-E version is more bulky than the Leica rangefinder film cameras and the M 10 successor. I had to get used to the weight of the camera: you need to hold it differently than my smaller rangefinder film cameras. Best is to grab the camera with the thumb of the right hand on the protruding element next to the dial button on the upper right back of the camera and hold the right side with the rest of the hand. This avoids unwillingly touching the viewfinder window. I added the weight factor as a positive since the camera's weight allows to shoot handheld at very low shutter speed without having image stabilization. The camera is built extremely well, feels solid and of good quality. Day and night compared to my plasticky Sony camera. I also like the unique M-E body design with anthracite top plate which matches both black and chrome lenses very well.
- Sensor dynamic range: The sensor can push shadows easily 3 stops at low ISO and keeping structural elements. I found it to work similarly well as my A7R sensor in this aspect.
- Optical rangefinder viewfinder: clear and bright, better than the M 9 from experience when I once tested the M9. The frame line color can be changed in menu (I keep it white) and shows the frame lines very well. Frame line selection is done electronically and works well for M lenses but needs manually adjusted with adapter-attached lenses (see below).
- LiveView/EVF: Leica allows to attach as optional accessory an electronic viewfinder on the hotshoe. Leica didn't make this EVF on its own but had it made by a third party company (rumors claim by Epson). The exactly same EVF is available as Olympus VF-2 and Leica Viscoflex EVF2 - but with a significant difference in price. You can get the Olympus VF-2 for about $150-200 used whereas the Leica Viscoflex EVF2 costs more than twice this amount. The only difference is the brand logo on the outside of the EVF. Hint: the newer M 10 camera models rely only on a newer Leica-based external EVF which then costs even more! The EVF quality with 1.4 MP resolution is surprisingly good even it is no longer latest technology either (which is now 2.4 MP for M 10 models). The EVF allows critical focusing when needed and to see in one window exposure values of the image. One big advantage I see by using the EVF is that you don't need to move the camera away to see the LiveView image on the back screen. This is especially useful in sunny conditions. Another advantage of the EVF is that it allows to compose by looking into the flipped EVF from the top similar to vertical viewfinders in some film cameras. For example I had the camera mounted on my tripod below the height of my hip, but I composed very well by looking vertically into the EVF from above. In high contrast areas, the VF-2 EVF tends to be a bit brighter looking than the actual photo.
- Wide and ultrawide lenses: Work extremely well on the M-E 240. I tested the CV 12/5.6 II, CV 21/1.8, CV 28/2.0, and also the CV 25/4.0 LTM Snapshot Skopar lenses with great success. No color fringing in the corners of the frame nor blurriness. Now these lenses work as well for me in digital as they already did on my film rangefinder cameras! The steep incident light angles with the ultra-wide lenses is obviously not an issue with this sensor and its stack layout. This fact alone makes this camera worthwhile for me.
- Image quality: Probably the best digital camera I had so far in regard to the quality of both directly captured DNG and JPG files. There is not much post processing needed if the photo is done right straight in the camera. Colors come out very naturally like the eye sees them. The images look not at all flat - I see a big difference here compared to my Sony A7R files which require more processing when taken in the standard photo mode. B&W JPG files are often spot on and might only require some slight contrast and highlight adjustments in post processing.
- HDR: the camera offers HDR setting between 0.5 up to 3 stops. Three or five frames can be selected in the menu - a bit cumbersome to use the wheel to make changes for aperture stops and number of frames and then press the set button - I often forgot to press the latter only to be forced to redo the whole HDR setup procedure again. But once you get used to this, the HDR mode proves a very feasible and good one in this camera. It compensates for the limited dynamic range of the sensor especially in highlights. The photos are taken very quickly, I was able to capture 5-frame HDR shots handheld easily. The photos remain separate on the card depending on the file saving setup (I save them as RAW and JPG) - the camera won't process them upfront into a viewable full HDR like other cameras do, for example the Canon 5D MkIII. To get the HDR, it needs to be done in post processing with software. Especially for scenery shots, I often use this feature now. This way I am able to keep the sky blue and see details in the shadows.
- Video: All the M 240 cameras including the M-E 240 version allow for is 1080/25p video. But honestly, nobody will buy into Leica rangefinder cameras for mainly using it with video. I see it as a nice-to-have gadget which comes technically nearly for free as part of LiveView. The M 10 on the other hand has no video option anymore. I suspect it was removed in this successor model to allow a slimmer camera body without danger to potentially overheat. Other reason is differentiation in Leica's own camera market: to make video-interested customers look into the SL/SL2 camera series instead. The M 240 series is the last Leica digital rangefinder camera series which still offers video in a 2013 technology standard format (the first M 240 first came out in 2013). The later M 262 model released in 2015 excluded LiveView and video capabilities.
- Shutter: The M-E 240 shutter is one of the most silent Leica M shutters I know from own experience. You barely hear a click when releasing the shutter. It is super non-sensational, allowing the camera to be used in quiet gatherings like performances or ceremony in churches etc. It can handle up to 1/4000 sec exposure time which is 2 stops faster than my Leica M 7 with a maximum of 1/1000 sec (great when using faster lenses without ND filter!). The shutter uses a double metal blade system and is in front of the sensor. The grey bar in between is the reflective area to allow light metering. The shutter can handle a maximum of three shutter flaps per second - far below what modern cameras can do, but not really important for a rangefinder shooter.
- Battery and battery charger: The BP-SCL2 battery has a long lifetime when fully charged and used predominantly just with the rangefinder viewfinder. Without LiveView or EVF, this battery gets you through a full day of shooting. The charger comes with two cables - one for the US, the other for the German outlet standard. This is ideal for me since I travel often between both countries and don't need to worry with a 110/220 V adapter for this charger. It also comes with a plug-in car charger for the battery. Charging a totally empty battery takes about 4 hours with the Leica charger. Supposedly this battery has no memory effect.
- Light Meter: The light meter in the rangefinder viewfinder is exactly the same as in the Leica M6. You have up to three choices of metering modes: classic, center, and multi-field. The classic method is the standard metering as in the M6 for example. Center method might come useful for close-up/macro work, and the multi-field is only applicable in LiveView or optional EVF mode. I keep the metering mode mostly in classic mode since I am also comfortable with this method from my Leica M 6/M 7 cameras. Interestingly, the Leica M 7 has a few more precise metering options in its display than the M 240 series has. This has proven to be useful for slide film photography where precise metering is key. Overall the metering system of the M-E 240 works very well, too.
- Camera Menus: For me a clear positive in this camera even I heard other users saying it has too many options (coming from Sony MLC, it is easy to satisfy me with a well structured camera menu!). I had an easy time to get used to the menu structure even it took me a while to find the singled-out INFO and SET menus which contain important additional features. Some menu options appear a bit weird when first using it like setting the ISO - it only works when the ISO button remains pressed and moving the dial at the same time. Leica could have just allowed to press ISO once and then changing the value accordingly. Probably it was done as safety step that the ISO isn't changed accidentally. I don't like using Auto-ISO, therefore I am quite often using the ISO button to change the ISO value. The camera menu allows to save settings as user-specific custom file which can be loaded and applied any time. I have currently two custom settings: one for regular color-based shooting and a second one for B&W.
- Shutter release cable: The M 240 uses the same method to with cable release as in the older M film cameras. Any kind of 35 mm camera based cable release with screw-in thread will work. There is no option to use a wireless cable release.
- Tripod mount plate inlet: This is a little thing which always annoyed me when using my Leica M film cameras on a tripod - that the tripod plate is always mounted off-center on the side of the base plate instead. I have to move the tripod off center to adjust for a central camera/lens lineup with the subject. The M 240 series has taken this into account and allows now to mount the tripod plate in the middle of the base plate. The camera sits now in center on the tripod head. The tripod mount uses the newer standard male 3/4" tripod mounting plate screws (same as for example in the M 6/M 7 cameras). Only slight issue here is that you can't remove the base plate when the tripod mount plate is still attached. The screw goes directly through a hole in the base plate into the camera body. You have to remove the tripod mount plate first before being able to remove the base plate, for example if you need to change the battery.
- Camera menu and camera packaging: Simply excellent. A nice black cardboard box with magnetic flaps and drawers for manuals/cards and charger and cables. The camera menu in German and English is well written and allows to find camera options easily. Probably the best camera menu I ever had for any of my digital cameras in the past. Leica makes it clear that you buy not only the camera but an experience here. I am glad that I got all the original packaging even I bought the camera used.
CONS:
- Reduced handgrip functionality: Often overlooked in reviews, The M-E 240 is not compatible with the full electronic Leica handgrip #14495 commonly used in the rest of the M 240 series. You can attach it to the M-E 240 body, but all (or most?) electronic functions like GPS will remain disabled. This information can only be found in a little addendum sheet Leica added to the camera manual (the original manual which comes with the camera mentions #14495 as suitable handgrip option which is false). If you decide to get a handgrip for the M-E 240, you might be better off with the cheaper version without electronic features, #14496. No idea why Leica disabled this functionality in the newer M-E 240 model since the ports and software are all the same as in the M 240. I suspect it was one way to hinder professionals going with the much cheaper and newer "entry" level camera version. This is the main difference to the original M 240: not the camera itself and its functions, but in regard to compatibility with the handgrip accessory. This might or might not be a deal breaker for some (not an issue for me other than USB accessibility).
- Viewfinder: Same as in the original M 240 series, the viewfinder magnification is less than the common 0.72x and only uses 0.68x magnification. The rangefinder rectangle to focus both frames is therefore a bit smaller than in most Leica rangefinder film cameras like the M6/M7 series for example. Also the viewfinder itself is not as wide as in film-based rangefinder cameras. With a 28 mm lens, you need to use the whole viewfinder frame available, there is barely any space outside the frame left. The viewfinder window can smudge easily, always have a lens cleaning cloth available to clean the window.
- Automatic lens recognition: The camera allows for 6-bit coded M lenses and can then automatically apply an in-camera profile for a specific lens. The lens frame in the viewfinder is electronic and selected by the bayonet mount according to the M lens focal length. If you have the camera menu set up with "Automatic Lens recognition", this will apply the lens frame in the viewfinder automatically for all M lenses - no matter if coded or off-brand. It's getting a bit tricky when using older vintage LTM screw-mount lenses (or any other kind of manual focus lens) with adapter: you need to have the camera menu set to automatic lens recognition. After you attached the LTM/M adapter, the correct pair of frame lines will be displayed. In case you need to change the LTM/M adapter with a different pair of frame lines, you need to turn the camera off first - otherwise the camera remembers the former setting and doesn't change the frame lines! After you exchanged the adapter, turn on the camera again, and the different frame lines according to the used adapter will be displayed.
- High and low ISO range: this is the obvious and main limitation of the M 240 series in general, but you would only consider such camera if you don't need high ISO in the first place (otherwise you really have to go the M 10 route which is its main improvement over the M 240 series). After testing exposures at ISO 100 to 6400, I am feeling comfortable using the camera up to ISO 3200. ISO 6400 shows quite a bit of noise but which can also be significantly reduced in post processing with anti-noise filters. ISO 100 is pulled from the native minimum ISO 200 camera setting. It keeps exposure values at ISO 100 the same as the ones measured at ISO 200 without changing the registered amount of light (seen through exposure simulation at ISO 200 and 100 in the EVF).
- Sensor dynamic range: Regarding highlights (for example sky and clouds), this sensor is super sensitive and can clip highlights very easily. There is no way to rescue clipped highlight structures in post processing. I found one stop overexposure in highlights is already a culprit. Pulling even slightly overexposed highlights is impossible - here the sensor differs significantly from the Sony A7R sensor performance. Since shadows can be pushed nicely on the other hand with the M 240 sensor, make sure to better underexpose half a stop or a stop. Use a graduated ND filter for landscape photos or push shadows in post processing. When underexposing areas too much, you might observe greenish casts in the shadows which you might need to desaturate in PP.
- LiveView/EVF: the magnification area cannot be moved within the frame - the whole camera needs to be moved if an area to focus is outside the center magnification frame. This can cost time to focus and then to move the camera back to its original position on the tripod. The EVF slows down shutter release times in case this is critical. The EVF uses a lot more battery power - better have a second charged battery ready when using the EVF more often. The camera's back screen cannot be tilted - hard to go back to this when coming from a mirrorless camera with tilt screen.
- Access to battery and SD card: only possible by unscrewing the bottom plate. I guess you get used to, but I felt it was a but of a step backward when coming from DSLRs and MLC where the battery and memory card simply sit in a chamber which can be opened and closed with a lid quickly. I found that the plate can't be removed if a tripod mount is still attached to it. This can cost lots of time to change a battery for example when the camera sits on a tripod.
- Red Leica button: Nothing against the brand logo, but I am used to tape Leica name and button on my Leica film cameras to be less conspicuous. The anthrazite M-E 240 camera color of the top plate looks actually very nice, but any kind of black or silver tape will stand out against the grey background. So far I haven't found a solution and keep the red Leica button visible.
- Optional battery: The M 240 series BP-SCL2 battery is much thicker than its successor in the M 10 and lasts also a lot longer when fully charged. But there is visible drain of battery power when using LiveView or optional EVF. A second battery is a good idea to keep going especially when using the optional VF-2 EVF. 50% remaining battery charge was used up in combination with the VF-2 in two hours. Problem is the price - a new one costs still about $200, and no third party company offers a replica. Used batteries go for $150 - not cheap either, and you don't know what you might be getting and how much the battery was used before. I had to bite the bullet and bought a new BP-SCL2 battery as spare one.
- No ultrasonic sensor cleaning: Standard feature in most digital cameras now, but not in the M 240. I have mixed feelings about having this option - I didn't see much benefit of ultrasonic sensor cleaning in my Canon 5D MkII and only a bit with my Sony A7R. In fact it can delay turning the camera on or off. On the other hand I need to dry-clean the M 240 sensor with my arctic butterfly swap quite regularly.
- Strap: Do not use this strap! After a couple weeks of walking around with this strap, I realized that the plastic fixing on the strap for the metal ring holders gives indents on the side of the camera in the black leather. The metal is protected for this reason with plastic parts on both sides of the camera which helps, but the lower end below the strap mounts isn't protected. I still need to find a camera which comes with a well suited and easily adjustable neck/shoulder strap. Same here with the Leica M-E 240: First I had to find an online YouTube video to figure out how to connect and disconnect the strap from the camera - it is not intuitive. When using the Leica strap, it also became a hassle with curled strap all the time - no fun. Simply purchase another strap and forget about this one - IMO it is unusable. The strap is really nothing special either other than the Leica brand name on the shoulder/neck plastic cushion.
What do I miss in the M-E 240?
- Easy accessible USB port on the camera. The port is only available with the optional handgrip I mentioned earlier. It's not a must-have for me since I normally simply unplug the SD card to upload the photos on my hard drive, but it would be nice to have to allow for example battery charging inside the camera. Due to the limitation of the handgrip functions on the M-E version as mentioned earlier, I am not sure if the USB port is accessible in the first place.
- Mentioned above, not being able to move the zoom magnification window in LiveView or EVF is a disadvantage. This alone will likely stop me to use the M-E 240 for macro photography and using my Sony A7R MLC instead which is much better suited here with movable zoom magnification window.
- I wish the M 240 sensor would allow highlight capture and pulling like my Sony A7R does. The M 240 behaves more like the M 9 regarding highlights. I am spoiled here with the bit better dynamic range of the A7R, but going back a step feels hard after getting used to the highlight post-processing capability of the Sony sensor. But shadows can be pushed nicely with the M-E 240, I just need to make sure that I always underexpose instead of overexposing highlights. The other option is to use the HDR function of this camera.
Overall I am very happy with this camera purchase. Leica is and remains an expensive brand, but getting a used (and nearly mint) camera for a good deal limits value depreciation significantly and allows me to actually use the camera in the wild without being afraid to carry a big jewel around my neck or shoulder. The M 240 was its first and last hybrid camera series made by Leica combining rangefinder, LiveView/EVF capability, and video. The M-E "entry" version has the same capabilities as any other professional M 240 series mostly just compromising in electronic handgrip accessory functionality. Leica currently doesn't make entry-level cameras or Summarit-lenses anymore, they also removed video capability from the M camera series fully. I believe therefore the M 240 series is and will remain in demand for many who accept the camera's lower ISO limitation compared to expensive current M systems. I will use the M-E 240 for years to come in combination with my Leica LTM and M film cameras. The M-E 240 won't replace my track-proven Sony A7R camera either - both will be used in different shooting situations.
]]>This factor is not needed in digital photography since a digital sensor receives and reacts to light in a linear way from dark to bright. This means that even long exposures are measured correctly by an external or internal camera-based light meter for digital photography. Since the majority of photographers is shooting digital, most have never come across the term "reciprocity" factor. It plays a huge role when taking photos with film - light is not received in a linear way like in digital. Film is less sensitive at both ends of the dark/bright histogram ends - it can be shown as a double-S-curve with turning point in the center. You might know that you can overexpose film quite a bit - it depends on the film, but 3-4 stops can be handled by most negative films quite well for overexposure without losing detail (this is different with slide film which can only handle a maximum of one stop overexposure before blowing out highlights - similar to digital where beginners often overexposure highlights instead of pushing shadows in PP). The same goes for dark areas with longer exposures needed - you actually need to increase exposure to avoid getting pitch dark shadows without detail using film. This is valid both for negative and positive (slide) films! Only that the amount how much more light is needed depends on a) the film, and b) the situation/scenery.
Best is to explain this with examples. As I mentioned in the beginning, Fuji Velvia slide film is not a beginner's film to be used since it does not allow a wide margin for wrong exposure - both at dark and in the bright. Rule of thumb is to avoid overexposure at all cost and rather underexpose this film half or one stop to avoid clipping highlights when present. The film is great to use during regular daylight in colorful scenes - what I like a lot is that it does not require any PP with color saturation after digitization/scanning. Kodak Ektar 100 negative film is also giving great colors but always annoyed me with its tendency to show shadows in blue/magenta cast. Fuji slide film fully avoids this issue and looks very natural in darker areas instead.
I have never tested Fuji Velvia 50 for low light photography - I only found few examples of night shooting with this film online. This time I gave it a try - it was sort of a gamble since I only had three frames of my 120 film left to hit it. I wanted to cover the sunset and the night scene of NYC from Liberty State Park across the river. How did I get to the results shown below?
First, I had to keep in mind the extension or reciprocity factor of this film above 4 seconds. It states to add an extra stop between 4-8 seconds, and multiply the exposure with factor 1.5x between 8-12 seconds. Above 16 seconds, the reciprocity factor increases to 2x. The first shot with this scene was taken before sunset at f/11 with 2-stop ND filter to blur the water a bit. The exposure here was 1 second - no need yet to use the reciprocity factor:
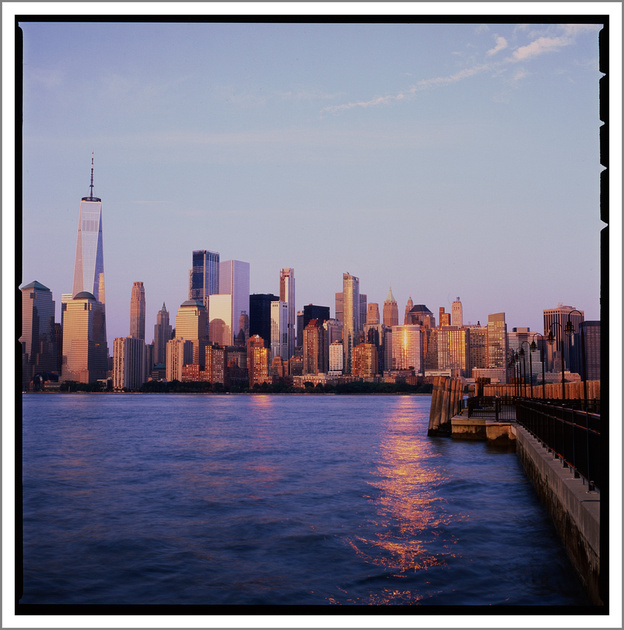
The sun was setting soon after, and quickly the light intensity dropped. I was still at f/11 but now without ND filter since there was no more need to extend the exposure time with less available light. My external light meter showed for ISO 50 an EV-value of 6 which corresponds to 2 seconds at f/11. Now I am hitting the range where the reciprocity factor comes in play - using the scale shown above, I would need to apply 2+1 = 3 seconds instead of the measured 2 seconds. But the situation/scenery also comes in play - I wanted to have the scenery darker to bring out the blue/magenta sky better. I estimated that 2 seconds should be sufficient and ignored the additional second. The result turned out exactly as I anticipated just with more saturation than expected:
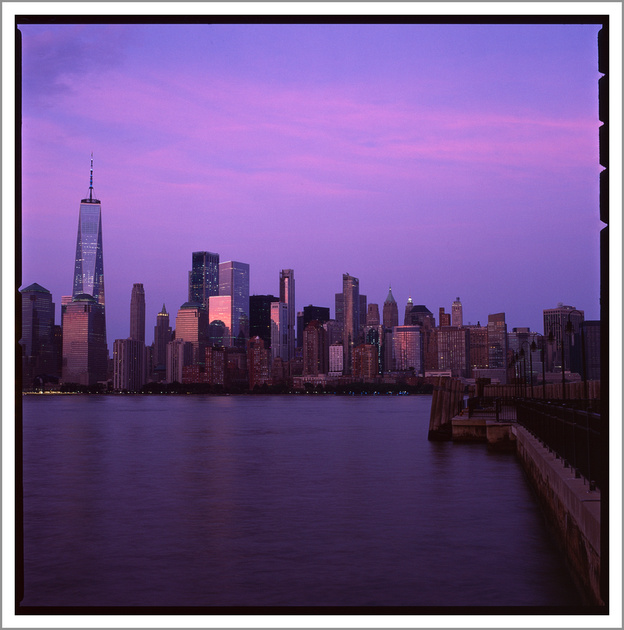
The light quickly vanished after the sun disappeared, and the city became alive with artificial light. Now my light meter showed me an EV value of 2 which corresponds to 30 seconds at f/11 and ISO 50 film. Using the required reciprocity factor of 2x, I would need 60 seconds to accommodate for the lower film sensitivity. But I wanted to avoid overexposure at all cost for my frame #12 - the last frame I had. I simply estimated that 45 seconds instead should bring me in the right range (taking the average of 30 seconds from my meter and 60 seconds with applied reciprocity factor). I released the shutter with my cable release and held the leaf shutter open in bulb mode for roughly 45 seconds (I counted in my head). The result was again very pleasing - showing all detail but avoiding underexposure:
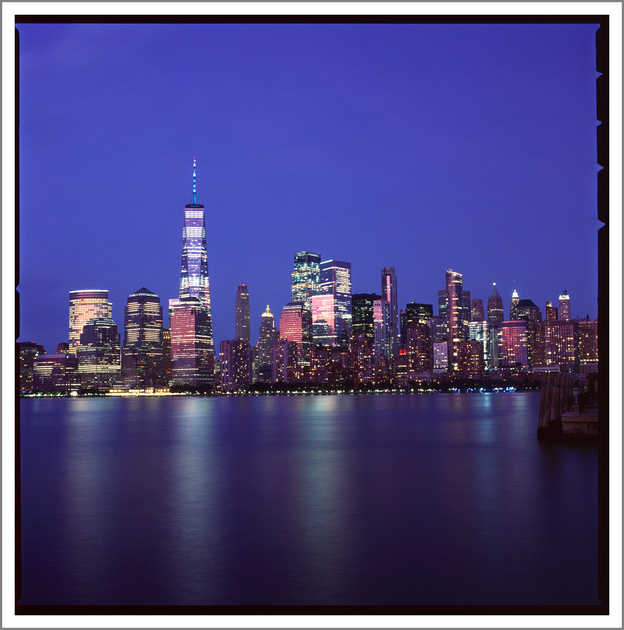
I might actually use this slide film more often for dim/dark light photography after this first experience with it in low light. I really love the bluish cast in the water and the sky which digital would not have brought out in the same way.
]]>
The price for this lens tends to vary a lot and isn't available online too often. I got mine for $160 in November 2019, but I also see prices in the $300-400 range. It is often regarded and sold as lens collector item.
Photo above: Konica-Minolta Super-Rokkor Chiyoko 45/2.8 LTM lens mounted on my Leica IIIc camera.
The lens is very well built and comes in a brass lens housing with interesting looking focus ring which appears resembling a gear. It is very small and compact for a standard focal length rangefinder lens which makes it ideal for travel. The aperture ring is at the front of the lens. The aperture ring moves smoothly without any clicks at the aperture numbers - so any kind of intermediate f-stop can be selected between the full aperture numbers. When turning the aperture ring, the focus ring tends to move, too which can be an issue when quickly making adjustments with this lens. Moving the focus ring also changes the position of the aperture markings - probably the reason why the aperture window in older lens versions made it a bit easier reading the f-stop by looking to the front of the lens. This is especially true in closer focus position around 5 feet where the f-stop can't be easily read. Newer lens versions like mine have two black dots on opposite sides of the focus ring and two two aperture scales to minimize the range of the dot being moved outside the view by looking on the top of the lens to adjust the f-stop.
The lens also has a little focus tab made of metal attached to the focus ring. Depending on personal preference, you can either focus with this focus tab or use the focus ring itself. Closest focusing distance is 1 meter (3.3 feet). The lens tube is fixed and doesn't need to be pulled out for focusing. The 50 mm viewfinder of my Leica IIIc camera can be easily used to compose with this 45 mm lens.
The lens is very sharp and fully coated on all glass-to-air lens surfaces corrected for optical aberration. It delivers excellent color and B&W photographs. I still recommend getting a generic 34 mm screw-in hood and a 34 mm snap-on lens cap.
Pros:
+ Tank-like built and compact pancake size
+ Very appealing look with the gear-like focusing ring
+ Ideal standard focal length travel lens; fits easily in any pocket to carry separate from the camera
+ Smooth aperture rotation to allow intermittent f-stops
+ Very sharp lens with good contrast
Cons:
- Focus ring moves aperture ring
- Aperture stop hard to read when focusing closer at 5 feet
- Heavy for the size of the lens
- Often lens caps have to be purchased separately and don't come with the purchased lens
- Uncommon 34 mm filter diameter
- Collector lens item can drive used prices up
Examples with Konica-Minolta Super-Rokkor Chiyoko 45/2.8 LTM lens on film: (Hover over image to see the technical info)
 Ilford FP4+ 125 film developed in Xtol (1:1). Lens aperture f/5.6
 Ilford FP4+ 125 film developed in Xtol (1:1). Lens aperture f/8.0
 Ilford HP5+ 400 film developed in Xtol (1:1). Lens aperture f/8.0
 Ilford HP5+ 400 film developed in Xtol (1:1). Lens aperture f/5.6
Personally I find vintage lenses from the 1940s to 1960s very interesting since some of them exhibit qualities irreproducible with new digital lenses. Why is this? Because > 60 years ago lenses were much more simply built to accommodate lower resolving 35 mm films. Also lens coating technology and very accurate robotic lens element manufacturing did not yet exist or was just at the beginning. Lens bodies were much smaller as nowadays lenses due to much less lens groups used and lack of auto-focus plus other electronic features like in-lens image stabilization. Floating lens elements were introduced first in the late 1970s. Less lens elements and none or minimal lens coating gave many lenses of this era a unique character. Modern lenses purposely removed these characteristics to improve corner-to-corner sharpness of the frame, have less chromatic aberration, minimal halo effects, and higher micro contrast. Good example for this are modern Leica Summilux (f/1.4) lenses which are aspherically corrected and go for a minimum of $4K in M-mount.
Lesser known but very interesting for those considering vintage character lenses is the often overlooked Summilux predecessor, the Leica 50/1.5 Summarit lens which was made first in LTM screw-mount and later in M bayonet mount. In comparison, this lens if found in very good condition with low amount of scratches on outer lens elements goes between $500-800 as used copy. The name Summarit is now a bit misleading after Leica introduced a novel f/2.4-based Summarit lens line in 2007. Those are seen as entry-level M-mount options for a much cheaper value compared to their f/2 Summicron counterparts. The new Summarit lens designs have nothing in common with the old 50/1.5 design first released in 1949. This 50/1.5 lens design relates to the predecessor which is the Leica 50/1.5 Xenon lens licensed by Taylor Hobson but now came with additional lens coatings for 7 lens elements in 5 groups. The lens is an oddball in the Leica line, and exhibits one property of only few in the history of LTM/M lenses: it transmits UV light, therefore it is highly recommended to use an E41-filter thread based UV filter for film photos (it could be very interesting to be used on a full-spectrum converted mirrorless digital camera for UV-photography!). The lens is beautifully made from brass with chrome finish and weighs 300 grams. The aperture ring has full stops between f/1.5 and f/16. The last stops between f/8 to f/16 are very close to each other on the ring - caution is needed not to accidentally jump over one stop here. Often the minimum focus distance of one meter is mentioned as con of this lens - but for film rangefinder focusing one meter was the minimum distance accessible with the rangefinder path anyway. When adapting this lens to a modern digital mirrorless camera with electronic viewfinder (EVF), close-up adapters can be easily used between adapter and lens mount to allow closer focusing as shown in a few examples below. The lens has a focus tab which locks into infinity position. The lock can be sometimes a bit of a hassle when trying to quickly achieve focusing between infinity (locked) and > 50 meters (unlocked).
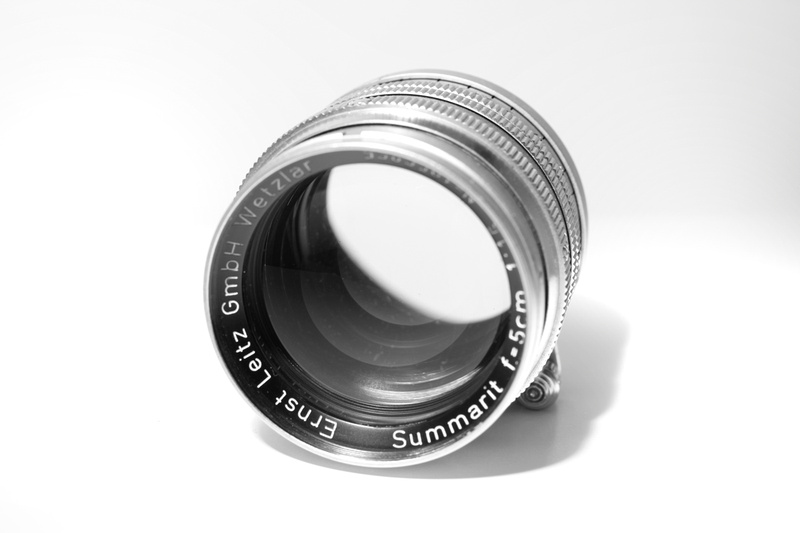
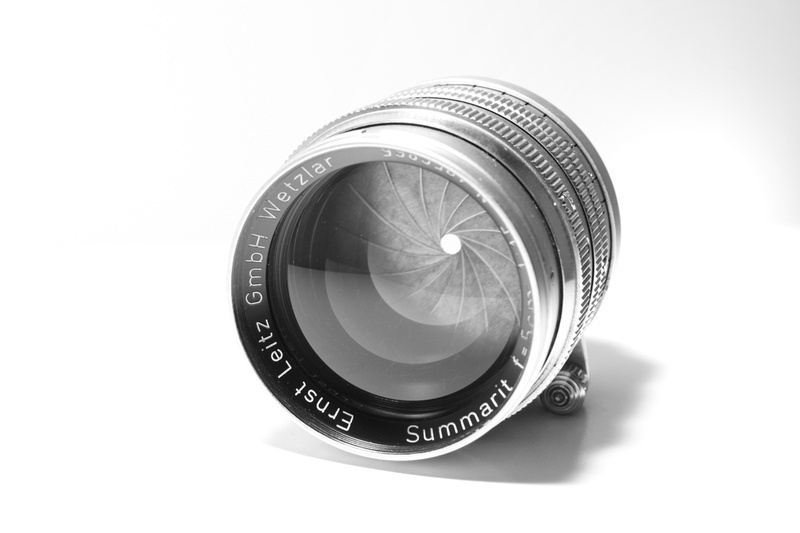
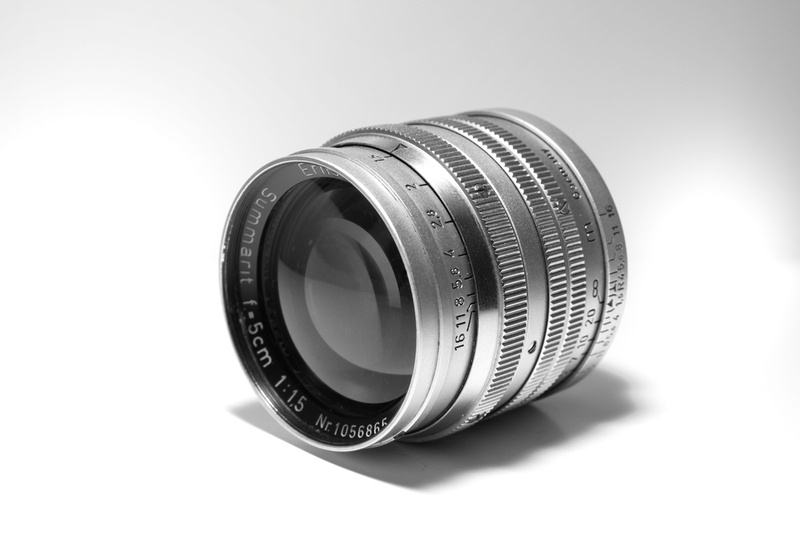
I found a very good nearly mint copy of the 50/1.5 Summarit lens in LTM mount on FB Marketplace sold by a fellow photographer. Since I own LTM and M-mount film cameras, I preferred the older LTM mount since I am now able to use this lens on my Leica IIIc and as well on my M-mount cameras with cheap LTM/M-adapter from China. The Summitar lens mounted on my M-cameras is well balanced but attached to my IIIc it leans forward. Focusing works well even on my IIIc - wider open the focus was still spot on!
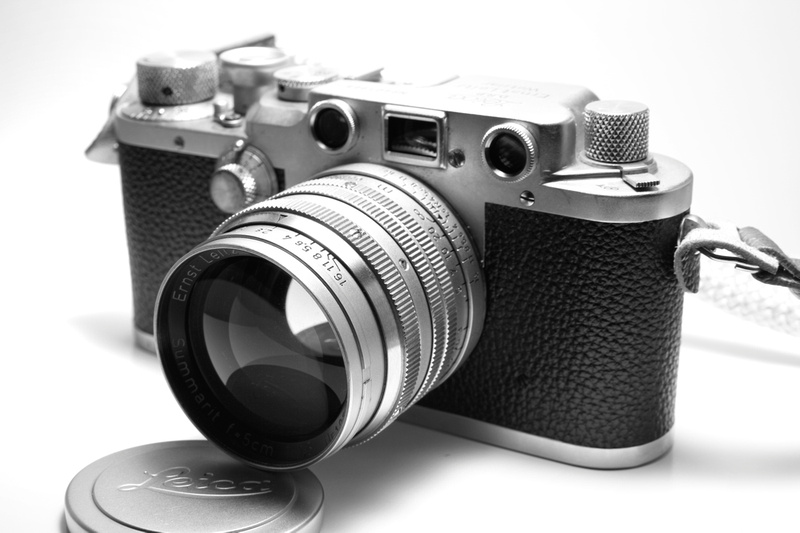
Photo above: Leica 50/1.5 Summarit LTM lens mounted on my Leica IIIc camera.
The lens exhibits a dreamy-like bokeh wide open at f/1.5 and f/2.0. You might need to use an additional ND filter to be able to shoot wide open at 1/1000 sec or less in bright weather conditions. In this fast aperture range the center focus is reasonably sharp but very low in contrast - less visible on film but certainly on a modern digital FF sensor (slightly increasing the contrast in post-processing is needed here). The bokeh balls are nothing like doughnut-like structures often seen with lenses made around the same time like the Leica 50/2.0 Summitar lens (will be reviewed in a future blog) but nicely circular without pattern. Sometimes they can be distorted creating very unique effects in the background - even with some triangular shapes. When closing down the lens aperture to f/4.0 and higher aperture number, the Summarit properties merge into those of a standard vintage Summicron 50 mm lens: sharp from corner-to-corner without distortions. The lens seems to be sharpest in the center at f/8.0 as expected with most vintage lenses. But even closed down, the image keeps a softer look with yellowish tint in coloration.
Even mentioned often as an issue in earlier lens reviews, I didn't see lens flaring as a biggie even when shooting against the diffused sun. I still would recommend using a 41 mm generic lens hood to avoid the clumsy and expensive Leica hood for this lens.
Pros:
+ Excellent portrait look to reveal soft skin without needed digital post-processing
+ Very good built quality: you don't find this quality with modern lenses!
+ Smooth 15 metal aperture blades which close in a full circular way
+ Unique and beautiful bokeh wide open at f/1.5 and f/2.0
+ Good for low light photography
+ Most affordable fast 50 mm Leica lens!
CONS:
- Low contrast wide open
- Minimum focus distance of 1 meter (adjustable with close-up adapters on digital cameras)
- UV filter needed for film photography since lens elements are UV-transparent
- Extraordinary expensive and super bulky Leica lens hoods for this Summarit lens. Better get a cheap generic 41 mm Summarit lens hood!
Examples with Leica 50/1.5 Summitar lens on film: (Hover over image to see the technical info)
 Ilford FP4+ 125 film developed in Xtol (1:1). Lens aperture f/2.0
 Ilford FP4+ 125 film developed in Xtol (1:1). Lens aperture f/1.5
 Ilford FP4+ 125 film developed in Xtol (1:1). Lens aperture f/2.8
 Ilford FP4+ 125 film developed in Xtol (1:1). Lens aperture f/1.5
 Ilford HP5+ 400 film developed in Xtol (1:1). Lens aperture f/2.8
Examples with Leica 50/1.5 Summarit lens adapted on Sony A7R with LTM/E-mount adapter: (Hover over image to see the technical info)
This is if you stick to the traditional brands. There is an alternative option especially when shooting with film. I already have an excellent Leica 35/2 M-mount lens, therefore I didn't want to spend several hundred bucks to get just another 35 mm LTM-mount based lens. The alternative are lenses made in Russia - they carry names as FED, Industar, and Jupiter. Some wider lenses used after WWII the exact same Zeiss Biogon lens glass and designs after Russia took over some of Zeiss manufacturing plants and lens construction blueprints in Eastern Germany. Later The Russian lenses were mass-produced with lens design variations from the original blueprints. Big advantage for amateurs is that those lenses are still very cheap compared to their western counterparts. But the low cost also comes for a price - Russian lenses tend to have more copy variation due to a much lower quality control in the plants. They suffer from some lens curvature making the image less sharp in the corners of the frame if not stopped down to f/11 or f/16. This field curvature with color cast issues in the corners of the frame is much less severe on film than on digital cameras. To use it on my Leica IIIc camera, I was more interested having a lens with character and a less perfect one.
I read some reviews and watched Youtube videos about the Russian Jupiter-12 lens - which is a 35/2.8 lens - which seems to be mostly fine especially on film where I wanted to use it mainly for. Prices for this lens have also risen in the past few years obviously driven by higher demand. I found prices mentioned in reviews dated several years back of $50 which I didn't see anywhere today. Even worse, known used photo gear resellers in the US have this lens listed by name but always shown as unavailable. I suspect there is not enough revenue for them to purchase and sell cheaper Russian lenses. When I screened the market, I did not find any Jupiter-12 lens offered in the US. On Ebay, prices were about $80-100 without shipping fee from Russia or Ukraine. Not so cheap either for a high uncertainty what I might be getting and without an easy way to return the item if needed. I waited a while, and then found an offer on Ebay for a Jupiter-12 lens in good condition with silver-looking metal housing for $60 (plus $25 shipping). The lens was made 1960 in the Lutkarinskij Optical Glass Plant and is likely one of the PT0825 series. I highly recommend reading the description of the lens on the Ebay posting in detail since the lens condition is key. The value of the lens is also connected to the manufacturing date, where it was made, and which version it is. I focused on a lens which is optically in very good condition without fungus, dust, or scratches and cared less about the lens version. As a bonus, this lens came with newer lens coating reducing flare. I figured this was worthwhile trying and ordered this lens. It took nearly 4 weeks to arrive here in the US - but it also came a long way from Siberia.
The lens arrived well packaged in bubble-wrap inside a small cardboard box. As shown in the item's description on Ebay, it came with the front cap but unfortunately had no end cap protecting the sensitive protruding lens element in the back (there was no end cap shown on the original Ebay post either, but I still hoped it would be included). The lens seemed disassembled at some point because the focusing ring was a bit loose. I could easily fix this by adjusting one of three little screws on the focus ring. The focus ring moves smoothly between 1 meter to infinity. Only in the small gap between M (macro) and 1 meter distance, the focus tends to be a bit jumpy and less smooth. The lens elements all look very clear without dust or scratches as promised. The aperture ring - which is accessible as rotating plastic element where normally the filter sits on other lenses - moves well, and the aperture blades change accordingly. The aperture ring serves a secondary purpose since it is built like a lens hood. The lens sits well protected deep inside this ring. The purple-blue lens coating reflects when directly looking onto the front lens making it hard to see the actual aperture blades. The large lens element on the back of the lens also looks like new and fully free of scratches. Only the lens barrel below the screw mount shows some wear of past usage which does not affect usability. The screw mount of the lens is fine and fitted perfectly on my Leica IIIc camera. The outer silver lens barrel looks nearly mint and must have been well cleaned before it was sent to me. The rangefinder focusing also works extremely well with this lens at all distances. Online I found on an older website the hint that a plastic film canister protects well the rear end of the lens in case the original cap is missing (The original caps alone go for >$15 on Ebay!). So overall not a bad deal for $60 - now I was curious how it would perform actually taking photos with it.
The Leica IIIc has only a viewfinder adjusted for 50 mm focal length. Any other focal length requires an external viewfinder sitting on the camera's hotshoe. For 35 mm focal length, I am using my Braun Paxette external viewfinder for 38 mm. Advantage is that this viewfinder is small and fits with its aluminum barrel perfectly on the brass metal of the camera. I simply estimate for the missing 3 mm in focal length which is fine.
I took a couple of shots with the Jupiter-12 on Ilford PanF+ 50 film on a sunny morning. I explored apertures wide open to stopped down to f/11. At f/2.8, the center of the image is still sharp but the rest is all blurry providing some nice effect. Con here is that the lens flare instantly can become an issue - I hoped the outer lens would be protected sufficiently by being quite deeply inserted inside the lens barrel but unfortunately this is not the case. Even with a "R" coating I got flaring and overexposure in the upper left corner of the frame since the sun was on the right when taking the photo.
Jupiter-12 at f/2.8
At f/4 the lens is still only sharp in the inner image circle, the corners look like creamed with vaseline. This might give some interesting vintage-looking effects, but when I took the photo this was undesired. Even f/5.6 still doesn't make the details in the corners of the frame sharp - it's getting better at f/8 but still not sufficient. To get a decent corner-to-corner sharpness, this lens has to be used at f/11 - which makes it a very slow lens especially when using low ISO film speeds.
Jupiter-12 at f/4.0
Jupiter-12 at f/5.6
Jupiter-12 at f/5.6
Jupiter-12 at f/8.0
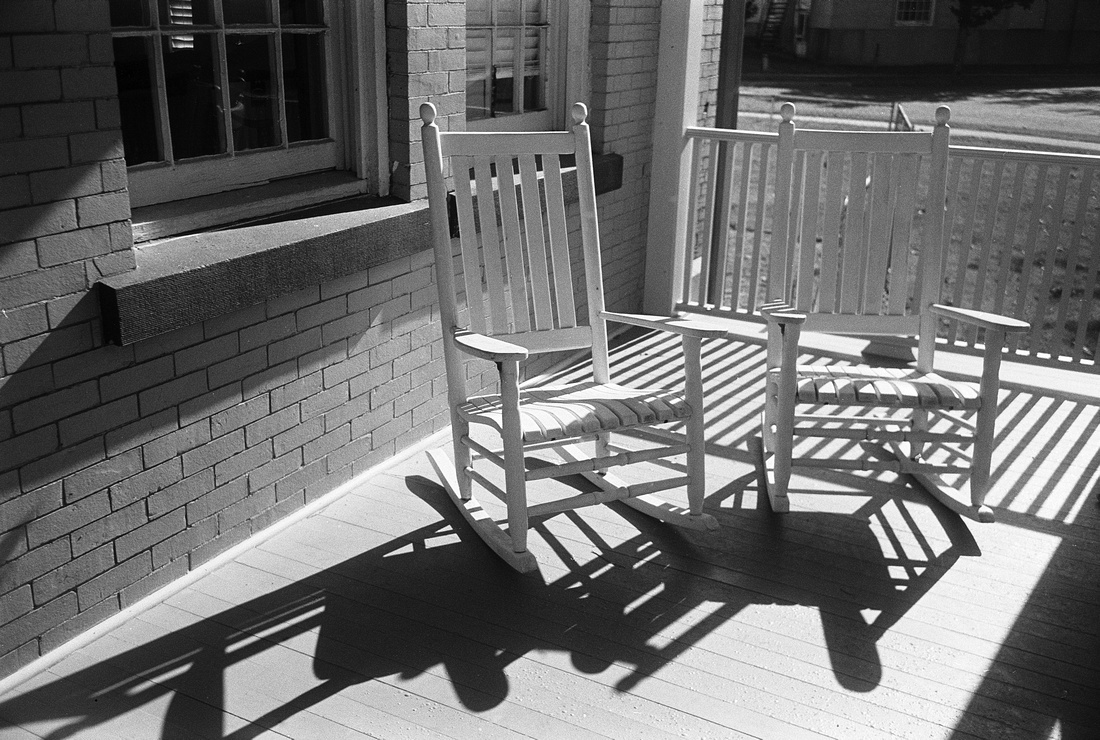
Jupiter-12 at f/5.6
I expected a bit more of this lens and felt sort of disappointed when I scanned the developed film negatives. It might still be okay for some vintage-looking full body portrait shots where the corners have some artistic blur - no other lens can do this easily like this one does. For now I am keeping it but decided to buy online a better Canon Serenar 35/2.8 LTM lens for triple the money paid for the Jupiter-12 lens (performance of this lens will be part of a future blog).
I was also fortunate to acquire locally a Industar (FED) N-61 lens which also comes with M39 mount, PT4735. It was formerly used on a Russian FED3 rangefinder camera where this 52/2.8 lens came as standard lens. The lens is available in different variations with slight variations in focal length (50 to 53 mm) - mine is the quite common nicknamed "Zebra" version made between 1965 and 1972. The serial number on my lens indicates it was made in 1965. It uses a Zeiss Tessar lens design and is coated. This lens goes around $20 online and is a great deal for the image quality it delivers. It is not a very fast lens with f/2.8 but its aluminum lens barrel and small lens elements make it very light and compact. My lens copy had no scratches and no visible delamination issues. It has 10 aperture blades which close in a circular pattern (I read that the newest version of this lens uses a star pattern instead when it closes - it provides a very artistic but also unnatural looking bokeh IMO). Unfortunately the filter size diameter of 40.5 mm hinders to use my standard 39 mm filters on this lens. But my original Leica lens hood 12585H which came with the Summitar 50/2 lens fits perfectly also on this lens (it clips on from the outside).
In opposite to the sort of mushy Jupiter-12 lens, this Industar N-61 lens was a big positive surprise to me. The scanned negatives taken with this lens blew me away regarding sharpness - it certainly is sharper in the corners than my Leica 50/2 Summitar lens. Little details in the corners of the frame can be easily seen even at wider open apertures with this N-61 lens. This lens competes in the league of best slower 50 mm lenses which I own - and this only for $20! It also works flawlessly adapted on my Sony A7R for digital photos.
Industar N-61 at f/4.0
Industar N-61 at f/8.0
Industar N-61 at f/2.8
Industar N-61 at f/8.0
Industar N-61 at f/5.6 or f/8.0
 Industar N-61 at f/5.6
Already owning Leica M film cameras, it might come to a surprise why I would bother with an earlier Leica camera made in the late 1940s after WWII. By chance I saw that an auction house two hours away from my home listed this Leica IIIc camera with original Leica 50/2 Summitar lens and two additional chrome M-mount lenses as part of an upcoming auction in which I was interested in also for other items (microscopy-related gear and books). The camera's serial# revealed that it was not a collector item but a standard series instead. So I decided to take a day off from work and head down to PA early in the morning to have a closer look at the items I was already interested in by seeing the posted photos online. The camera obviously hasn't been used for a long time - the lens was quite dusty on the front lens but otherwise scratch-free, and the aperture ring was a bit sticky but worked fine. The camera body had a little crack in the skin, both the rangefinder and the viewfinder windows were very hazy inside and nearly unusable. But the shutter seemed fine and also most shutter times still worked well judging by the difference in time for the shutter to close. Only a few slower shutter times didn't work. I quickly realized that the camera had no major drawback, and mostly might just needed CLA (cleaning-lubrication-adjustment). Interestingly, there was an original Leica manual underneath the camera in the box - but for a Leica M3 camera which I already own. The M3 camera itself was not part of the auction - I never found out what happened with it but suspect that someone kept it before it could become part of this auction. The additional two Leica lenses in chrome versions - a collapsible Leica 90/4.0 Elmar and a Leica 135/4.5 Hektor lens came both in M-mount and were obviously part of the M3 camera set but added in error to the Leica IIIc screw-mount camera. Both M-mount lenses were in very good shape and made in the late 50s, just a bit dusty on the outside. At this point I set in my mind the highest possible bid for the package and hoped nobody else would be as interested in it as I was at this point. More people entered the auction hall afterwards, and a bunch of them looked at the camera but either had no idea how to operate it or were scared by the dusty/old appearance.
After a few hours in the auction - which was also streamed for online bidding - finally this Leica camera gear had its turn. It started with $10 and went quickly up to $100 - then it was just me competing with another bidder in the room and someone online. The price continued to increase, at $150 the other bidder inside the room left, and it was just me and the online bidder. My comfortable limit in my mind was set to $300, so I came closer and closer to this when the price went above $200. Lucky me the online bidder stopped adding bids after the $250 mark was reached - I was the only one remaining and got all for this price (plus auction fee and tax of course). It was a very good deal, and I saved enough money here to send the IIIc with Summitar lens in for CLA for another $200. When I received the camera with lens back from service, it looked amazing - new skin, clear rangefinder and viewfinder windows, shutter times fully operational, all mechanical parts moving smoothly. The lens was cleaned inside out and then reassembled - it looks like new. The other two chrome M-mount lenses I received work flawlessly after a bit of cleaning by myself on my M-mount cameras - especially on my Leica M3 with its 0.91x viewfinder. I found that currently each lens is sold online between $300-$400. But for now they are keepers for me, too.
The look of the Leica IIIc with Summitar 50/2 lens after the auction. Some cracked skin on the lower left, a bit dusty, and hazy windows, and not fully working slow shutter speed dial were the only obvious camera issues. The lens was scratch-free for its old age!

The shutter curtain of my Leica M3 (in the back of the photo) broke just at the time when I got the IIIc - both made a trip for service and repair. That's how the cameras - Leica IIIc and M3 - looked after I got them back. Also the Summitar lens was cleaned and lubricated. All looks like new! The size comparison is misleading in the photo: the IIIc is much smaller in size than the M3 in the back!
LEICA IIIc REVIEW
The IIIc camera is clearly its own class of so-called Leica Barnack cameras. They are fully mechanic cameras without need of battery and have no light meter. Lots of levers and buttons to operate the camera correctly - not the right tool to make fast adjustments during some shooting. But the built-style and vintage look - simply superb. The III-series is much smaller in size than the later produced first Leica M-cameras (M3 and M2 for example) and built as a rigid steel/brass body. The original L39/LTM series lenses were collapsible which additionally kept the rangefinder lens size very small to carry. I wonder which kind of modern camera would last over 70 years and could still work with some lubrication and cleaning like on its first day. Even taking electronic materials out of the equation, a camera isn't built like this since many decades.
Leica made sure that all cameras which followed the original III-versions could still use the original screw-mount lenses with thin adapter on the newer bayonet M-mount. On the other hand, it causes a major hurdle when trying to go the other way like I did now - I started with M-mount cameras and lenses and now suddenly owned a screw-mount camera. I figured quickly that M-mount lenses unfortunately do not fit on the older LTM/L39 cameras: the flange distance of screw-mount LTM cameras is longer than the ones of newer M-mount cameras (which seems a contradiction on the first look since the IIIc camera is smaller in size compared to the M3 for example). This means that the adapter to mount a LTM lens onto a M-mount camera compensates for the shorter flange distance of the M-camera and pushes the LTM lens a bit further out. But you can't use a M-lens made for a shorter flange distance on a camera which requires a longer one! So all my nice an d excellent M-mount lenses don't work on the IIIc. Even this is a bummer, it has one benefit: The IIIc forces me to use LTM lenses which might not be as optimized for later quality requirements - a real vintage- and character-style shooting experience!
I downloaded a user manual for the IIIc and watched some You Tube videos online to know how to operate the camera correctly. It was a short learning curve for me since I am already used to film gear and newer Leica cameras. One thing which was new to me was the bit cumbersome film loading with the IIIc: First, the film strip needs to be cut in a unique way to enable the camera to reel it. I found best is to make a cardboard screen which can be held onto the film strip to cut 10 cm in length off the top. Very important is to have exactly two sprocket holes open before the strip ends at the film cartridge outlet. I found this not well documented in the Leica manual I downloaded but much better described in some "How to Insert Film Into the Leica IIIc" videos. Next the film spool has to be taken out of the inside of the camera - it is a good idea to check that it is included when buying a used Barnack camera! The end of the film strip is squeezed into the spool - make sure the spool is in the correct way which means that it will appear awkward since Leica decided to have the film sitting in the camera with more tension to flatten it against the original turn how the film is rolled inside the film cartridge. The most tricky step comes next to insert cartridge and spool correctly placed in the camera - later M-camera models have a self-adjusting mechanism which moves the advanced film in the right position. The IIIc does not have this - to check that the film is placed correctly, fire one or two exposures, remove the lens on the camera and then use the "B" shutter position to see inside while pressing on the shutter release. The shutter curtain will remain open and makes the film plane visible while the shutter release is pressed. If you see any kind of sprocket holes on top or bottom, you need to reverse the film, put it back in the camera and check again until all sprocket holes of the film are covered. This is very cumbersome and makes changing a film in the field nearly impossible to do quickly. It is IMO the biggest drawback of the camera. But like with anything, the more often you practice the easier it will get.
If you are used to a modern digital, SLR, or modern rangefinder camera, you will be confused to see two little windows next to each other on the upper left on the back of the IIIc camera. When this camera was made, Leica still had the rangefinder focusing path and the viewfinder separate from each other - therefore two windows for each. With the left window you focus on a magnified central area in your view by bringing two frames on top of each other like any other rangefinder focus works. I found it remarkable that this older rangefinder style uses a bit of yellowish circular spot in the middle of the focus area in the rangefinder path which actually helps to bring lines together to achieve focus. I am not sure if this is standard in all this kind of cameras, or if this is a bit of a fluke just in my copy - in any way it is not obstructing and actually helps. The right window is the viewfinder adjusted for 50 mm focal length. After shooting a few films with the camera and the attached 50/2 Summitar lens, I can tell that the viewfinder window is just a rough estimate of the view you will be getting in the final image. The viewfinder gives you a bit wider field of view that what you actually get with a 50 mm lens. I believe that this is the reason why some use an external 50 mm viewfinder on the camera's hotshoe to allow better framing. But since this is a vintage camera fun for me to shoot with, I simply deduct a bit on each side of the viewfinder's frame to be fairly accurate on the taken image.
There are no other "frame lines" with this kind of camera - for any other focal length than 50 mm, you rely on an external viewfinder. When you consider getting one, best is to ask yourself first which kind of focal length you will be shooting with this camera. You can potentially get a Leitz VIOOH finder which has multiple viewfinders for 35-135 mm range in a revolver-like device setup. It is very bulky and likely attracts attention - I rather prefer a smaller more inconspicuous one. Since I am shooting more wide than tele, I continue using my Cosina-Voigtlander 21/25 external viewfinder also on my IIIc. When I get my 35 mm screw-mount lens, I will be using my cheap little Braun Paxette 38 mm external viewfinder which is sufficient (35 mm LTM lens review will be part of a future blog).
Talking of wider than 50 mm screw-mount LTM lenses - I was shocked to see online prices of old Leitz lenses. I suspect collector demand drove prices up especially for 35 mm Leitz LTM lenses. But also older Nikkor and Canon LTM lenses go for (too) much IMO. After a while of digging and searching, I found a more reasonable option as used copy online for a Voigtlander 25/4.0 Snapshot-Skopar LTM lens which I intend to use with adapters also on my M-cameras and my digital Sony A7R. I didn't know when I bought it, but the 25/4.0 has no rangefinder coupling. The lens is purposely built not to use the rangefinder focusing but simply to estimate the distance. Hyperfocal distance setting is very good with this lens which leads to excellent sharpness at f/8 for nearly all shots I took with this lens. It is the smallest wide angle lens I own - it fits in any pocket! If you shoot wider, I highly recommend this lens (and external CV 21/25 viewfinder) for the IIIc-type camera.
Leica IIIc with attached Cosina-Voigtlander 25/4.0 Snapshot-Skopar LTM lens and Cosina-Voigtlander 21/25 external viewfinder. The lens is super small and light for a 25 mm wide angle lens with f/4.0. You can tell from the distance scale that the focus ring doesn't need to be moved much between 0.7 meters and infinity.
The collapsible Leica 50/2 Summitar lens was produced in the 30s/40s in many different versions and iterations, and only collectors and experts for this kind of lens gear know all the differences between them. I know that mine was manufactured in Wetzlar/Germany in 1942 judging by its serial# - during WWII! It might have an interesting history to tell how it made it to the US and how many owners the camera and/or lens had before I got my hands on it. At the time not many were able to afford such camera gear in Germany. Judging by the condition of camera and lens, they were likely not traded and used too often. To see the Summitar lens unscratched with > 70 years after its manufacturing date is very unique. After having it serviced, I was told that there is some minor lens delamination starting on the side of one of the lens elements, but it does not affect image quality. Delamination is quite normal for a lens of this age. At the time when this lens was produced, Leitz also did not yet apply coatings on this lens.
The lens blocks a little bit one of the viewfinder corners which I didn't find an issue but worthwhile mentioning since this lens does not block the viewfinder attached to M-mount camera bodies. The lens delivers very sharp images in the center but even at around f/8 the corners tend to be slightly unsharp which is the character of the Summitar lens. My lens has some unusual f-stop numbers engraved, so f/5.6 or f/8 have to be sort of guessed. There are no click-stops on the f-stop dial, the 10-bladed diaphragm is opening and closing smoothly depending on the reel position. Supposedly this lens provides beautiful sunstars, but I haven't explored this option yet.
In the field, I found the IIIc is easier to operate than expected. Winding to the next frame takes a bit longer with the turning knob compared to M-cameras with single or double-stroke lever. But you likely won't use this kind of camera for action shots in the first place - the IIIc slows you down just enough to think about a good composition but is still fast enough to be used well for street photography. The camera feels extremely pleasant in my hand to hold it. I bought a cotton leather neck strap for the camera, and it didn't bother me at all carrying the IIIc for hours. The rangefinder focusing worked extremely well in sunlit and cloudy conditions as well. To my surprise, the shiny protruded lens element of the Summitar lens did fortunately not gain attraction either. It is still all very small and compact. The design of this camera is nothing but beautiful and everything seems just right in the positioning of buttons and levers. After reading online reviews and watching videos about the III-series, I was ready in my mind for some slow-downs and drawbacks to actually use this camera but the opposite happened: it quickly became a favorite tool to shoot 35 mm film.
The only hassle brings me back to the film loading with the IIIc. When using M-cameras and the IIIc in parallel, you have to use best judgment upfront which kind of films you might use during a field trip with the IIIc. Cutting the film lever into the desired length and form seems quite an inconvenience when being outdoors, so it better has to be done earlier at home. You could still use the film with prepared long film lever when changing plans and intending to use this film for example with a M-mount camera instead - a simple cut with a scissor will do but some exposures will then be lost compared to a regular 35 mm film.
One more advice in regard to the tripod mount: similar to older M-mount cameras, the IIIc uses a 3/8" screw-mount tripod mount. Most tripod plates these days use a 1/4" screw - you need an adapter to fit it into the mount on the camera's base plate. But careful - regular 3/8" to 1/4" adapter screws protrude quite a bit on the IIIc base plate (they work perfectly fine for the M3 for example!). You have to file off a bit from a regular screw adapter to make it fit, or you order a so-called screw adapter for Rolleiflex and Rolleicord cameras which seem to have the same length.
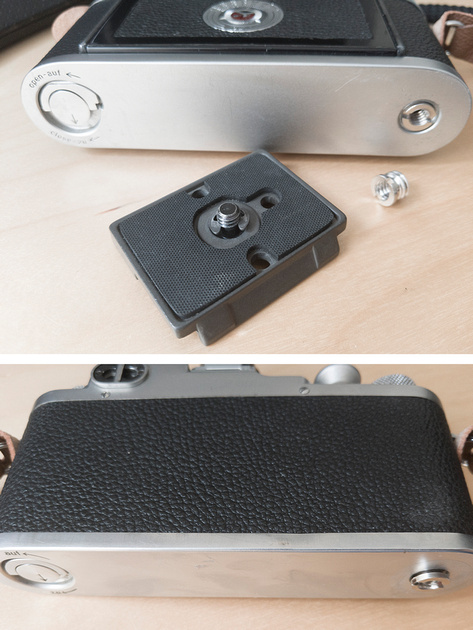
Surprise, surprise....the generic 3/8" to 1/4" screw-mount for 1/4" based tripod plates fits well on the Leica M3 base plate (top) but protrudes quite a few mm on the Leica IIIc with thinner base plate (bottom).
Getting the fitting Rolleiflex/Rolleicord screw adapter for 1/4" tripod plate mounts works!
USEFUL ACCESSORIES FOR THE LEICA IIIc
There are a few quite affordable accessories which come in handy with this camera body. I tend to stay here with third-party suppliers since they are much cheaper than the original Leitz/Leica items (and do the same in the end):
(a) LTM/M adapter (approx. $10): very useful to mount LTM lenses also on other M-mount cameras. I can even mount the LTM/M adapter directly onto my M/E-mount adapter to use screw-mount rangefinder lenses on my Sony A7R camera.
(b) Cable release. To use this, I have to unscrew the shutter release button to gain access to a screw thread surrounding the release pitch. The cable release can be fitted onto this screw mount. Less well known but works well also as cheapest option is getting a Nikon AR-2 style cable release. They go online for approx. $20 or sometimes even less.
(c) Mentioned earlier in my review is the wide open field of non Leica-based screw mount rangefinder lenses for decent prices (approx. $50-150 for non collector items also dependent on the lens focal length). Russian FED, Industar, or Jupiter lenses can be used with Leica screw-mount cameras. Between Russian and Leica screw-mount lenses is a minor difference in the layout of the helicoid thread pitch, but I doubt that it makes a visible impact on film. These lenses still deliver a quite high image quality on digital mirrorless cameras and certainly do on film. Don't expect perfectionism compared to modern lenses (you wouldn't use the IIIc in the first place if this was the case), but they have character in their little faults. There is a huge range of very affordable Russian 50 mm lenses (Jupiter-8 for example). A bit more expensive but also with character are for example screw-mount lenses from Canon and Nikon (> $250).
Some recently taken photos with the Leica Summitar 50/2 LTM lens and the Leica IIIc:
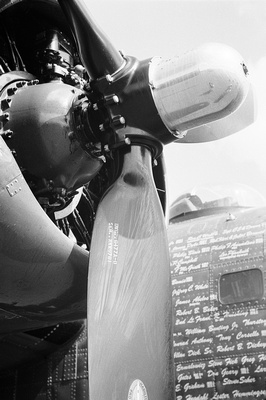

Some photos taken with the Cosina-Voigtlander 25/4.0 LTM lens and the Leica IIIc:
There are a few blogs online which have brief descriptions how to do this, but from my experience they all lack some crucial details. First, it is never mentioned which Hasselblad film cartridge should be used. In my opinion this is an important point to think about. Hasselblad made basically two kind of 6x6 film cartridges - A12 and A24 types. The A12 type is used with 120 film which is still available today whereas the A24 film cartridge was designed for 220 films which allowed twice as many frames (24 to be exact) on one roll of film than the 120 film (which gives you 12 frames). There is an important difference between both types of film cartridges - and this is the focus plane of the film itself. Hasselblad designed the film cartridges to allow the most accurate focus of the lens onto the film plane. 120 film is a tiny bit thicker than 220 films were - 120 film uses paper backing whereas 220 films miss this paper. This means the focus plane of the film inside the A24 film cassette had to be adjusted a tiny bit closer to the lens since 220 film lacks the paper backing and is therefore thinner. The opposite is the case with A12 cartridges for 120 films. Now let's look at 35 mm films - they are "naked" without any paper backing on top. To allow best sharpness when modifying a Hasselblad cartridge for 35 mm film, I recommend using one of the older A24 film cartridges since the focus point will match closest the one from 220 film. It might still be okay to use A12 cartridges also, but I didn't try and have no idea what kind of cartridges - A12 or A24 - were used by other bloggers. To be on the safe side regarding correct focus, A24 is better, and if you have one sitting around unused since there is no 220 film sold anymore, you might find good use for it this way. When you get an older A12 or A24 cartridge make sure that the light seals are still (a) in place and (b) functioning. I bought my A24 cassette online for less than $40 (they are much cheaper than the A12 ones), but the former owner must have removed the light seals behind the cover. If there is a leak, light enters the film from the side where the dark slide is taken out. I only found out after I shot a film with it, and all frames were overexposed on the left of the frame caused by the light leak. Time to order (or make yourself) light seals and replace the decayed old ones (if even still inside).
35 mm film rolls have actually the same diameter as 120/220 film rolls. This makes it possible to insert a 35 mm roll into the space normally reserved for a medium-format spool within one of the Hasselblad A12/A24 cartridges. You can purchase 35 mm roll adapters for Hasselblad cartridges online which are 3D printed. But you can save quite a few bucks if you cut them yourself. For this you need an empty 120 or 220 plastic spool and a sharp knife which can also act like a saw (I used my Leatherman knife for this task successfully). One thing is very important here: one needs to be a bit taller than the other one, otherwise the 35 mm film won't be centered within the film cartridge! The difference is only a few mm - so don't cut one half too far first, test by setting both of them with a 35 mm film roll into the cartridge and grind away more if needed. The final stems don't have to look pretty, and the 35 mm film roll will often be a bit wobbly, but this is not a deal breaker for the application.
Cut-out medium-format spool stems. The 35 mm film roll comes in between them. Make sure one is a bit taller than the other one to have the film centered in the A24 cartridge.
Fit the taller one at the bottom of the 35 mm film roll, and the smaller one on top - this will make the film centered on top of the black screen on the back of the film holder unit. Place the film roll that the emulsive side of the film (in this photo the red colored slide of the Fuji Provia 100F slide film within a self-rolled Kalt film cassette) points to the outside. Reel the film onto an empty 120/220 spool on the opposite side similar how it is done with medium-format film. Turn the take-up spool a few times to ensure the film is not coming loose from this spool.
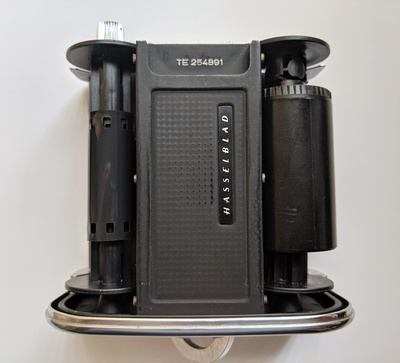
Inserted self-rolled 35 mm film cartridge inside an A24 Hasselblad medium-format film cartridge. Make sure the emulslve side of the film points outside that it can be exposed later.
If everything was done right, the film should look like this below (left photo) and within the inserted film holder unit inside the A24 cartridge after the dark slide is removed (right photo). Make sure the film strip is fairly centered in the 6x6 frame showing the light sensitive surface of the film. Important: when the closed cartridge is now added to the Hasselblad camera, it will expose the frame in the vertical direction! This is great for portraits but less desired for landscapes. To get a horizontal panorama, the camera (plus cartridge) must be rotated 90 degrees. I find a 45 degree prism finder very useful here since it still allows me to focus and compose the image in this camera position.
Reel the film towards the "1" position on the cartridge and then take the first frame twice to make sure the first frame is not overlapping with some already exposed film part when it was inserted.
An additional advantage of the A24 cartridge is that you will never run out of 60x24 mm frames of the inserted roll of film. You should get about 18-20 frames from a 36 frame roll of small film. When using an A12 cartridge, you need to disengage the whole cartridge when the seemingly last shot was taken to allow the camera to reset the counter and winding on. Again, much easier and safer with the A24 here!
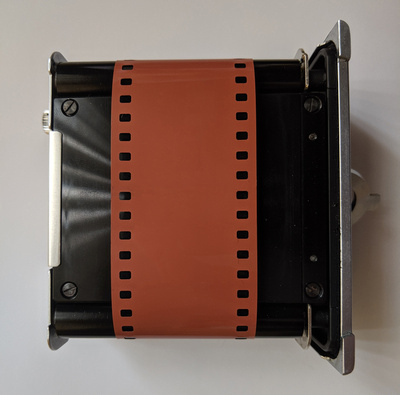
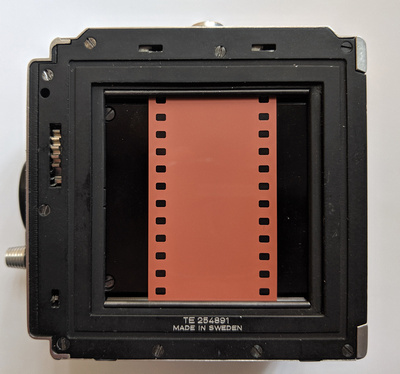
Inserted 35 mm film with the red colored emulsive side on top (left). The film holder is then inserted into the A24 cartridge (right). The film then lays straight on the plate below.
When the film is actually finished, you can't wind-off the film like you would do with a 120 or 220 medium format film. The 35 mm has no more capacity to wind anywhere further, and you also can't rewind it into the original 35 mm cassette. You have to open the cartridge in the pitch dark or inside a bag and directly reel the film from the take-up spool onto a development reel fitting to the used film development tank. Some examples taken with Fuji Provia 100F film below (developed myself with E-6 process chemicals). Sometimes the exposed sprockets add an additional guide to the scene especially when horizontal or vertical lines are present. In any way, the sprockets with numbered frame and film information makes the photo unique and automatically watermarked!
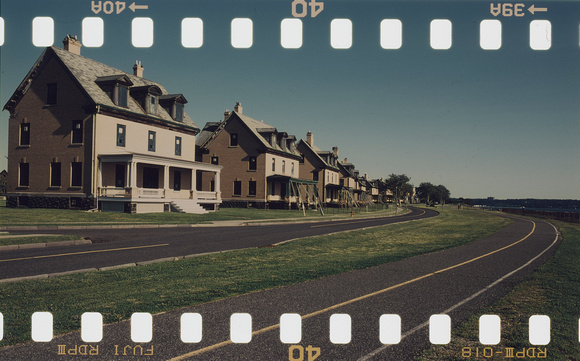

]]>
With regular color negative film, there is the rule of thumb that for every 10 years of storage, the film loses 1 stop of sensitivity when stored well. This rule does not easily apply to color slide (positive) film since overexposure can easily be tolerated by negative film but not by slide film! I decided to be cautious on my first trial run with the Ektrachrome 400 slide film even it was already 12 years old. I didn't want to risk overexposing the film by applying one stop exposure upfront without having tested it first (meaning to use it as an ISO 200 film). I set my Gossen light meter to ISO 400 sensitivity and went from there. As location for testing, I selected Fort Hancock at Sandy Hook/NJ since I am very familiar with this place. It provides good examples for yellowish, greenish, and brown decaying structures in high contrast scenes depending on the light. I chose a sunny day with a bit of overcast in the sky since I wanted to see how the colors would be registered by this film.
As first frame with this film, I selected the famous lighthouse tower which was recently repainted in a glowing white. Since so much light is reflected from the white paint, I added an additional stop of exposure to the metered value to avoid underexposure in the darker areas. I was afraid that I would still blow out the sky by doing so but simply gave it a try. I used a circular 2-stop ND glass filter to accommodate the limit of 1/500s of the camera and avoiding to close down the lens aperture to the limit. To my surprise, the frame turned out nearly perfect - I could see details in the shadows as well as structure in the white of the tower. This first frame already revealed one main distinguished property of this film - there was no washout of the sky, instead it turned out fully blue like if I had used a polarizer. Some cyan color sneaked into the white of the lighthouse, so I de-saturated a bit the cyan color channel of the scanned positive to make the white look more natural. Shadows still tend to have some blueish cast which reminds me on Kodak Ektar 100 color negative film which does the same. On the other hand, the red turned out darker than expected. The top of the lighthouse tower has a red metal casing which looks black in the positive; also the red in the flag didn't look natural. I increased the saturation of the red channel to compensate - indeed all frames needed to be pushed a bit in saturation for the red color channel. The film reveals some grain if focused closer, but it remains invisible for websize postings. But seeing it already quite well in an enlarged 120 film size, I wonder how worse it would get in the small film format - I suspect it would be too grainy for my taste there.
For the second frame, I chose a motive which contained high contrast elements as dark ones behind the staircase, brighter sky on top, and a yellowish tinted wall of the building with wooden stairs in shadow and in the sun on both sides. I know that the dynamic range of slide film is much more limited to negative film, but I wasn't sure how the Ektachrome 400 film would handle it. Similar to the first frame of the lighthouse, I had to decrease saturation of cyan to make the stairs look more grey and increase a bit the saturation of the yellow channel. I left the blue channel unchanged since the sky again turned out perfectly. I personally like the blueish cast within the window glasses, and the bit of blue in the shadow on the left. There is no detail in the dark areas behind - I got the first clue here that maybe a slight overexposure of the film could have been useful. Later frames proved this suspicion.
The third frame was predominantly a test how fairly bright (and fairly colorless) sky would turn out. Again I exposed the scene for ISO 400 but had to push the midtones a bit before the final scan after previewing the scanned image. Yellow/orange colors had to be saturated a bit more avoiding that some reddish color cast gets into the brighter elements of the otherwise - again - perfectly lit and colored sky. I could/should have used a graduated ND filter for this scene, but the plastic graduated ND filters which I use often create a magenta color cast which is no issue to remove in a digital photo but certainly is an issue for a film based photo! Since I wanted to see in this trial how the colors turn out on the film itself, I didn't even try to use the filters. As bonus some geese just flew into my photo when i pressed the shutter release button - since I didn't use a filter and therefore used quite a fast exposure time of 1/250s, they showed up very sharp close to the left border.
Time to test the film sensitivity of other colors! Some of the decaying structures use green paint - I decided to take a frame with the 80/2.8 lens closer focused in to blur out the background with f/8 and my circular 2-stop glass ND filter. The film revealed a less good sensitivity for greens - they show up in a more blueish look fitting to the dominant color sensitivity of this Ektachrome film. Even seeing the trade-off in the greens, I like that the bright sky in the background still shows some blue in it. Other than increasing again the saturation for yellow as in the frames above and increasing the midtone exposure, I had no other post processing to do here.
The last frame shown here as example is from a wall drawing which I detected on my drive to Sandy Hook. The blue/yellow/orange colors lit by the sun from the back were the perfect test subject for the Ektachrome 400. Consequently, again the blue dominated the frame followed by the yellow as second. The shadow caused by the overhang has a blueish cast, too.
Overall, a very unique film which doesn't compare easily to any other Fuji slide films I have used earlier! I can't fully exclude that some of the color gamut deviations are partially caused by my own E-6 development, but so far I developed a bunch of other Fuji slide films very well which had a different look than the Ektachrome film. A quick summary of my pros and cons of this film:
PROS:
- Rich in blues, brings out sky rich in color without using additional filters
- Very rich and contrasty look
- High resolution for this mid ISO range film
- Best use for landscape/scenery photography, also architecture
CONS:
- Less sensitive for green, yellow/orange needs to be pushed a bit
- White has a cyan tint in it (can be removed easily in PP)
- Visible grain when zoomed in (not an issue for the 120 film format though but likely for 35 mm film)
- Wouldn't use it as my first choice for portraits
This situation remained about the same even up to 2001, when I last time visited Yosemite National Park with friends of mine (see photos below taken with my SLR at the time in 04/2001). There were more amateur photographers with SLRs and film P&S cameras around, but well dispersed throughout the park. You could enjoy the silence when hiking and taking your time to snap photos. The change started slowly around 2002, when the first digital cameras became available for the amateur - I also got my first digital P&S, the Sony DSC-P5 with at the time unbeatable 3 MP in this category! When going outside on hikes and to take photos, I suddenly saw a few more other amateurs shooting with digital cameras, but it was still sporadic.
I came to the US permanently in 2005, and this was also the year when I upgraded to my first DSLR, the Canon Rebel XT with decent 8 MP APS-C sensor. Before I had stopped taking regular photos with my analog SLR since film development cost and uncertainty in the lab development took the fun away for me. My Sony DSC-P5 did not allow me to use manual modes, it was all P&S only. It worked well, but I was quickly bored by just pressing the shutter release button with this camera or making a quick low res video sequence with it. The Rebel XT brought back the fun for me even I had compared to my current situation a minimal technical photography knowledge since I was never taught in it nor did I read books about it - I just learned from my Dad and shot film with try&error. I remember that I thought in 2005 that I only need one lens for all (why the heck bothering with primes?!) and bought this camera with a Sigma 28-300 super zoom lens. Quickly I had to realize that this lens was not as I expected it to perform especially at the wide and long ends (in fact it turned out to be the worst lens image-quality wise which I ever bought!). I used this lens still for a year - but decided then to make more use of the modernized internet at the time with photo forums and the first photo reviews streaming in. I self-taught myself about lens characteristics, lens speeds, optical properties, etc etc. I bought my first higher quality Canon EF lenses and suddenly even had a lot more fun! GAS (Gear Aquisition Syndrome) was kicking in, and soon I had a nice collection of EF lenses at hand. I really enjoyed digital at this point and remember that I never wanted to go back to film. Year by year starting around 2005, I saw more and more people with digital cameras in the field. I lived in PA at the time, and tried to connect to other amateur photographers in the area. But there was not even one meetup photography group in the whole Philly area nor a photo club to share ideas and do photo shooting in a group. For years I photographed by myself all the time until I joined flickr and found a few photographers in my area to meet up with. Flickr also became the first website to share my photos with others. 2009 was another milestone for me when I was able to afford a full frame (35 mm based) DSLR, the Canon 5D MkII. This camera brought me again to a higher level in my skills using this camera with better viewfinder and finally avoiding the often disliked crop factor since I preferred mostly shooting wide. At the time I was shooting often at Valley Forge National Historic Park, and I could tell from year by year I was shooting there that more amateur photographers started taking photos around me, but it still wasn't too bad regarding crowds. In 2010 I got the opportunity to do my first photo exhibit inside the YMCA in Berwyn/PA - not really knowing how to do this professionally well, I used cheaper glass clip-frames instead of wooden frames. The exhibit was still well received, but this was the time I learned that the location and audience is important when anticipating sales. Most people simply wanted to go to the gym and exercise or bring their kids to classes and were not at all into photography or even considering buying photos (later I learned that the same applies for exhibits in libraries where people might look at the photos but most have no intention at all to make a purchase at this location).
2010 brought big professional changes for me when I changed my workplace and moved from PA to NJ. I would have never thought at the time that this would change my photography severely! In PA I loved going to parks to take scenery, flower, and especially all kind of insect macro shots - I could do this there for hours undisturbed. But NJ was a totally different game - parks there are always crowded in spring to fall, I found it very hard to do macro shots undisturbed by people walking by. But my move had its benefits - people became interested exponentially in digital photography since gear was now a lot more affordable than just 5 years earlier. Photo meetup and photo clubs formed all over the place, and getting to know others with similar interests was easy. I started getting out more, shooting sunrises and all kind of locations in a group of 10-15 people. Everybody knew each other, it was a mixed age range from the 30s to 70s.
But nothing remains the same, change is imminent! What was formerly a nice group of single-minded people became an overcrowded and less personal group only 2 years after I joined. I remember a sunrise shoot where more than 40 people came, and it was tough to have somebody not walking into my frame (or not standing myself in the frame of somebody else). Also the age distribution in the group changed - the younger people disappeared, and suddenly the median was easily over 55 at the time. Nothing against retirees (hey, we all don't get younger), but this is the group from which camera manufacturers must have made a lot of money selling gear! It is caused by a great combination of available time and opportunity to use a technology at its highest for an affordable price. Younger people often are professionally busy, have family commitments, and often less money available to purchase photo gear, too. Also since mid 2007, smartphones were on the rise which came with increasingly better camera technology. Cameras also had quite short innovation cycles - every two years a new camera with new sensor or image improving technology hit the market. Marketing created a hype to upgrade to the best quickly, vest in more modern lenses etc. And people followed - both with smartphones and digital cameras.
And now things turned really crowded. Forget about being contacted by a well known publishing company which saw one of my photos on flickr and asked to purchase it for a book. The values of photos hit the bottom, photo stock markets skyrocketed in profitability by paying the photographer only the absolute minimum and cashing in the rest. After I started using my own photo website and deserting flickr, I was contacted a few times to hand over a few photos for free and just receiving the acknowledgment with my name. When I refused to do this, I got once the response that "everyone can do this photo with the cell anyway". Well, best of luck buddy! But this clearly was a sign of a shift in attitude towards photography which had much more supply than demand. Professional photographers had to close down their business because of amateurs disrupting the prices and profits with often mediocre quality of work done. I remember an article where a professional landscape photographer was asked how he avoids that somebody else takes the same shot. His answer was to use special lens gear which most amateurs can't afford - even this is no longer an obstacle now for most lenses which all got cheaper. Competition between amateurs was also on the rise - facebook became very popular and people posting their taken photos. One way to kick out potential competition was (and still is) to hide the location where the photo was taken. In one example a few years back one amateur photographer even purposely assigned the wrong location to his photo to mislead potential copycats. This all ignores that the value of any kind of photo isn't there anymore monetary-wise in the first place.
What's next? Mirrorless technology is certainly on the rise, but the photo market itself is saturated since all interested ones already upgraded from film to digital camera technology from about 2005 to 2015. Smartphone cameras are so good now that nobody can tell the difference between cell and semi-professional camera from a photo posted on the web. Art galleries ask interested photographers for a hefty fee just to present photo prints for a few weeks in a small gallery section. Rarely anyone actually still buys photos - companies have contracts with photo stock distributors for an annual fee to use any kind of photo they need from the site. Potential customers rather grab their own digital camera (or cell phone) to try to take a similar photo which they see and like in an exhibit than actually paying $$ for it. It has gotten so bad that many started post processing well taken photos into painting look-alikes since this stands out from the mass and actually attracted customers to purchase the modified photo. Others went a step further and sold all their photo gear to do painting rather than photography since this is still seen as form of art.
Especially youngsters who never grew up with analog photography have come back since 2016 to film. Film is again a slowly increasing market after it was considered dead in 2010. Several companies are now revamping their activity to manufacture films which isn't all that easy after equipment was shut down or given to the junkyard about 10 years ago. Analog well maintained camera gear of known brands like Leica, Zeiss, Hasselblad etc easily doubled in the past three years due to high demand. Film will never even get close to the digital photo market in the future - it will remain a niche, but it is again a growing one. Many find themselves more connected with the "real" photography when using film, and I have to agree with this from my experience after I started shooting film again 4 years ago.
It is the best time ever regarding the choices we all have to use photo gear, but it has also become an overcrowded field leading to environmental issues, for example in National Parks where herds of amateur photographers enter every year stumbling on the same location to take similar shots as already seen on facebook or IG. Iceland already took measures and closed districts to photographers for exactly this reason. More often we all see signs with "No Photography Allowed" because it has become just too much. I sometimes ask myself these days if it is really worthwhile going out and shooting instead of doing something else. I most often still answer it with "yes" since I use it as creative outlet, but my expectation has severely changed what I want to do with my photos compared to 10 years ago. Other than for the benefit of social interaction, I don't see any value for me in participating in photo exhibits anymore or trying to sell my photos online.
I am curious what I might write in 10 years from now on this subject. Please leave your comments below! Happy shooting!
]]>First a quick summary of my findings where both camera systems have similarities and differences:
| Mamiya RZ67 Pro | Hasselblad 500 C/M |
|---|---|
| Crop factor from 6x7 cm to 35 mm format: 0.50 | Crop factor from 6x6 cm to 35 mm format: 0.55 |
| Heavy and sturdy plastic camera body, very good for studio work | Rigid and well built mostly metal camera body but well portable |
| Battery required, electronic features | Fully mechanical, no battery required |
| Exposure time from B/8 sec to 1/400 sec (on camera exposure wheel) | Exposure time from B/1 sec to 1/500 sec (on lens) |
| 6x7 cm film back which can be rotated for portrait or landscape | 6x6 or 4x4 film backs, square format (exemption is a rare optional 4.5x6 portrait/vertical film back) |
| Lens focus system is in the camera allowing close focus distance | Focus is in the lens, minimum focus distance is 0.6-0.9 meters |
| Lenses are a bulkier with leaf shutter in lens | More compact but heavier lenses, leaf shutter in lens |
| Backwards compatibility lens system with limitations (shutter speed) | Fully backwards compatible lens and accessory system |
| Light metering possible with optional prism viewfinder | Light metering possible with expensive electronic prism viewfinders |
| Automatic film winding with optional RZ winder (heavy with batteries) | Manual film winding only |
| Standard 120 film backs for 6x7, 6x6 backs are very expensive | Big variety of A12 (6x6), A16 (4x4 or 4.5x6), and A24 (6x6) film backs |
| Multi-exposure by simply flipping M/R switch on the camera | More cumbersome way to handle multi-exposure, no direct function |
| Prism viewfinder with electronic metering available (has to fit the specific camera model) | Large variety of older and newer prism viewfinders with and w/o electronics, pricey |
| Mirror flips up after cable release is mounted onto lens port and shutter release button is pressed on the camera | Designated mirror up lever for long exposures |
| Camera price with 120 film back and 110/2.8 lens: used approx. $600 | Camera price with A12 (120 film) back and 2.8/80 lens: used approx. $1200 |
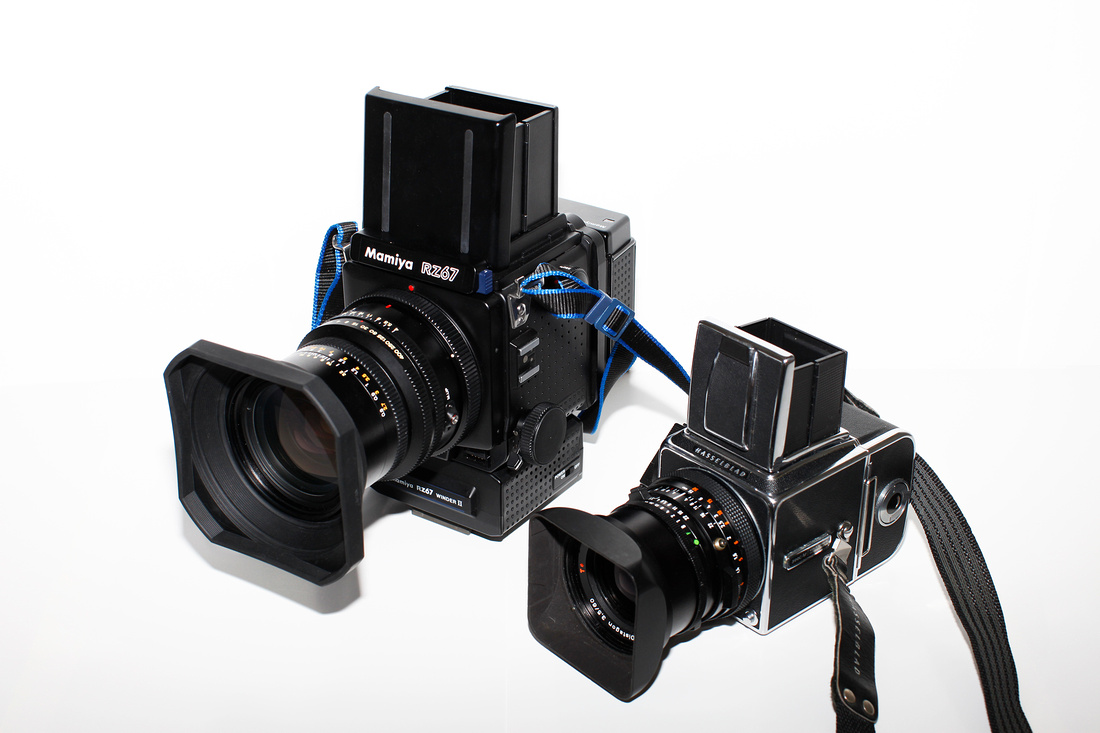
Size comparison between Mamiya RZ67 Pro and Hasselblad 500 C/M with vertical viewfinders. The Mamiya RZ67 Pro has the optional automatic film winder II attached
Which Camera for Which Purpose?
I used both camera systems outdoors for shooting, and carrying the Mamiya RZ67 Pro around for a full day will be quite an exercise. This camera is not made for being moved around and rather serves its purpose as a studio or tripod based camera. The rigid and heavy Mamiya camera body might lead to less vibration issues fixed on a tripod, too. In a studio, the Mamiya can be advantageous over Hasselblad due to its shorter minimum focus distance better suited for portraits and head shots. Since Mamiya lenses have no focus ring capability, and the focusing is all done with a bellow within the camera housing, a much closer focus distance can be achieved. The Hasselblad 500 C/M is a much better choice when you want to be flexible and shooting without tripod. Regarding framing, the Hasselblad will allow you to compose with a square format (6x6 cm as standard) wheras the Mamiya RZ67 Pro generally shoots with 6x7 cm (the standard film back for this camera).
How Do You Mount or Carry Each Camera?
Both cameras can be mounted directly on the camera's base plate onto a tripod head plate. I prefer to use the standard Manfrotto tripod head plate with 1/4" screw mount. The Hasselblad 500 C/M requires - similar to my Leica M3 - a tripod mount reducer bushing from 3/8" to 1/4". Gladly I got a whole set of the bushings when I needed one for my Leica M3 which now helped me to fit a second one for the 500 C/M. The RZ67 Pro body fits directly the 1/4" screw. One difference I observed is that the much heavier RZ67 Pro is ironically better balanced with the neck strap - a lens can be changed much more easily in this position. The Hasselblad flips vertically over after a lens is detached with the lens mount pointing downwards. It doesn't make the lens change unsafe, but it is something to get used to with the 500 C/M. Talking about camera straps - I cursed several times the designer of this Hasselblad camera strap. Mounting and removing the strap with the metal locking plate mechanism is no fun and forced me several times to review the few sentences written about doing this correctly in the manual. If you are not careful, the strap slides and might scratch something on the camera. I highly recommend to attach the Hasselblad camera strap only once and leave it there (make sure it is winded correctly!). The position of the strap unfortunately is not ideal either on the 500 C/M due to its full 360 degree rotation capability - it easily gets in its way with the shutter cocking knob on one side and with sliding in and out the dark slide of the film back on the other side. The Mamiya strap is fixed in a vertical position on the camera which avoids this inconvenience.
Talking About Film Backs and Film Formats...
Loading 120 or 220 film takes a few more precautions with the Hasselblad system: After the roll of new film is inserted, make sure to open the film plane fixing mechanism via clamp first and slide the film underneath of it before rolling the beginning of the film into the inserting spool. After the film is inserted into this spool close the film clamp again. The Mamiya film loading system is more straight forward here and doesn't use this additional film clamp. I never had the impression that a film inserted in the Mamiya film back was less evenly aligned than in the Hasselblad system. Trying to shoot directly in square 6x6 format with the RZ67 Pro is a challenge - used 6x6 Mamiya film backs are extraordinarily expensive online. Better way is to crop in post processing from the 6x7 format after scanning or cut one centimeter off from the frame in the enlarger for darkroom printing. The Mamiya viewfinder has little ear marks to allow composing in 6x6 format, too. The Hasselblad system has a lot more choices when it comes to film backs - there are multiple release versions which can all still be used on the 500 C/M. A very good overview of Hasselblad film backs is shown here:
If you still have some 220 film sitting around, the Hasselblad system is the way now to shoot with it. I found an A24 (cartridges for 220 film have the A24 classification for 24 frames - twice as many as with 120 film) cartridge in good condition online for $40. Keep in mind that 220 film does not use the additional paper backing layer of 120 film which makes the film plane of 220 film thinner. Therefore the film cassettes are rarely interchangeable between 220 and 120 films - a few Hasselblad film backs allow to do this, but certainly none from Mamiya. General rule of thumb for Hasselblad film backs is the newer the better. Often the dark slide is scratched or has bents with the risk of failing winding mechanism in older cartridges offered for sale. Check online on websites the serial# of cartridges to determine their manufacturing date. A16 Hasselblad 120 film backs for 4x4 cm format go for approx. $70 in good condition whereas newer standard A12 ones for 120 film cost more than twice as much used. Also make sure that the cassette serial number (the newer ones only show the last few digits) matches the serial number of the film back - the backs can have quite a bit of variability in the construction - best image quality projected on the film is achieved by matching cassette and film back.

Film backs for the Hasselblad V-series, from left to right: A12 with Lindahl dark slide holder, standard A12 back, A16 back for 4x4 frame format, and A24 designated for 220 film with 24 frames
Another a bit unfortunate mechanical construction is the design of the dark slide in Hasselblad film backs - the end with the lever is a bit protruded to one side. It is not easy to see which side is which especially during shooting - it only becomes a potential issue when removing the film cassette from the inside. If the protruded dark slide lever is pointing towards the film back, it will be automatically moved outside when the film cassette is removed. This is not a big deal, but not as convenient as with the Mamiya film backs where this is never an issue.
Hasselblad was a bit cheap when it comes to storing the dark slide during shooting. Some film backs have an added Lindahl-fabricated dark slide holder on the back which can be quite useful to have. All Mamiya film backs have as standard a plastic dark slide holder on the back.
Careful how the dark slide is inserted into a Hasselblad film back - if the bit protruding lever element is pointing towards the side of the film cartridge lid, it will be pushed out with the lid when opened (left photo). If the lever element points to the other side, it will stay in place when the lid is opened (right photo)
Taking photos in square format is something to get used to. Coming from 35 mm film, I am more used to the rectangular format. I enjoy 6x7 with the Mamiya RZ67 Pro camera, but I admit that I now like 6x6 with the Hasselblad even better. The focus on a specific object in a 6x6 frame is more emphasized than in a similar rectangular shot. Big advantage for 6x6 is the avoidance of landscape or portrait framing - you never have to flip the camera or a camera back. Another positive of shooting 6x6 film is that 12 frames fit on one roll of 120 film instead of 10 frames in 6x7. I also tried shooting 4x4 with the A16 Hasselblad film back (giving 16 frames on one 120 film), but the compromise in resolution is visible compared to 6x6. Composition is more cumbersome in 4x4 since a crop factor of 1.5x is applied. IMO it is still a good solution if you are short on a specific film, or avoid changing film too quickly.
Nice feature of the RZ67 Pro is its ability to do multi-exposure shooting by flipping a switch on the camera side. This decouples the film transport mechanism and allows infinite exposures on the same frame. The Hasselblad system also allows doing it, but it is a bit more cumbersome: The film back has to be removed before the shutter is cocked, then the film back is attached and ready for the next shot on the same frame after the dark slide is removed.
It's All About the Lenses!
Nothing beats Zeiss lenses made at the time when the 500 C/M was manufactured in built quality and the lenses I have are superb in sharpness. Since the manual focus system is located within the Zeiss-Hasselblad lens, it potentially can be used adapted on any modern digital mirrorless camera (MLC). Mamiya lenses are only one third of the price compared to the Zeiss-Hasselblad medium-format lenses, but they don't have any focus capability within the lens. Beginners might be confused by looking at a Mamiya medium-format lens which has a look-alike focus ring which only uses a scale to estimate hyperfocal distance depending on aperture setting. It does not have any mechanical function!
Usage of Mamiya medium format lenses is limited to the Mamiya cameras (if no adapter with additional focus feature on a is used adapted to a MLC). Mamiya lenses therefore can't be used on a Hasselblad system. This might make reselling these kind of Mamiya lenses a bit more difficult.
A disadvantage of the Hasselblad-Zeiss lenses is their lack of a standard filter ring thread. Instead the Zeiss lenses use a lock-in system (named with a B** (** = 60 for the Zeiss lenses I use) to attach the lens hood outside the lens barrel, and the fitting lens cap mounted directly onto the bayonet (here it is an advantage to have the bayonet - lens caps sit much better than with any other lens system I know). To use a regular 77 mm diameter filter, you need to purchase a cheap step-up ring (B60-77 mm). I can't use the designated Zeiss lens hood anymore when the step-up ring is attached. Mamiya lenses are much more comfortable here - they use a standard 77 mm filter thread. No issue to use lens hoods with Mamiya lenses since the fitting filters are directly mounted to the lens.
Mamiya allows to use lenses made for the RB67 camera also on the RZ67 cameras. Unfortunately, the lens design was changed quite a bit between these camera versions: when attaching RB-camera based lenses (named K/L lenses) on a newer RZ67 Pro, keep in mind that the exposure setting knob on the camera is overruled by the exposure ring on the K/L lens. You can easily make the mistake and expose like usual with the camera knob and realize later after developing the film that most frames are either under- or overexposed because you shot everything at the same exposure selected on the K/L lens ring. This is because the older K/L lenses lack electronic communication with the camera. Otherwise K/L lenses are cheaper than the more modern Mamiya Z Sekor lenses, but there is another culprit to be aware of when it comes to long exposure shooting. Two remote cables are needed to accomplish this with K/L lenses: one has to be inserted into the lens body to open the lens leaf shutter after the shutter release button is pressed to lift the mirror up (M.UP insert), the other cable in the "B" insert closes the lens' leaf shutter after a given time. Tricky part is when the cable controlling the lens leaf shutter is removed - you have to remind yourself to triple-check (!) that the tiny screw-in M.UP thread on the lens body is fully immersed with the red ring NOT being visible around it. If this element remains protruded (meaning the red ring is visible!), the whole leaf shutter mechanism will be messed up in future exposures - the lens shutter will remain closed and you get unexposed frames! In this case re-insert the cable release and remove it again afterwards to have the screw retracted inside the lens body. Both culprits happened to me when I first used my K/L lens with the RZ67 Pro body - this is the reason why some recommend not to use K/L lenses on newer electronically controlled Mamiya bodies. But keeping the potential obstacles with K/L lenses in mind, they are often an excellent deal out there with very good image quality quite similar to the newer Z lenses. I have not yet tested the Hasselblad system and lenses for long exposure capability! I will update this section after I have tested it.
 Tricky culprit with Mamiya K/L lenses when doing long exposure photography: make absolutely sure that the M.UP screw is pushed back into the lens housing after removing the shutter release. For normal shooting, the red ring should not be visible as shown in the left image.
The Zeiss-Hasselblad lenses use a nice feature on the exposure scale on each lens - the EV number is printed in orange and can be directly copied from the EV number shown in an external light meter. This works well in theory, but is not so practical in reality - the orange EV mark is in 3 o'clock position from the 12 o'clock distance meter mark on top of the lens. I found it very cumbersome to look on the side of the lens to find the EV mark especially when the camera is not mounted on a tripod and hanging from my neck. It is easier to translate the shown light meter based EV number into the corresponding aperture/exposure time equivalent and directly set it this way on top of the lens.
The Zeiss lenses allow to merge otherwise independently rotating aperture and exposure rings - a feature I very rarely use, but it can be helpful when for example the same scene needs to be photographed in a range of different aperture settings. Automatically the exposure time is aligned with each chosen aperture which saves time. Mamiya lenses have neither of these features (which IMO is not a big loss at all).
One thing I found a bit cumbersome on the Zeiss T* CF lenses is the depth of field lever. By moving it into position, the lens aperture will remain at the given aperture setting and allowing a more realistic image view through the viewfinder of the applied depth of field. If you forget to move it back into the open aperture position, you might wonder about a too dark image at closed aperture in the next frames of shooting. Unfortunately this lever can easily be stuck on my Zeiss 2.8/80 Planar lens - therefore I rarely ever use this feature and leave the lever alone.
 The orange EV scale mark is on the side of the Hasselblad-Zeiss lens bodies - unfortunately not a good position to select this number when the camera isn't used on a tripod (left photo). Aperture and exposure times can be chosen separately or rotated together (right photo).
Achieving Focus
Hasselblad follows the traditional way of focusing with the camera: through the lens by turning the focus ring. The Zeiss-Hasselblad lens focus ring is located at the lower end of the lens barrel - opposite how it is done with DSLR lenses from big brands like Canon or Nikon where the focus ring sits on top of the lens barrel. The focus ring of the Zeiss lenses which I am using is fairly slim for the size of the lens. The manual focus on the Zeiss CF lenses is very precise, but it is not a fast focus system either. Especially when I want to focus from an infinity stop to a close-up distance, it requires a few turns on the focus ring to get there. Mamiya has the focus system built into the camera housing itself: A small bellow moves the attached lens back or forward to achieve focus. I found this system much faster to change the focus point. Problem here is that the RZ67 Pro has no fine adjustment wheel at the focus button (the RZ67 Pro II does), so I need to be very careful how much I turn the wheel to nail the focus within the viewfinder. A small extension or contraction of the bellow makes a big difference in lens focus! I am so far fine with either system to focus accurately, but I simply prefer lenses with focus ring.
About Viewfinders
Both camera systems come as standard with a vertical viewfinder. It is something to get used to especially since left and right of the frame are reversed by looking onto the matt glass due to the mirror underneath. The matt glass of the Hasselblad 500 C/M can be changed - there is a variety of options available, for example with or without grid lines.
For accurate focusing at more shallow depth of field the vertical viewfinder is not the most convenient even if the loupe element is used. When the Mamiya film back is rotated, the vertical viewfinder view changes accordingly depending on landscape or portrait position. To achieve accurate focus, the loupe has to be used - feasible and decent solution, but it requires time to flip out the loupe, focus, and then push it back in. A better option to allow more precise and faster focusing is with a 45 degree prism viewfinder which provides a direct view through the lens without mirror effects.
The Hasselblad system allows to adapt all kind of newer or older prism viewfinders; Mamiya also has some for their cameras. I decided to buy a mint used PM-45 viewfinder for the 500 C/M which has the big advantage that the ocular can be rotated to fit the eyesight diopters. Otherwise additional expensive glass inlays have to be used! The prism viewfinder allows to use the camera like a SLR and shooting from eye-level (while you shoot from your belly level with the vertical viewfinder). Biggest con for a prism viewfinder is its price for the Hasselblad system - the PM-45 goes for about $400 (if you are lucky!). But IMO it is a worthwhile investment which pays off in the long term - I would say it is nearly a must-have for portrait shooting. One minor disadvantage of the PM-45 I have observed recently in cold weather - the ocular lens tends to fog easily, so always have a fiber ready to wipe away the condensed water droplets! You can get more sophisticated (and even more expensive) prism viewfinders with electronic metering, too. I decided against additional electronics since it is another feature which might break especially when the viewfinder is an used one. Instead I prefer to use external metering with a handheld meter.
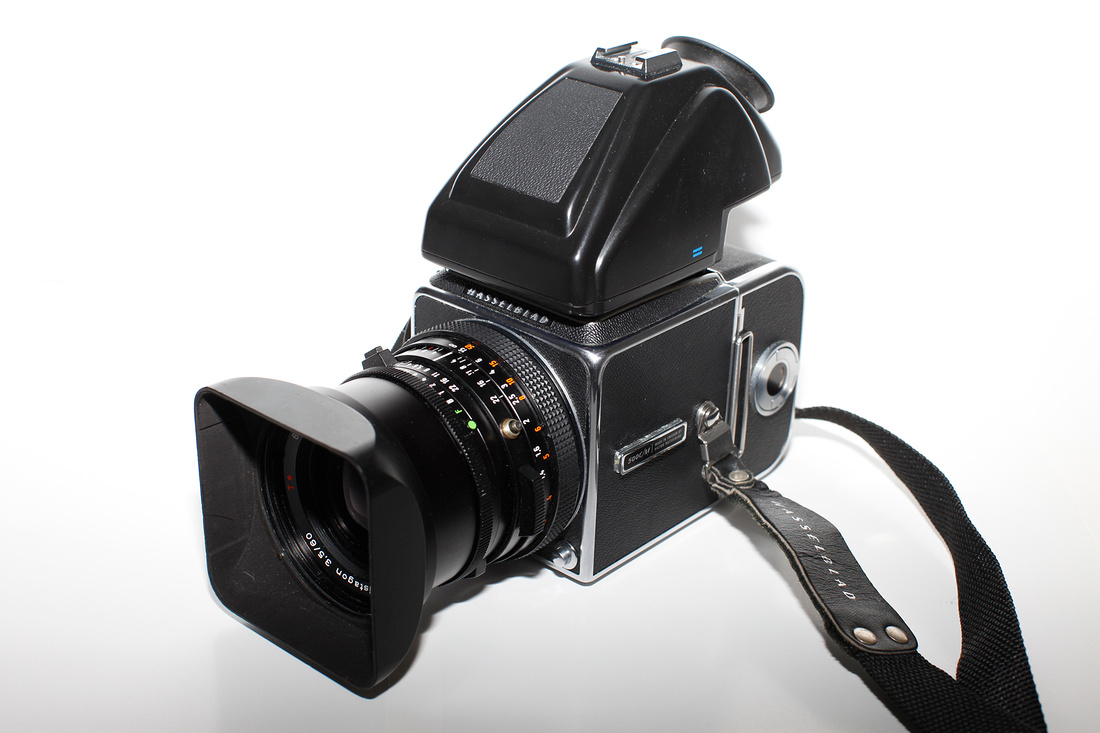
PM-45 prism viewfinder attached to the 500 C/M camera. The matt glass remains in place when the vertical viewfinder is interchanged with the prism viewfinder
Link to Hasselblad Prism Viewfinders
So far I have no personal experience with Mamiya prism viewfinders.
Mirror Up!
Since both cameras have a quite big mirror inside which flips before an exposure is taken, vibration can be an issue especially when shooting at slower shutter times. The Hasselblad 500 C/M has a lever underneath the film winder button which flips the mirror when pressed upwards before the leaf shutter is opened. This avoids getting a blurry image due to vibrations by the flipping mirror. Disadvantage of this method is that you can't see the frame through the viewfinder after the mirror is flipped - this method should be only used when the camera is mounted on a tripod. I tried it a few times handheld, but it is very challenging to maintain the composition in the image frame before and after flipping the mirror and then taking the exposure.
The Mamiya RZ67 Pro can also have the mirror flipped up before an exposure is taken. But the camera has not a designated button or lever to flip the mirror up - instead you have to first attach a cable release into the long exposure lens port, then press the shutter release button of the camera which will flip the mirror up and open the camera back shutter. By pressing the cable release and holding it in open position for a given time, the exposure is taken without the mirror causing vibrations.
Medium Format Film Development
One remark in regard to developing 6x6 or 6x7 films. High micro contrast developers (e. g. Rodinal) are not necessary for this size of B&W negative since the resolution and detail in this size is already so superb that increased edge sharpness is not needed. I prefer a low contrast developer like Xtol in 1:1 dilution which also suppresses strong grain formation. A low speed film like PanF+ 125 gets a digital medium-format look with beautiful grey tones using this developer.
I am using Paterson development tanks with adjustable film reels good for 35 mm, 4.5x6, and 6x6 or 6x7 cm film sizes. I use nitrile gloves when removing the 120 film from its paper backing and cutting the adhesive end. Then I insert it into the plastic reel - but instead of using the back and forward movement with the reel bearings, I simply push with my fingers the film further inside the reel. 120 (or 220) films have no notches which makes this easy. I found this the best way to avoid bending the film or getting the film off track.
Can I Shoot with a Digital Back?
Something I didn't test yet but watched videos about is adaptation of both camera systems with pricey digital backs. In Mamiya's case, only the RZ series can do this; it is said that the RZ67 Pro II is even better suited here due to improved electronic couplings with the digital back. A specific additional adapter set is needed to mount a digital back on a Mamiya RZ67-based camera. All Hasselblad cameras can be equipped in theory with digital backs since the digital device only needs to act as recorder of the captured image but has no control over the otherwise fully mechanical camera and lens parts (which is not so simple with the Mamiya). No additional adapter is needed for the Hassy - the film back is simply replaced by the digital back. But keep in mind that we are not there yet to shoot 6x6 or 6x7 digitally - the largest digital sensor close to 4.5x6 cm size was just announced by Phase 1. Any kind of digital back will have a smaller image frame than film based medium format - it comes with a crop factor and change in the field of view. Instead I recommend to shoot film and simply digitize the developed frame with a good flatbed scanner (for example the Epson V850 or predecessor series).
Where Does This Leave Us?
Which is the more fun system to shoot with? I would answer it is the Hasselblad system. The more bulky Mamiya camera system is a hybrid of traditional medium-format technology with added electronic features which can be sometimes confusing how they play with each other (or not). I personally really like that the Hasselblad 500 C/M is a fully mechanical one - maybe a more fair comparison would be versus the Mamiya RB67 which is also fully manual. If cost is an issue, the Mamiya cameras and lenses are the way to go - the cost only about 30-50% of similar Hasselblad prices with used gear. The Mamiya cameras also give you best flexibility in the medium format size - from rectangular to square (see above regarding PP crop). Hasselblad medium format cameras are focused on square frame formats. At this point I wouldn't separate myself from any system described here - they both complement each other in functionality. Both are capable to capture fantastic photos!
]]>
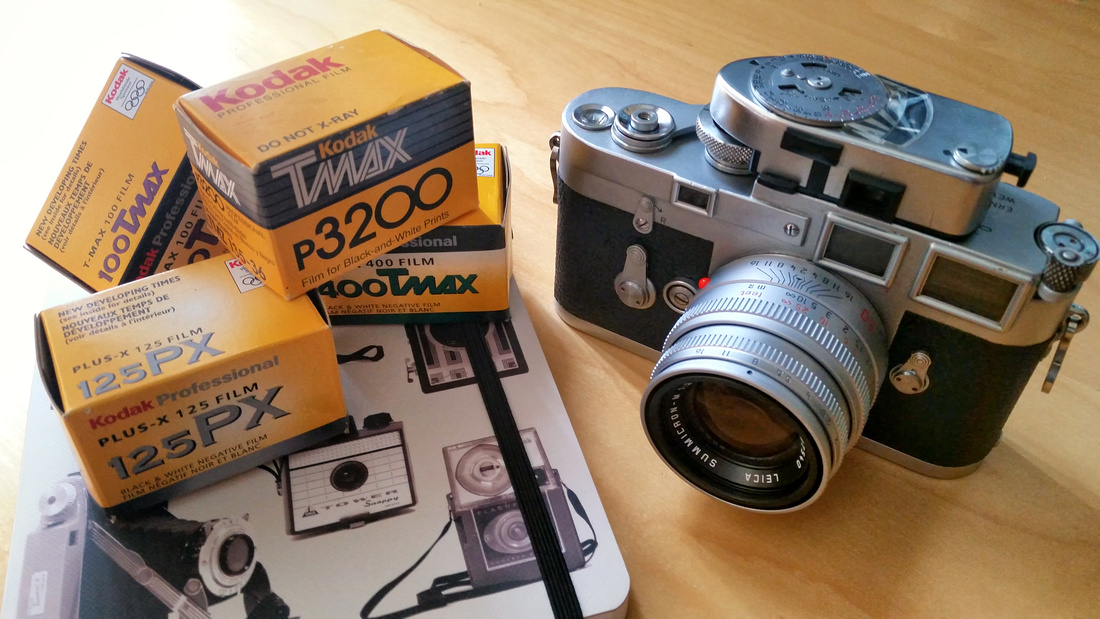
Leica M3 with original Leica Light Meter MR
The Camera Body
The camera body is simply to fall in love with - rigid hard metal base in brass chrome with a good weight. I don't want to ever experience it, but I am quite certain that this camera can drop on solid ground from a handheld position without suffering damage of the body itself. Beautiful also the nicely engraved Leica name on top of the camera which I like much better than the much more attention grabbing Leica red dot on the front in later models. The camera sits very stable on a flat surface with chrome 50/2 lens attached. The center of gravity is on the camera housing and not moved towards the lens! The eyepiece of the viewfinder has no rubber gasket to protect eyeglasses from scratches caused by the metal ring. No biggie for me at the moment since I don't wear glasses while shooting, but I can see this is an issue for other fellows. On the back the camera has two flash synchronization cable sockets for electronic flash and flash bulbs. The latter ones are probably not in use anymore. So far I also never used any electronic flash with this camera either. The film indicator on the back plate is fairly useless IMO but nice to look at. It allows to select the ISO/ASA speed of the inserted film but has no function within the camera itself. It is just a reminder which kind of film speed is used.
The M3 also came in "trim" versions depending on its manufacturing date. Biggest difference between versions is double-stroke (DS) or single-stroke (SS) advance lever. Which one is better? I am pretty undecided about this since all my other film cameras have a single-stroke lever. But I was surprised how quickly I got used to the double-stroke lever. You need to twist the right hand thumb less with each stroke compared to a single-stroke lever (which turns further). I would not make DS or SS as selection criteria for a used M3 camera - both do the same job. Leica later abandoned the DS advance lever which might make a DS based M3 a bit more "unique" and vintage.
This feature might not be often used with Leica Ms, but I really like that the M3 has a shutter self-time release which was unfortunately abandoned by Leica in later models. It's a nice feature and comes handy for group shots where the photographer wants to be included. The shutter click is very silent. Compared to the shutter of my M6 - which I already consider silent - the M3 shutter is even less noisy.
One bad surprise with the M3 was once for me its a bit unusual tripod bushing - it does not fit to the more common 1/4" but is instead made for 3/8" bolts. You need a tripod reducer bushing - good to be aware of this before planning to shoot a sunrise or a sunset with the M3!
The M3 has no light meter within the camera - something seemingly backwards when using this camera in the digital age. You can fully ignore any kind of metering and estimate exposure by following the sunny f/16 rule. I personally find the latter a bit too uncertain since the sunny f/16 rule depends also on the latitude location - in more northern zones it is more like a f/11 sunny rule. With changing weather conditions (sunny/cloudy sky etc) it gets quite tricky sometimes using this rule, especially when taking photos of high contrast scenes. But there is a simple and nearly as convenient workaround - use a free light meter cellphone app. Some apps even distinguish between reflective and indirect lighting by using either the back or the front camera of the cellphone. I found that my light meter cellphone app - I am mostly using an app named LightMeter on my Android phone - is nearly as accurate as my Gossen light meter - instead of carrying cellphone and external Gossen meter, I now only use my cellphone app. In its reflective mode, it also allows some sort of spot metering which works well.
After I shot two films with my M3, suddenly the winder and the shutter were stuck. I read that this is quite common with older Leica rangefinder cameras which haven't been used for a while. Unfortunately, there is no easy homemade fix for that issue: You have to send the camera for a CLA which stands for Cleaning-Lubrication-Adjustment. The US-based Leica repair service in NJ never even replied to my inquiry if this camera could be fixed and how long it would take. Best solution is to contact one of the few independent Leica specialists which you can find online instead which are also very price-competitive and more responsive. My M3 was fixed in less than two weeks, only lubrication and readjustments of shutter speeds were needed as well as cleaning of the rangefinder system. It is working perfectly since!
How To Insert Film
The film insertion into the M3 might appear a bit sketchy in the beginning. The take-up spool is removable - make sure that it the spool is included when you intend to buy a M3! It is an essential part - in case it is missing, you can't insert any film in the camera. To use film, you have to remove this spool from within the right side of the camera after opening the base plate. Then you insert the beginning of the film into a thin slot within the spool. If done right, a dotted arrow will show up against the inserted greyish beginning of the film. Now both film cartridge on the left and take-up spool on the right are inserted into the camera. I find this the most tricky part since the spool has to click into place, but most often the film is not horizontally aligned yet behind the shutter. You might have to move the spool or the film cartridge winders a bit that the beginning of the film aligns with the gear rim of the transport spool which sits next to the inserted take-up spool. Or in other words: the lobes of the gear rim have to grab into the film sprocket. If this isn't done right, the film won't move! After you close the flap and adjust the base plate, take two shots and make sure that the two-dotted rewind knob turns every time you use the advance lever to transport the film. Then you are good to go! Removal of the take-up spool resets the frame counter of the camera to zero.
Rangefinder System and Viewfinder
The Leica M3 is considered to have the best rangefinder system of all Leica Ms even to this date. My experience with the M3 confirms this. The viewfinder is larger than on later M series cameras, and it comes with a bigger magnification finder of 0.92x (standard is now 0.72x and largest size offered is 0.85x). This is especially useful for 50 mm and longer focal lengths of 90 and 135 mm where this camera really shines with. To focus my 90/2.8 M-lens on my M6 is much harder due to the much smaller finder view than with my M3. Another benefit of the M3: no rangefinder patch flaring which appears sometimes in later models as seen in the M6. The M3 viewfinder has a bit of a bluish tint by looking through which does not matter at all. Later M series models like my M6 don't have this tint anymore.
The most frustrating to me is the lack of 35 mm frame lines - especially since 35 mm is my go-to focal length normally. Yes, probably the M2 would have been a better choice here, but simply this M3 worked out for me in a decent deal. Work-around is to use an external viewfinder which I mentioned in the first paragraph, but most of them - even used - are very pricey. I didn't want to vest more than $150-200 for this kind of viewfinder when my M6 already included frame lines for 35 mm lenses. After a bit of searching and waiting, I came across a good deal for a Braun Paxette 38 mm viewfinder in chrome - which fits perfectly on the camera's hotshoe and in its color. The 3 mm focal length difference is small enough that adjusting a composition with the Paxette viewfinder doesn't make a big difference compared to the final 35 mm lens-based photo. Best is that I was able to get it in excellent condition for its age for about $25.
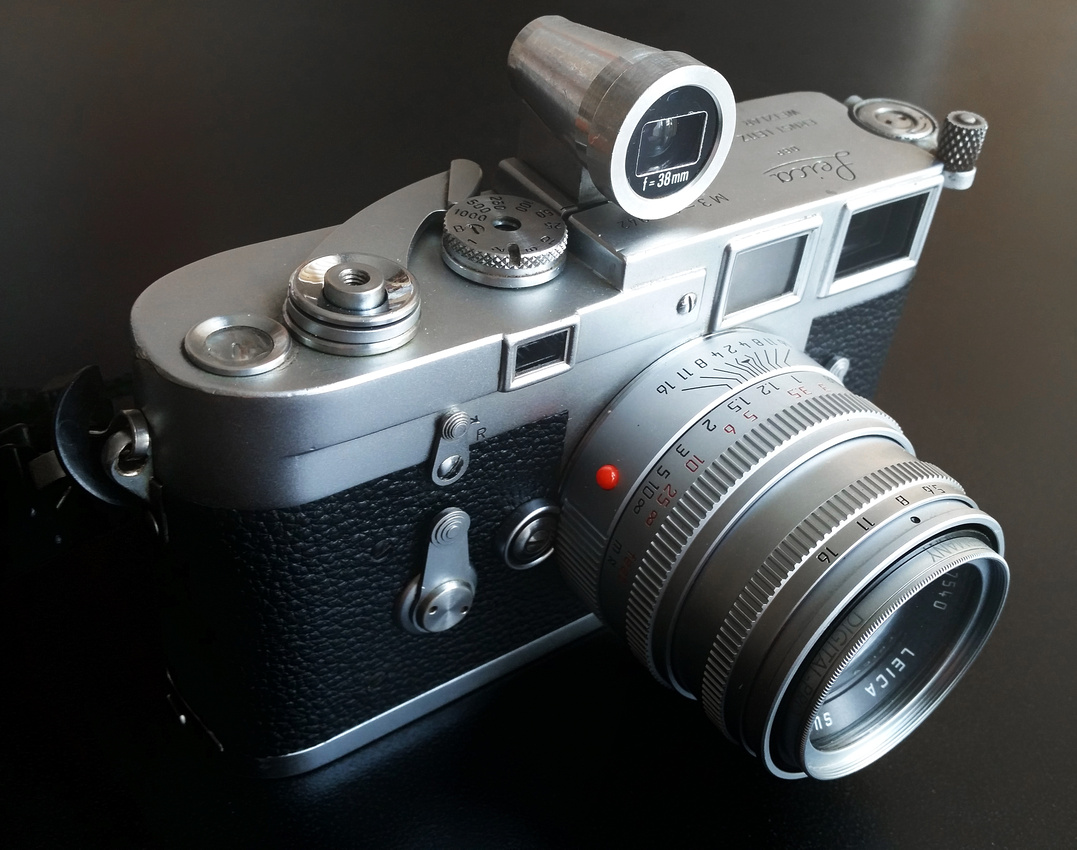
Leica M3 with Braun Paxette 38 mm External Viewfinder
The M3 also requires a pretty good estimate which film ISO to use for an upcoming shooting. You never want to be stuck with a slow film ISO at 100 or below if there is no sun or it is getting slightly dark outside - especially if the camera is handheld. With fast film speeds more modern Leica film Ms also only can go up to 1/1000 seconds same as the M3. With an ISO 400 and a fast lens open at f/2 to allow some shallow depth of field, you might exceed the 1/1000 sec on a sunny day easily. Only way out then is to use a neutral density (ND) filter. I find myself most often using an ISO 125 film which I can push to ISO 200. With a f/2 lens, this allows me to shoot without ND filter and avoiding also too slow shutter speeds for most scenes outside.
Certainly a keeper camera for me - fully mechanical without need of battery, it will work the same with minimum maintenance needed for many years to come.
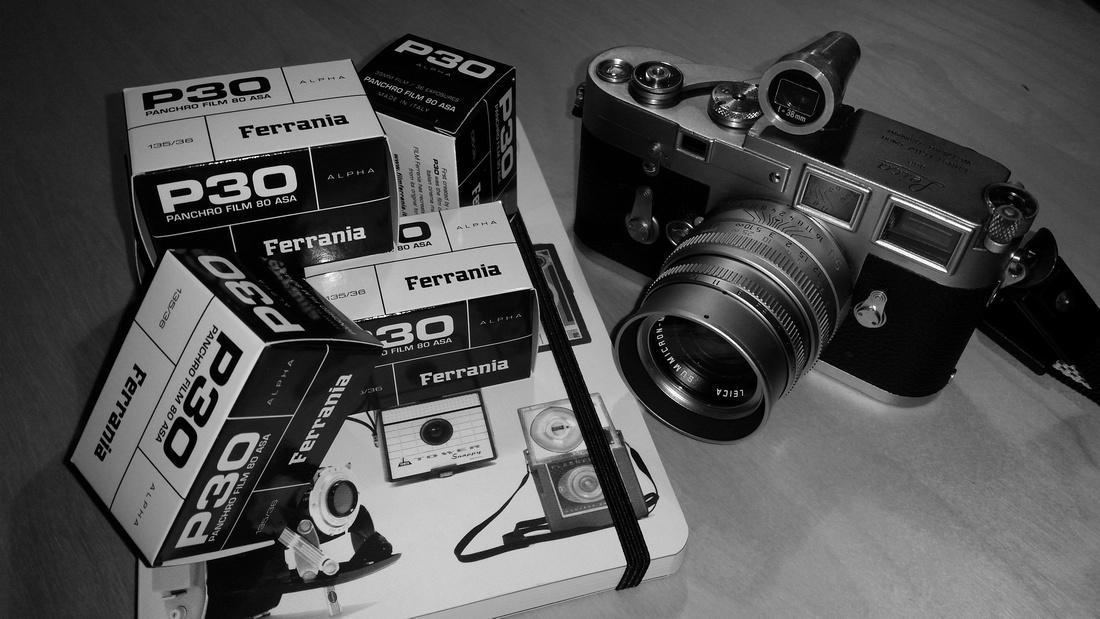
After I bought my A7R, I found myself with a small, compact, and powerful high resolution mirrorless camera but still had to rely on bulky wide angle lenses for landscape and scenery photography. I am using the Canon 17-40/4 L and the rectlinear Canon 14/2.8 II L on my Canon DSLR cameras (also the 8-14/4 fisheye lens, but this is not a typical landscape lens). Those lenses are quite bulky especially when used in combination with the Metabones adapter on the A7R. So I started to look for alternatives which would facilitate size and weight of lenses which could be used for travelling and hikes. I already bought the Leica 50/2 Summicron-M rangefinder lens which amazed me by its sharpness and overall quality.
From experience I knew that I rarely use very wide focal lengths like 14 and 17 mm for landscape photography. Since I already had the 17-40/4 L lens, I also imagined to get something faster which pointed towards a prime lens. Zeiss also makes the very good Distagon 21/2.8 lens which comes with a (D)SLR mount - both price and size of this lens made me disregard this option. This Zeiss lens also exists in rangefinder ZM mount, but reportedly suffers form color shifts and vignetting on the A7(R) sensors. Alternatively, there is another option - the Cosina-Voigtlander (CV) 21/1.8 Ultron lens with Leica M mount. I liked that it is one stop faster than the Zeiss lens and came with a better price tag; also some reviews were positive to use this lens on the A7R. I found one con of the CV 21/1.8 lens - the fixed and not removable lens hood which would make it a pain or impossible to use this lens with graduated ND filters.
I didn't find a good deal for a used CV 21/1.8 lens, so I bought it new. It arrived in the unopened original box. The lens was mint, but when I fist used it, I instantly recognized sort of scratching noise when moving the focus ring back and forward. It didn't sound right because my CV 35/1.2 II lens is very smooth when moving the focus ring. For my first test shots, the CV 21/1.8 lens performed extremely well and with sharp images even wide open, so I kept it. On my first hike with this lens, I had to demount the lens from the camera, when suddenly a metal flake fell out of the lens mount. It turned out that this was the reason for the scratching noise - after the flake fell out of the inner lens barrel, everything worked smoothly with the focusing ring! I was lucky it came off and didn't hit the sensor when the lens was mounted on the camera!
This lens is very well built, metal lens case and engraved clearly visible scales. The aperture ring clicks slightly and stops at half and full apertures. The lens has a 58 mm outer diameter with filter ring. I also decided to get a 3-stop full ND filter with 58 mm size to allow for longer exposure times (especially useful for waterfall photography or in sunny conditions).
When taking photos with blue or grey sky in it, I observed some purple fringing and vignetting in the corners of the frame with the CV 21/1.8 Ultron lens (and independent on the aperture used). I couldn't tell from photos where the whole frame was filled with objects (for example inside a forest or more close up). Likely this isn't caused by the lens itself, more by the combination of this lens with the A7R. The A7 series has a thicker sensor stack than other rangefinder camera sensors have which might cause this. You can remove this fringing and vignetting in post processing, but I found it rather cumbersome to do and to get it right in the RAW file. Fortunately, Sony offers a very good tool to facilitate this - it is called "Lens Compensation" app for A7 and NEX cameras. It costs $9.99, but it is worth the investment especially when using several MF lenses. Leica M cameras use coded M lenses to determine which lens is attached to do this kind of compensation internally.
The Sony "Lens Compensation" tool lets you change peripheral shading (reduces vignetting and purple fringing), chromatic aberration (reduces reddish or blueish borders, and distortion separately for different lens profiles. It is a bit try&error to get the best outcome by changing the settings here - for the CV 21/1.8 Ultron lens, I am using +15 for vignetting suppression, -3 for red, -10 for blue fringing, +4 for red chromatic aberration, and +2 for blue chromatic aberration, no changes for distortion. This nearly removes all fringing, vignetting and aberrations which makes the post processing much more easier. This tool is extremely useful for third party MF rangefinder lenses on the A7 series - highly recommended! Also I should point out that this tool works both for RAW and JPF files!
In general, wide angle rangefinder lenses can be tricky or some even impossible to be used with the A7 camera series. I recommend reading reviews for a M mount wide angle lens with the A7 series before purchasing one. Unfortunately, this information is very scattered and sometimes hard to find in the internet - sometimes even with conflicting reviews. But there are still a few decent rangefinder wide angle lens options out there which work out great on the A7(R) especially when lens profiles are being used.
]]>
There is only one issue - the combined size of camera body and lens. Sure, I was (and still am) used to carry my bulky DSLR with up to 82 filter diameter lens gear, but seriously - who really wants to do this? Especially when you are on photo trips or do some hiking, size and weight counts a lot. Attaching my 24 and 90 mm TSE lenses with adapter to my A7R is still heavy and bulky in size - but smaller TSE lenses are simply not available. But what about the "normal" focal length like 50 mm, small wide angle (35 mm) and wider (21 mm)? Regarding my shooting style, I am leaning more towards the wide side up to 50 mm, and only rarely use 100 mm and above for other than macro shots with a 100 mm macro lens.
I read that the Sony A7R can be equipped through suitable lens adapter with Leica rangefinder M mount lenses. This caught my attention since rangefinder lenses are much smaller than SLR lenses but deliver outstanding image quality. There are three manufacturers which produce rangefinder lenses: Leica, Zeiss, Cosina/Voigtlander. All of them are MF lenses. AF does not exist in the rangefinder world - I suspect it would increase the lens size if equipped with AF. In times before mirrorless cameras, rangefinder lenses were mostly used on Leica M series cameras (hyper expensive but excellent rangefinder focus system). Now with mirrorless cameras like the A7R, the same lenses(?) can be mounted on the A7R. This is at least what I thought in the beginning.
I first checked on available lenses, and was shocked about two things: (a) the price tag, and (b) the variety and naming conventions of rangefinder lenses. It took me hours to familiarize myself online about this. First I started looking for a rangefinder lens in the 50 mm FL range. My eye was caught by the Leica 50/2 Summicron-M lens which accidentally a friend of mine offered me for sale if I would be interested. In Leica terms, this lens is one of the most affordable Leica lenses and also one of the most reliable and proven/used ones. I decided to give it a try and bought this lens in the chrome brass version. It is a bit heavier, but still very small and compact in size, built like a tank. I am using a cheap Fotasy M-mount/E-mount adapter which is very small, too - I did not encounter any problems with this adapter so far.
I have some good experience with 50 mm lenses - but this Leica one is by far the sharpest I ever owned. The word razor-sharp comes in mind when looking at the taken photos on my 27" LED screen. Wow. Also the colors appear very natural, none or only slight post processing is needed here. Focus peaking and magnification tools of the A7R camera make sure that the focus point is accurate even at f/2. Fast apertures are ideal for portraits or shallow depth of field effects. f/11 and f/16 make an ideal landscape lens with the Cron-50 lens.
A7R, Leica 50/2 Summicron-M II lens @ f/16: Smallest aperture delivers still razor-sharp results ideal for landscapes
A7R, Leica 50/2 Summicron-M II lens @ f/2.2: still very sharp, allows to capture good portraits
This got me hooked to further explore rangefinder lenses for my A7R. I was now looking in something wider, in the 35 mm range. Photographers often use a combination of 35 and 50 mm lenses which is also my experience. I landed a good deal for the Leica 35/2 ASPH (stands for aspherical) lens. Quite an investment, but since I was so satisfied with the Cron-50, what could go wrong having a killer Leica prime rangefinder lens combo. Of course I read reviews, and the 35/2 lens is described as performing extremely well - on Leica M series bodies.
I received this lens and mounted it with adapter on my A7R - and was shocked. The lens performed well in close focus distances, but at infinity it was the worst I had ever seen - totally blurry corners, uneven focal plane in the middle of the frame also. What was going on here - a $2500 lens sucks? In one other thread online I found a Leica blogger describing similar issues of this lens with the A7 camera series. The explanation given is that the thicker glass on top of the A7 sensor leads to unwanted refraction especially visible in the corners of the frame. This didn't explain the uneven focal plane (I assumed some decentered lens) but after shooting many test shots providing me always with the same disappointing outcome, I decided not to keep this lens. I started digging for more information online about issues of rangefinder lenses on the A7 series, and found more hits. Unfortunately this information is very dispersed online in many blogs and forums. But in summary, rangefinder lenses can have issues at focal lengths shorter than 50 mm with Sony's mirrorless full frame sensor. In Leica terms, only the faster 35/1.4 ASPH lens seems to work decently well on the A7R in the 35 mm range - I excluded this one since its price tag was just too unreal for me. The Zeiss Biogon 35/2 might be an alternative, but I found something better:
By reading about 35 mm rangefinder lenes, I came across a short note mentioning the Cosina-Voigtlander C/V 35/2.5 lens. But it was a bummer - again issues in the corners with some color cast were reported here. Somebody mentioned that the more expensive C/V 35/1.2 Nokton II lens is a great performer on the A7R, so I tried to find out more about it. After seeing several positive reviews about this lens and its A7(R) performance, I decided to give it a try and bough a mint used one for a decent price.
In my opinion this lens is a hidden gem - I never had a lens so small and compact, well built and sharp even at f/1.2 if focused accurately. This lens was another keeper for me fairly soon after I fired some test shots. This impression got confirmed after taking more photos at the Zombie Walk event in Asbury park and during some photo trips afterwards. This lens shines for portraits but is also stellar in landscape performance. And the best, you get a light sucker as a lens - you can shoot handheld in fairly dark indoor areas with ISO 6400. It can deliver wide open an outstanding bokeh caused in part by the 12 aperture blades used in this lens!
A7R, C/V 35/1.2 Nokton II lens @ f/1.4 (left) and f/1.2 (right): Fantastic blur-out effect, sort of 3D effect and simply amazing bokeh!
A7R, C/V 35/1.2 Nokton II lens @ f/1.4: with ISO 6400 and still 1/40 sec you can shoot handheld in dim areas.
A7R, C/V 35/1.2 Nokton II lens @ f/11: What else can you expect from a good landscape lens?
In summary, going forward with rangefinder lenses proved the right thing for my style of shooting. I compromise in AF but don't mind at all focusing manually. Rangefinder lenses have a much better MF ring and "play" to focus accurately in combination with the focusing tools provided by the A7R. I also like the built-style of the rangefinder lenses with metal lens body - I trust it more than the commonly made of plastic lenses nowadays. Overall the combination of two rangefinder lenses and the A7R is still a lot more compact and less heavy than my Canon 5D MkII with 35/1.4 and 50/1.2 lenses. One thing which I am not sure about yet is the performance of rangefinder lenses in infrared. I am very curious about this application since my intention is at some point to convert a second mirrorless body to full spectrum or infrared. So far I did not find any information how those lenses will perform in infrared - likely a matter to test at some point.
PROS of rangefinder lenses:
+ Size and image quality/sharpness if suited for the A7 series
+ Metal lens body
+ Better MF ring to focus accurately
+ Smaller lens filter threads allow to use smaller/less expensive filter sizes
+ Lower weight compared to DSLR lenses at similar lens speeds
+ More inconspicuous to use in public
CONS of rangefinder lenses:
- Price (there is no free lunch)
- Limited amount of rangefinder lens manufacturers
- Especially wide angle lenses can have issues with the A7 sensors (unsharp corners, color casts)
- Hard to find out about specs of older lens versions and their realistic market value
- High addiction potential (seriously!)
]]>
A few weeks ago, I finally grabbed a decent deal for the Sony A7R camera. I am still keeping both of my Canon 5D MkII DSLRs - one is for IR light anyway, the other one would function as second camera body in addition to the A7R later. I also bought the Metabones III Sony camera E-mount to Canon EF lens mount adapter. This adapter is not cheap (unfortunately $399) but the best option currently on the market to allow to use Canon EF lenses with AF or MF together with the A7 camera series.
Sony's A7 cameras arrive in a box with (very short!) USB cable to connect to a PC or Mac, and also to charge the battery plugged into the camera with the included USB plugin charger. Unfortunately Sony decided NOT to include a battery charger in the package - many complain about this in my opinion rightfully. Would it hurt Sony to include a new $50 battery charger for a camera around $2300? (A7R list price - Update: prices have come down, now in 06/2014 you can get the A7R for about $1800 or less). I don't think so. So I still need to get the Sony battery charger plus one additional battery - both items are currently back-ordered at most online retailers. Also interesting that you won't be able to use any transparent cellphone cover to protect the OLED display of the A7 series camera - it simply wouldn't stick. You are better off purchasing additionally for $14 the Sony screen protect semi hard sheet. Counting all of this - plus Metabones adapter, charger, additional battery, you will be paying about $2800. For this price, you can buy easily a Canon 5D MkIII camera or - if you intend to switch - the Nikon D800. So is it really worth it to go with Sony? Here is my summary and subjective impression:
PROS:
1. Weight&Size: amazing! The whole camera body fits by its length into my hand. It is very light-weight which makes it a perfect travel camera. The size fits in a small camera bag.
2. Operations: Some criticize that the buttons of the A7 series are too small or to cumbersome to use. I find it the opposite - I never had a camera which made it so easy to change aperture, exposure time, ISO, magnification, and exposure settings all in one hand and by looking through the viewfinder while doing all the changes! Other than the bit cumbersome C2 function button, the camera's button and wheel locations are well thought of and designed. I am a big fan of the EVF in the A7R - the display is bright and the functions can all be seen very well to make changes. Much better than in any Canon DSLR which I operated so far. The EVF is 100% field of view coverage! After a photo is taken, I also prefer to review it through the viewfinder - I can see details better in the EVF viewfinder than on the display especially when shooting outside.
3. Focus Peak Area: Part of camera operations, but I find it so important that I created a separate bullet point. It is one of the "must use" features for me in this camera. It makes MF a pleasure to use quickly and accurately. The outline of objects in focus is enhanced with a specific color (can be customized, I use red) when focusing manually. This can be combined with the MF Assist function which displays an up to 14x enlarged image. It is hard to miss a manual focus even at wide open fast apertures when applying those two functions.
4. LCD Display and OLED EVF: very crisp and clear LCD display which can be tilted according to the user's position to the camera. The OLED based electronic viewfinder is superb in resolution and reveals very well photo details.
5. Sensor: the heart of every digital camera - the Exmor CMOS sensor without optical low pass filter leads to a very high resolution with low noise and rich tonal range.
6. Image processor: BIONZ X image processor allows fast recording speed with 14-bit RAW for high detail and tonal range processing.
7. Wireless connectivity: comes with pros and cons, but overall it is a good thing to have. So far I used it rarely and rather prefer to download the RAW image files from the SD card directly through card reader to my PC.
8. Third party lenses: ideal camera for this. It even allows to use cropped sensor lenses and jumps then automatically into the APS-C size capture of the full frame sensor (similar function has the Nikon D800(E) series). The A7 series works will all kind of photo lenses most ideally made for 35 mm full frame. This opens a broad field of lens accessory which can be used with the A7(R) camera. The camera's mirrorless design allows not only use of SLR but also of rangefinder lenses with fewer lens elements which are smaller and often better in quality.
9. Camera body built: the A7R has a magnesium alloy body which is more resistant than the plastic body of the A7 model.
10. Camera balance: no issues so far - I am mostly using the Metabones adapter tripod mount or the lens tripod mount instead of attaching the tripod plate directly underneath the A7R camera.
CONS:
1. Manual: it simply sucks and develops into a patience test to learn about the camera. It just provides you with a very quick overview about its main functions but does not tell you how to operate the camera or which custom settings are best to apply. It took me a few days to dig through the menus and functions plus settings. I found most of my questions answered by googling it - I found that everything was already at least once asked in one of the many photo forums out there. Sony definitely needs to improve there. I wouldn't be surprised if people are unsatisfied with this camera because they don't understand the functions or how to use them.
2. Charging: without external battery charger, you need to rely on the charging of the battery inside the camera through USB cable. It takes 310 minutes to fully charge an empty battery this way. Also, the battery arrives uncharged in the box, so you need to wait about five hours(!) before you are able to use the camera fully charged. Again, Sony could have avoided this by adding the external battery charger into the package.
3. Battery consumption: is high. Because display or EVF view is always turned on, it drains the small battery rather quickly. Currently I only have one battery, but fully charged it lasted me for a day trip of photography so far. But it is better to have at least one spare fully charged battery with you.
4. Menu structure: needs to be improved. Some functions are hidden in sub-menus where you don't expect them to be. HDR is one example - the manual HDR option is conveniently located in the display view where you can select up to 5 photos taken in a row with a given range of under- and overexposure stops. This works fine with RAW files. There is another Auto HDR mode in the settings menu which only works with JPG files in the camera. I personally find this option rather useless. I am not convinced that users of this professional A7 series camera need in-camera JPG files anyway.
5. Remote Control: Oh well, Sony. You got me badly with this one - I tried for hours to get it to work with my Samsung Galaxy S3 Android cell phone via wireless or NFC connection. It didn't work. It is one of the worst documented features in the manual, too. I had no trouble connecting the A7R to my wireless router, and I also was able to directly connect my cell phone to the wireless transmitter of the camera. But Sony relies on the "PlayMemories Mobile" cell phone app to use the smartphone as remote control of the camera. When opening this app on the phone, it will disconnect any wireless connection first, but is then in my case unable to connect to the camera (it goes in an endless connection trial loop). NFC did not work at all either even my smartphone has this function. Currently I am hoping that a firmware update will fix this issue.
Update: I solved the issue to connect my cellphone to the camera. The mobile data plan of the cell phone has to be turned off first, and all old former DIRECT-tcE0:ILCE-7R wireless connection memorized in the smartphone WiFi log have to be erased in case you experience problems. This is more an Android issue with the connection than it has to do with the camera. When the connection between camera and cellphone is established through the PlayMemories Mobile app, it works really fine.
6. Commercial in-camera Apps: principally a good idea to have apps for specific camera functions similar to apps on a smartphone. Some apps come for free, and Sony allows you to download them through their support website either through your connected PC/Mac or directly through wireless connection of the camera (that's what I did). But the better apps cost you something - I really like the multiple exposure app for this camera since I enjoyed doing double exposures with film. What I didn't like here is that the "Multiple Exposure" app only allows me to take two exposures (no multiple as the name says!). I had to pay $5 for it. There are other useful apps e. g. for time lapse photography for the same price. Again Sony tries to squeeze out more bucks from you after you already purchased this camera plus Sony accessories. Those functions are included as standard in a more professional Canon camera like the 5D MkIII.
7. Light Leak: A7 camera series users described that light leaks through micro gaps between E-mount and attached lens or adapter in 4, 8, and 12 o'clock positions at very long exposure times. So far I did not experience this issue on my A7R camera. Nevertheless, I found a very simple and efficient solution to resolve this potential issue: I used a rubber band which USPS uses to wrap up stored mail when I am traveling. This white/yellowish 6 mm wide rubber band exactly covers the gap between orange colored mount on the A7(R) and adapter or lens attached.
8. Copyright info in RAW files: is missing. Currently there is no simple way to add your name into the saved RAW camera files EXIF extension automatically. I hope Sony will implement it later in one of their freeware software updates for the "Image Data Converter" program or in an in-camera menu option. The software itself works fine but has a some basic look and is much less sophisticated than for example Canon's DPP freeware RAW converter program.
9. Shutter noise: loud. So far no problem for me, I even like the feeling of an old camera shutter noise. But if someone wants to take photos in an unsuspicious way, you can be sure that this shutter will cause attention. It might be an issue for street photography or in concert halls for example.
10. AF: I have no experience with Sony E-mount lenses, they might focus well in AF with the A7R. But third party lenses like Canon EF lenses focus very slowly after being attached to the Metabones III EF adapter. The A7R uses a different AF system than commonly used in DSLRs, too. So far I decided mostly to use MF with EF lenses attached via adapter - I am simply faster by doing this and more accurate by using the focus peak area and the zoom magnification tool to focus. If you rely on fast AF with existing Canon or Nikon lenses, I would not recommend the A7 series to you. You are then better off with a good DSLR of one of the camera manufacturers instead.
Additional Comment after firmware 1.0.2 release: AF speed has improved. Still slower than directly on a Canon DSLR body, but definitely better than before. I still prefer to use my A7R simply in MF through the excellent focus peaking feature!
11. Weather-sealing: somehow questionable especially when using adapters and no Sony lenses. Even lenses and adapters sit tightly, I am not sure how much humidity still can creep in between the mounts. Under wet/rainy/humid conditions I would likely rather use my 5D MkII than the Sony A7R.
12. Compressed RAW files: Sony developed its own compression algorithm for RAW data which supposedly is lossless. It is unclear if still some recorded information could potentially be removed by this compression, but so far nobody including me has seen any disadvantage of this method. Still it might be a good idea at least to offer A7 series users to have files either saved as uncompressed RAW or slightly compressed.
WHO IS THE A7(R) COMPETITION?
Sony started a very interesting approach with the release of the A7 series last year - it is certainly a game changer especially in the full frame camera market. Principally, the A7 series competes with every DSLR manufacturer, but I believe it is mostly Canon which might suffer most of the A7(R) impact. Nikon already uses Sony's Exmor sensor in the D800(E) series - for most Nikon users the A7(R) only makes sense to allow third party lenses to be used or to limit weight and camera size. Canon on the other hand still sells older type of FF (full frame) sensors built into the 1Dx, 5D MkIII, and 6D cameras. Consumers unsatisfied with Canon's current approach to neglect or delay the release of a high MP/high DR sensor definitely will consider the A7R as alternative - I can count myself to this group. I like my Canon lens gear, but Canon does not offer me currently a camera with novel FF sensor in which I could be interested in. People who are shooting wedding/sports/events, or bird photography likely won't be attracted to the A7R due to its slower fps rate and slower AF. The A7R is predominantly made for landscape/architecture/fine art photographers who can make use of the higher sensor resolution and dynamic range by giving up on fast AF especially with existing lens gear other than Sony lenses. I doubt that many buy the A7(R) cameras to use them just with Sony lenses.
Also, the A7(R) competes with the Leica rangefinder market. Leica users can attach many of their existing Leica rangefinder lenses easily on the A7(R). Since those lenses are MF lenses anyway, it is only the camera body which changes (some Leica lenses work better than others on the A7 series due to different lens entrance pupils and thicker glass on top of the A7's sensor). Leica's electronic features in M series cameras are limited compared to what Sony's A7 series offers. Still the MF system between Leica M-series and Sony A7 series is very different. But seeing how quickly and accurately I can focus manually with my A7R, I can imagine that some Leica users think to use an A7 camera as alternative to the rangefinder-based M-series.
You don't need the Sony A7 camera series if:
1. You already have a Nikon D800(E) camera and have no other MF lenses
2. You rely on fast fps (frame per seconds) and AF only
3. You don't like small cameras with smaller-sized buttons
4. You are not interested in manual focusing or in any third party MF lens
5. Especially for A7R with 36 MP photo file size: You dislike having larger RAW and image files in post-processing
WHERE DOES THIS LEAVE US - SUMMARY:
The Sony A7R camera is not for everyone. Beginners will be overwhelmed by its functions, others might find the lack of fast AF and fps in this camera a deal breaker. Street photographers will dislike the loud shutter. I see the camera not as a replacement of a DSLR but as a great addition to have. I am mostly into landscape and fine arts photography, so this is a camera I was waiting for since a while. I am not only intrigued by its sensor, but even more so by its capability to be used with all kind of lenses. You might have old MF lenses which can't be used on a modern DSLR, or you see a good deal somewhere for a MF lens - no worries, guaranteed you will find an adapter which makes this lens work on A7 series cameras. The metal MF adapters cost less than $20 per piece! The small size of the camera comes handy and is ideal to take with me on travels. If weight is an issue, I can simply take a small and older MF lens with me to be used in combination with my A7R. I will review the quality of photos taken with third party MF lenses with the A7R in one of my future blogs, stay tuned!
The full frame sensor of the A7R is simply amazing. The difference to other existing sensors e. g. in Canon full frame DSLRs is huge. I didn't expect to see this difference when I bought the A7R. But the photos posted here in my blog didn't need post processing nor a graduated ND filter to take them - impossible if I had taken those with my 5D MkII. The shadows come with a lot more detail instantly, the colors appear richer and more natural as my eye sees them. There will be more for me to test, but after a bunch of first test shots this difference is more than obvious. To me it is the perfect combination of excellent electronics and very good glass which I own. The advantages of the A7R outweigh the cons mentioned above.
Consider that you will need to vest an additional $500 for adapters and accessories after you purchased the A7R. This does not make it a cheap full frame camera deal - in fact you need to ask yourself what you will need the A7 series camera for. I hope my blog facilitates your decision-making process. Furthermore, I am looking forward to the first Sony firmware update of the A7 series cameras due on March 19th.
]]>
I chose a variety of architecture, scenery/landscape, and closeup motives. Especially for the landscape photos I added a Wratten #15 yellow filter on top of my lens to increase the contrast of clouds in the sky and to highlight some light green tones from grass and foliage. Part of my photo tour to explore this B&W film led me to the pier in Keyport/NJ where I took infrared (IR) photos last year before hurricane Sandy devastated the NJ coastline. The pier in Keyport was destroyed by Sandy, too. When I came back there in July 2013 to take the B&W film photos, most of the pier was already rebuilt. I walked to the same positions at the pier where I remembered myself being in 2012 and decided to take similar photos at this place. This allows me now to compare the newer film and the older IR photos with each other. As I mentioned in my blog about IR photography earlier, I convert my infrared photos in B&W during post-processing.
The two photos below show the same boat located at the pier - the left photo was taken in infrared in 2012, the right photo with Ilford B&W film in 2013:
As expected, the IR photo shows better contrast and reveals clouds better and more dramatic. The Wratten #15 yellow filter helps to see the cloud structure in the film photo, but a read filter might have been the better choice here, too. The US flag stands out better in the B&W film photo.
The boathouse on the pier was newly re-constructed after Sandy had destroyed it. The left photo in IR shows the old structure, the photo on the right is the new B&W film photo taken one year later with the new house. Main difference is the rooftop and the new ladder:
The IR photos is richer in contrast while the film photo is more evenly leveled. The IR photos were taken with the Canon 14/2.8 L lens on full frame, while the B&W film photos were taken with the 17-40/4 L zoom lens.
The photos below (left in IR, right B&W film) show the structure underneath the main pier. I got a more contrast-rich B&W shot in IR with the old pier but also the film photo with the rebuilt pier has something going for:
The Ilford XP-2 film has an amazing tonal range in B&W which can't be beaten easily with a conventional DSLR camera. The film is definitely a good addition to digital camera gear.
]]>
PROS:
AF: the biggest strength of the MkIII. The camera offers many options to select areas or single AF points out of 61. The AF system is copied from the professional 1D series obviously. I tested it in combination with the Canon 50/1.4 EF lens, and was surprised to see that even without previous microfocus adjustment and in difficult light situations the center of the focus was edge on at f/1.4. One shot was enough to get it perfect - something which was very hard to accomplish with the 9 AF point system of the MkII. I also like that the 5D III has AF points in the corner of the frame which is ideal for portraits. I did not test the AI Servo mode, but I believe that it tracks much better moving objects than the 5D MkII does.
- High ISO quality: this advantage of the MkIII is mentioned many times in reviews, and I have seen it at ISO 6400 when a friend of mine used his MkIII at this high ISO number. I personally prefer shooting at low ISO, so I didn't go up higher than ISO 640. Up to ISO 640, I didn't see a difference in IQ between MkIII and MkII.
- Electronic level: Fantastic! I really like this new feature in the MkIII which is displayed on the LCD display. Since I was mainly shooting with my tilt/shift lens, I relied a lot on accurate leveling of the camera on my tripod. Normally I am doing this with my MkIIs by using the bubble levelers on the tripod and the head. But the electronic leveler is a bit more accurate and allowed me to get the parallel and vertical lines of structures lined out correctly much more easily.
- 100% viewfinder: Finally, Canon! I always wished to have a semi-professional camera with 100% viewfinder coverage! It is real "What-You-See-Is-What-You-Get" without using LiveView. I got used to add 2% to the 98% viewfinder in my MkII cameras, but it is easy to forget to do it when you ahve 100% viewfinder coverage anyway! Just to go back to the 98% is not so easy....in my opinion another big plus of things to have in the MkIII.
- In-camera HDR: People were raving about this feature in reviews, and I was excited to test it myself. Well, I spent several hours with automatic and semi-automatic in-camera HDR modes in the MkIII, and overall I was personally disappointed with this feature. I decided to use the in-camera HDR first (up to 7 single shots which can be automatically quickly fired with different exposures and which are adjusted by the camera) and then to to it manually in the way I am used to do HDRs in my MkII. The MkIII provided me with an instant HDR in JPG file format to see how it can look. So far I didn't see a convincingly good in-camera HDR JPG file! I recommend using professional HDR software and post-process the photos accurately at home for good looking HDRs (I prefer the natural HDR look rather than the overcooked tonal one). You can simply use the created HDR RAW files saved in the automatic in-camera HDR mode - they were obviously the same as in my manually taken HDR files. Yes, the in-camera HDR is faster, but it saved me only a bit of time. It can be advantageous if no tripod is on hand, and shots have to be fired quickly out of the hand. A maybe nice to have feature which some will use more often than others I guess.
- Silent shutter mode: I can see this as an advantage for photographers who want to take photos in churches or in concert halls. To me - I couldn't care less. I realized later that the camera was in silent shutter mode all the time, I didn't even realize this during my shooting. As I said, okay to have, just that I have normally no need for it.
CONS:
-
Biggest drawback of the 5D MkII was its limited AF capability which was exactly the same as in the older 5D classic. Now we got an excellent AF in the MkIII, but....the main drawback is the lack of new sensor development! This is where Canon cut back in this model - for some it is not a big issue who don't want to deal with larger file sizes or just with more MP. Others like me miss an upgrade of a new sensor, something similar to the Nikon/Sony Exmor sensor which has better resolution and higher dynamic range. I would love to have bigger files to be able to crop photos in case of wildlife shots on full frame for example. It didn't happen, for me it was disappointing news when I saw the sensor specs of the MkIII. Still the MkIII comes with new Digic5+ processors for more processing power. I am sure some processing algorithms also were improved compared to the MkII. But other than this, the IQ (especially at lower and normal ISO numbers) is the same as in the MkII. RAW file sizes are about the same as in my MkII what is expected.
-
Ergonomics: I added this point underneath the cons because one major drawback compared to the MkII is the way to magnify photos on the camera screen - in the MkIII you have to press the zoom function on the left camera side first and then use the wheel on the right top camera side to zoom in or out. Something you get used to, but I didn't see it as an ergonomic improvement. The MkIII was sitting in my hand as well as the bit smaller MkII body - both are equal in handling otherwise.
-
Price tag: the camera is simply expensive. It has come down now a bit to more reasonable numbers, many purchase it in the US via the Canon refurbished program. Some justify the price because of its professional AF system, but since it is copied from the 1D series, and I can't see why it makes this camera so expensive.
Overall the 5D MkIII would be my dream camera if it had a better/newer sensor in it which I consider the heart of any digital camera. I am not a wedding photographer or photo journalist who relies on quick and accurate AF. The expensive price tag makes it a bit unattractive against other options out there - the entry model full frame 6D camera for example or compared against the Nikon D800E for example. It really depends on the main usage of your camera(s) and your style in photography - I am more a scenery, landscape, architecture, macro, and fine art photographer, AF is just not so important to me. I decided to stick to my MkII camera models until Canon hopefully announces a successor model with (much) better sensor.
]]>Until now: a friend of mince convinced me to test out the 35 mm Fujichrome Provia 100F slide film which supposedly enhances the color saturation. I re-activated my older Canon EOS500 film SLR camera with this 36 slide film (surprise, when I added both of the two removed eight years old Lithium 3V batteries into the camera, they were fully charged and functional!). I took my SLR camera on several trips to shoot with it in parallel to my 5D MkII DSLR camera - often I even composed exactly the same motive for later comparison.
This blog describes my findings in regard to differences and similarities comparing side by side my film and my digital photos. The slide film was developed in a professional photo studio and the negatives scanned via E-scan and saved as medium-sized JPG files (3-4 MB size), good enough for some minor post-processing. For a higher resolution scan I would have been charged a lot more, about $3 for each photo to be scanned and saved as Hi-Res TIFF file. Since I didn't know the outcome and quality of the final photos, I decided to stick to the cheapest E-Scan option. Overall I paid for film development, scanning, photo CD and shipping plus tax $34.51.
People watching my postings on my website here might be already familiar with some of the photo motives which I present here in this blog. Be aware that I used the same lenses for the presented photos, same apertures and similar exposure times at ISO 100 to allow valid comparison.
Beginning of November last year we had a bit of early snowfall in East NJ, so I used the opportunity to take a few landscape photos in my neighborhood. I will always post here the digital photo on the left and the film photo on the right.
You can instantly see that the red and brown color tones appear more saturated in the film photography whereas the original digital file came out a lot more blueish. I had to change to warmer color temperature to get close to the snow in the more original looking film photo. The digital photo is a notch sharper but this can be also due to the lower resolution scan of my film photo.
In the second scenery photo below I tested the high contrast performance - purposely I did not want to create a HDR here but stick to the original shot only.
Main difference is the difference in the sky color - more dark blue in the film photo, also we see more saturation in the remaining fall foliage and in the water reflection. Overall the film photo has a stronger contrast, too.
Both cameras were with me on a trip to visit a few lighthouses at the NJ coastline. It was a clear and sunny late fall day, so I had an ideal situation to test the film performance in the settling afternoon sunlight which is richer in yellow and red tones. The first comparison shows the Cape May lighthouse below:
Again we see stronger orange/reddish color saturation in the film photo on the right with a different blue in the sky. The digital photos on the other hand expresses better the green foliage which appears more as a brown in the film photo. The film photo appears warmer while the digital one has a colder touch. We can see this trend consistently in all photos here.
Afternoon sunlight at the East Point lighthouse showed an even bigger difference especially in the reed in the foreground. I even had to reduce the saturation of the film photo to make it more realistic.
The Red Mill in Clinton/NJ offered another possibility for testing with a lot warmer tones in the film photo:
Interesting also the difference in the photos of the old quarry building next to the mill which includes a bunch of colors on the outside:

More examples revealing differences in the saturation are shown in the following examples:
An indoor shot taken inside the St. Augustine lighthouse in Florida also reveals differences in the color saturation. The film exceeds a bit in the reddish tones here: and the higher contrast does not reveal the details in the stairs as much:
The color of the water reflection is not as nice and blueish as in the digital photo on the left, but this is likely the result of having a higher saturation grade in the red which makes the water look more grey:
Overall the color is expressed much more saturated in this film as also seen below in the cathedral in St. Augustine, FL. I can definitely confirm that the film saturates strongly the red and yellow colors and has much more contrast in dark areas.
Who is the winner - film or digital? The simple answer is that there is no winner at all, it is like comparing apples and oranges. It all depends which kind of film is used and also which kind of setting provides the best effects for the available light. I did not expect to see such big difference here, but the confirmation of the effects of this high color saturating Provia film makes sense. I am sure that the development process of the film played another big role here, but this was out of my control.
For me at least it was a good experience to trust my manual film shooting skills which I learned more than 28 years ago with my first SLR camera. I can recommend shooting film even if you just started out in digital - it helps you focusing on the essence of photography and to be quantitatively and qualitatively selective before releasing the shutter of what to shoot.
]]>Wide angle T/S lenses are commonly used in architecture and landscape photography, but also with longer lens focal lengths for closeup photography of jewelry, even sometimes for portrait work. Architectural photography commonly makes use of the shift function in the T/S lenses: Falling lines of tall buildings can be reduced or fully avoided. The image plane and therefore the focus are kept parallel to the subject. There are post processing programs out there which correct falling lines in photos taken with regular lenses, too. This gives a more natural look very similar to a photo taken with a T/S lens, but it will crop the photo without keeping the regular film or senor proportions of the negative or RAW file.
Shifted vertically, lines can be kept parallel to the subject which leads to a more natural look as seen in the central University building at Princeton University below. This was taken with Canon's 24/3.5 T/S lens where the lens was shifted 10 mm up.
Instead of shifting the lens vertically, sometimes it is useful to have it shifted horizontally to create a distortion-free panorama photo. The crosswalk photo is a stich of three single photos - one shifted horizontally fully to the left, one center one (not shifted), and one shifted to the right. Have a look at the pillars - they are all straight, only the one far left is bent a bit due to the lens angle towards the subject. By stiching three 24 mm T/S photos together, the field of view is similar to a 14 mm lens! Landscape photographers apply this technique to create a natural looking super-wide angle view.
Lens tilting can create the "miniature effect" - focusing on one specific subject in the frame, and making the surrounding area blurry. The photo below taken at the Red Mill in Clinton, NJ shows this effect - I used the few mm tilted 24/3.5 T/S lens in combination with a 2x teleconverter making it a 48 mm f/8 lens. The shallow depth of field surrounding the fisherman in the middle of the photo was only created by tilting the lens out of its focal plane following the Scheimpflug rules.
The lens was also shifted a bit up to have the sensor plane parallel to the corner wall side of the Red Mill behind. Combination of shift and tilt can work nicely, but it takes a bit trial and error to get used to. A camera equipped with LiveView is very helpful here since it allows you to see instantly the final composition of the photo.
Instead of creating more shallow depth of field, tilting the other way allows much deeper depth of field at a fairly low aperture number (more wide open aperture). The photo with the old barn in Valley Forge Park, PA is an example for this: To have both the brick wall in the front and the building in the back in focus, normally you would need a small aperture like f/22. This shot again was taken with my 24/3.5 T/S lens, but at an aperture of f/4.5. Tilting and shifting the lens in the right directions allows to focus both background and foreground reasonably sharp and keeping the sensor plane parallel to the structures. If you look closely, you will see that the plant branches in the middle are unsharp - the result of the Scheimpflug rules since the depth of field is no longer horizontally aligned when the lens is tilted!
T/S lenses take some patience and experience to get used to. You always need a tripod to work with a T/S lens. Also they do not come with AF. In case the lens is shifted and tilted, I recommend checking the focus confirmation with the enlarged area finder in LiveView. Exposure also changes with the shifted direction of the lens. But main disadvantage is the price - they still cost about $1K as used and older lens versions. Latest new T/S models are at least double this price. They have less vignetting and a better rotation system of tilt and shift being parallel or perpendicular. I am still using the older (first) version of Canon's 24 mm T/S lens, and so far I am fine with it, too. If you once get used to T/S lenses, you will always carry one with you if composition allows to use it for.
]]>It is mostly a matter of taste to like this effect or not - I personally love a beautiful and especially colorful bokeh effect in photos taken with a wider open aperture. Bokehs can look fairly unattractive at smaller apertures due to less circular shaped patterns (which means there are more edges visible leading to polygonal shapes and hard-edged bokeh). The more aperture blends a lens contains - preferably even with rounded edges - the better looking is normally the bokeh effect. The photo on the right was taken purposely to create this out-of-focus effect (135/2.0 at f/2.0).
How can we explain this effect from a technical point of view? In out-of-focus areas each point of light displays an image of the aperture of the lens, normally a round disc. Depending on the lens construction and the aperture used for the photo, you might see big full circular shapes, oval ones, or donut-like discs. The brightness of this disc largely depends on the lens correction, too (it means how they are corrected for spherical aberration). Some modern lenses use so called apodization filters to even enhance a smoother looking bokeh effect.
Often bokeh effects appear in the photo unexpectedly. When I took the shot shown below of a mockingbird (which was fairly aggressive against me when I disturbed it), I later found the nice looking bokeh discs on the left which fitted perfectly to the overall composition. This photo was taken at 400 mm focal length at a smaller aperture of f/7.1.
In my experience, the best bokeh effects can be often achieved by highlighted backgrounds, sun reflections from the side hitting foliage/leaves, light reflections on water or other shiny surfaces. You might see that some of your lenses are better than others in your collection to reveal a beautiful looking bokeh.
]]>
When I first started many years ago in film photography, I herited two simple M42 thread based simple prime lenses with 28 and 50 mm focal lengths. I am still convinced today that starting out with a simple 50 mm prime lens (no need for a super fast lens copy at this point!) is the best way to learn about composition and photography. It still amazes me today what you can do with this focal length on full frame (this is the 35 mm film format). Just go a few steps forward or backward and voilà, you get the perfect composition even mostly distortion-free. It is a decent portrait lens to do either head shots at closer distance or family portraits from bit further away. And with a simple close-up lens or extension tube between lens and camera, the 50 mm lens can be converted into a decent macro lens, too - only to name a few examples. Recently I took this infrared photo below with my 50/1.2 prime lens - I had to walk to the right spot to frame it the way it is seen here, but no further processing was necessary in the composition!
Later in life I switched mostly to zoom lenses for several reasons: (a) Price: Decent zoom lenses are still quite a bit cheaper than faster prime lenses in a similar focal length.
(b) Convenience: the zoom lens covers a broader range of focal lengths which avoids changing lenses too often and having the risk of dust getting inside the camera and on the sensor. This can speed up the "snapshot" effort to capture something quickly - in case a prime lens needs to be changed first, the critical moment will have vanished for sure.
(c) Weight: Instead of carrying a bunch of prime lenses, one single zoom lens is easier portable which is a big advantage for travel or on hikes for example.
Seeing this, why would anybody bother with much more expensive prime lenses? Well, there are a couple of good reasons: (a) People often claim quality of primes having the edge over zoom lenses. This was definitely true in the past, but needs to be a bit more elaborated for more recent times. When comparing excellent prime lenses with newer zoom lenses at the same applied aperture, you will not see a difference easily. All big photo gear brands have now new top quality level zoom lenses which compete easily in photo quality with prime lenses in the same focal length. There is a different story for cheaper and slower zoom lenses, especially so called super-zooms which extend over a broad range of focal lengths (e. g. 28-300 mm) plus having some macro capabilities. I recommend to avoid super zoom lenses - their performance is very weak towards the long end (loss of sharpness and especially in contrast), and they tend to show more distortions at the wide end. A super zoom lens is an optical compromise to make the best of covering a broad focal length range. By knowing its limitations it can be still used sometimes in a decent fashion under good light conditions - I also own one of those fairly cheap super zoom lenses, and I used it a few times for short travels where I couldn't take a lot of gear with me. I was lucky enough to get this close up photo of a sea lily done with my 28-300 macro zoom lens from a distance!
(b) Speed: In my opinion the biggest unbeatable advantage for a prime lens - the main reason why I went back using mostly fast primes. Prime lenses in general have the same speed or are faster than zoom lenses. My prime lens setup consists of the 35/1.4, the 50/1.2 (and 50/1.4 which is also very good), the 85/1.8, and the 135/2.0. Together with a 1.4x teleconverter I can convert the 135/2 lens into a 189/2.8 lens which covers the medium tele range. Speed is important for taking photos under low light conditions, for night photography, for portrait shots, and for better auto focus (AF) accuracy. More light can get into a fast lens at its widest open aperture still providing a focused image with a shallow depth of field (DoF). A good example is the night shot in Holmdel Park below which was taken without tripod support under very dim light conditions with my 35/1.4 lens at f/1.4.
(c) Weight: This claim really depends. The faster the lens, the more and also bigger glass is built into the lens body which increases the weight. My 24-70/2.8 lens is heavy, but adding the weight of my 35/1.4, 50/1.2, and 85/1.8 lenses, I am nearly at the double of the weight of the zoom lens (950 g for the zoom, 1600 g for the set of primes). So the weight argument is a bit vague here in case somebody wants to cover the range of a zoom lens with several very fast prime lenses. It makes sense on the other hand when comparing two sort of prime lenses with each other - the 50/1.2 weighs 590 g, while the 50/1.4 (one third stop slower) weighs only 290 g. That's why I am keeping the 50/1.4 - ideal to reduce weight if needed and still having a fast lens!
Personally I often mix up both of the worlds - depending on the situation, I sometimes choose my 50/1.2 in combination with my 70-200/4 IS lens. For landscape shots I always take my 17-40/4 and my 24/3.5 T/S lenses accompanied again by my 70-200/4 IS. For far tele ranges I only have a slower zoom lens, the 100-400/4.5-5.6 which was so far always sufficient to me. For close-up and macro studies, I often only take primes like my 100/2.8, 105/2.8, or 65/2.8 macro lenses. I also managed to take fantastic close-ups with my 24-70/2.8 and with my other tele zoom lenses by using extension tubes or a reversed lens setup (this setup will be described in my future macro photography blog). The dragonfly photo below was taken with my 70-200/4 IS lens, 1.4x teleconverter, and 12 mm extension tube.
Overall, there is nothing wrong using a good zoom lens! It provides more flexibility and often reduces weight. For more creative photography, I recommend using prime lenses. Just because the depth of field effects are so much better with fast primes. My photos are taken with a broad mix of different kind of lenses - in the end the final photo and the composition counts, it is the photographer's job to ensure the most is made out of the wanted effect no matter how this task is accomplished. Tools (related to lenses) are not just tools, some can be applied better for one kind of job than others. This makes photography exciting!
]]>Fast lenses need larger glass since it needs to accommodate for the larger maximum aperture hole of the blades. The size of the lens also depends on the focal length - longer focal lengths need larger glass, too. And now we see the two main disadvantages of fast lenses - weight and cost. Larger glass requires larger lens barrels, more difficult optical design, and more sophisticated quality control of the lens parts. Most modern consumer zoom lenses are slower lenses with maximum apertures between f/3.5 and f/5.6. They are light and less bulky - ideal for carry-on luggage and traveling.
But fast lenses have a few unbeatable advantages speaking for themselves: normally lenses are sharpest a few stops beyond the maximum aperture. A 50 f/2.8 would be likely sharpest at f/5.6 or f/8. If we now have a 50 mm lens with a larger maximum aperture of f/1.4 for example, we suddenly reach the peak of lens sharpness already around f/2.8 to f/4.0! This means we can work under much more difficult light conditions with wider open apertures and also achieving the same sharpness!
Faster f-stops allow the photographer to create much more creative photos by making use of the shallow depth of field (DoF) at wide maximum aperture numbers. The DoF at f/1.0 is so shallow that focusing on the right spot gets extremely difficult. Fast apertures are also very demanding for every autofocus (AF) system in cameras since it makes it harder and harder for the electronic focus system to determine the focus spot accurately enough. Microfocus adjustment of lens and camera together is highly recommended here to compensate for tiny camera body and lens variations which can otherwise easily lead to front- or backfocus issues. Unfortunately not every DSLR camera has this option included yet. Beautiful DoF examples can be created with flowers like the one on the left. The center is kept sharp, while the petals become more blurry with a wider aperture which gives the photo some sort of motion effect.
Bigger lenses let a lot more light pass through the sensor and the viewfinder itself! When I bought my first fast lenses, it amazed me how much brighter the view through my fast lens got. Manual focusing was so much easier! Sometimes the light transmission was so good that I had to underexpose my photos with up to -2/3 stops of exposure compensation. My 50 f/1.2 lens - it is the fastest lens which I own so far! - is a good example for this phenomena. Of course this effect is perfect for shooting in dim light conditions or especially in the night. The photo of the shell was taken under a dim light and manual focus with my 50 f/1.4 at f/2.2 without tripod support.
Often forgotten is another quite interesting positive effect of fast lenses - the very smooth bokeh effect. Bokeh derives from the Japanese and stands in photography for an aesthetic quality of blur. This effect is mostly caused by the lens design itself and by the shape of the lens aperture blades. Smaller apertures lead to more unwanted hard-edged bokeh, while fast lenses with wide maximum apertures give desirable smooth bokeh circles. A good example for this effect with a fast lens is one of my Christmas photos below.
I used my 135 f/2.0 lens wide open at f/2.0 for this shot. The out of focus lights appear in circular or oval shapes with no sign of edges which gives a mix of unreal and dreaming effect.
It takes some effort as amateur to vest into a bunch of fast prime lenses. But I guarantee you that you will hold onto them because they enable you to take photos in a way you would not be able to do with slower zoom lenses.
]]>
It is surprising that I never had to change contrast or saturation of taken RAW photos with this lens - the color reproduction is superb, you might need to underexpose a bit to achieve better contrast especially at wider open apertures.
Main issue of this lens is getting lens flares opposite to the position of the light source. This is nearly unavoidable with such 180 degree field of view. Flares sometimes create additional artistic effects. Best way to remove those flares is to apply a circular crop of the taken photo in post processing. Other 8 mm prime lenses might be better in this regard and not as prone to flaring - but they cost at least more than twice the money and have no full metal lens body!
The lens allows to use apertures between f3.5 and f16 in 6 stops. Best sharpness is achieved at f8-11. Chromatic aberrations are much less than I expected after reading some reviews. In fact my Canon 17-40 mm f4 L lens shows more purple fringing at 17 mm uncorrected than this lens does.
The photo on the left is an ideal situation for making use of the circular 180 degrees - the crosswalk and the architectural design of it shines within this view. Just make sure that your shoes won't be in the photo!
Architecture is one of the best situations where this lens can be used. The photos below were taken inside a mosque which is located inside a castle garden of my hometown in Germany. Both are HDR (high dynamic range) photos to compensate for the bright light coming through the windows and the darker inside of the room leaving the bright colorful wall paintings as seen with your eye. The photo on the left is the central view, while the right photo is directly pointed towards the circular ceiling.
Looking more into creative aspects, the photo on the left shines a different light on a very common object. Can you guess what it is? The circular distortion brings out totally different elements in the perspective view.
Another example is the photo below - as you might have already guessed, it shows the inside of a hot air balloon. At the balloon festival they charged visitors an entrance fee to go inside balloons and to take photos - here I found my Peleng lens to be a useful spy lens! I just needed a brief moment outside at the entrance door to take this photo through the opening - and got at once the whole inside area.
Fisheye shots allow for unusual compositions like the photo of the inside of a wedding pavillion outside. The round roof shape was ideal for the circular field of view at 8 mm full frame. I was lucky enough to get the cloud structure into the center.
If you want a fun lens to do some more creative shots of landscapes and architecture without getting too serious about it, then this is the right lens for you. It is not my most commonly used lens, but there are situations where it is just the best to cover the situation.
]]>The anti-alias and the hot mirror filter (AA/ICF) in front of my full frame 5D II camera is very strong - I can confirm posts of disappointed IR photographers who tried the IR filter-on-lens method with this full frame camera. Very long exposure times about 30 seconds are needed, and unfortunately some regular light passes through due to the very long exposure. The IR photo doesn't look right, the white reflective tones are all greyish looking. Post processing can't resolve this either.
Finally in April 2012 I had a second 5D MkII camera body converted to an infrared camera with 715 nm cutoff filter. To do this, the AA/ICF filters in front of the CMOS sensor had to be replaced. The ultrasonic sensor cleaning was disabled, too - the piezo strips of the cleaning device are directly glued on the AA/ICF which had to be removed.
I have used now my IR camera on many occasions, and it is a blast! I am able to create photo compositions which are just impossible to do in regular light or normal B&W photography. Clouds and foliage appear bright and very rich in contrast, while water is mostly pitch black.
This moment on the left photo remained only for less than 2 minutes, and I was fortunate just to have my IR camera with lens ready to take a shot of this scenery! This picture in regular color would look much less impressive.
With a 715 nm cutoff filter, still some light will be able to pass through the sensor. By converting the red/blue color channels in post processing, even some sort of color photos are possible. Personally I like it with blue sky in the background and white foreground as seen in this photo below. Especially green foliage (grass, leaves, plants) looks very vibrant in infrared. The chlorophyll in the plant cells is known to reflect infrared light which is registered by the camera. The more infrared an object reflects, the more brighter it will appear in the photo.
This allows to take very contrast-rich photos which cannot be taken in regular light or the same effects achieved by professional post processing software. My converted IR camera can be used in infrared nearly the same as my regular light camera body. Focusing works the same (it is calibrated after the conversion, but I recommend also using microfocus adjustment for commonly used lenses). Metering is a bit more tricky - it can change severely by just moving the camera from a specific angle to the sun for example. Get used to manual mode or at least under/overexposure settings! +/- 1 to 2 stops exposure compensation settings are totally normal.
This goes in line with using one of my favorite lenses, the 24 mm f/3.5 tilt/shift lens. I love this lens for architectural and landscape shots since I can avoid distorted lines by shifting and increasing (or decreasing) the depth of field (DoF) by tilting. Now I can use my favorite wide angle lens in infrared, too! The photo below which was taken inside a castle garden could not be accomplished with a regular 24 mm wide angle lens - do you see the straight vertical tree lines? Infrared gives the additional "touch" by showing the young leaves and bushes in a bright contrast to the dark tree stems.
Other than nature, IR photography is a useful tool in the mechanical/technical area. Its better contrast-rich photos bring out details a lot better and appealing. The HDR (high dynamic range) photo below of an opened turbine of a FedEx cargo airplane was taken at 17 mm focal length. Small differences in light give a glow to some tubes and parts, while other structures remain darker.
Last but not least my IR-converted full frame camera allows to take appealing portrait shots! One IR portrait photo of mine can be seen in the "About" section of my website here. Skin looks smoother and more even than in regular light.
Please feel free to check out my infrared photos on my website! They can be found in several galleries, with some of them in the infrared gallery.
]]>