Welcome to my Photo Blog!
Small and Overlooked but a Hidden Gem: Cosina-Voigtlander 25/4.0 Snapshot-Skopar LTM
This photo blog is about the smallest 25 mm wide angle lens made - the Cosina-Voigtlander 25/4.0 Snapshot Skopar lens. I purchased this lens as nearly mint copy online to have a wide angle LTM lens to use with my Leica IIIc camera. I got it for $200 which was a very good deal at the time. I didn't want to spend a lot of money for a LTM lens. I could also use it in combination with my already existing external metal combination Voigtlander 21/25 mm viewfinder (the newer round one model with improved optics than the plastic body predecessor).
The lens is tiny - without hood and caps only 35 mm from rear to front. The lens fits conveniently 39 mm filters - standard diameter size of many Leica M lenses. The small lens size comes with one debit - it has no rangefinder focus coupling. Instead the lens allows quick focus with a click-stop focus ring applying zone focusing: it has stops at 0.7, 1, 1.5, 3 meters, and infinity. I was skeptical when I first tried this lens and afraid to have many out of focus photos - but the opposite is the case - it is very hard NOT to focus correctly with this lens. The wide angle of 25 mm allows a good wide range to be in focus - therefore the lens does only supply a very simple hyperfocal distance scale. More is simply not needed - already at f/4 and a rough estimate of the focus point will nail the focus. Aperture f/8 is a guarantee to have everything in focus. I never used this lens at an aperture smaller than f/11 (meaning f/16 or f/22). I am used to the metric system, so having the distance scale in meters is a benefit to me. It might be a culprit for somebody used to the ft distance scale though which is not printed on the focus ring.
I also like the lens design a lot - both focus and aperture rings are small but can be easily moved. The focus ring has a tiny metal focus tab which has to be used to turn the focus ring. The focus ring does not allow to be turned directly on the ring itself. I personally prefer turning focus rings just on the checkered ring pattern instead of using the focus tab. But I got quickly used to turning this ring by using the tab. The distance locations from minimum focus distance (0.7 m) to infinity are very close next to each other which makes it very easy to quickly move from minimum distance to infinity quickly.
The aperture ring has click half stops from f/4 to f/22 and contains 10 aperture blades.
The lens comes with a small round metal hood which seems to be sufficient to avoid flares from my experience with this lens so far. The round hood can be screwed into the outside lens thread. It has one debit - if a 39 mm filter is attached before the hood ring is mounted, the hood often does not fit outside the attached filter. I sometimes simply push the round hood loosely onto the outside of the filter to allow some flare control.
The Voigtlander metal front lens cap sits both on the metal hood ring or directly on the lens itself. The cap sits a bit better and tighter on the hood ring. The lens has a quite long rear plastic lens cap to allow for the protruding back lens element. Important to hold on to this cap because it is unique for this lens.
The lens is built very well with full metal housing. Only debit as in all of my other Cosina-Voigtlander lenses is the too easily removable black paint. The paint starts to loosen first at the aperture and lens holding rings. The silver metal starts shining through - it does not affect functionality of course but will certainly affect the used lens value just for viewing reasons. None of my black Leica lenses experiences the same issue. I wish Cosina would do a better job with the black paint on their lenses.
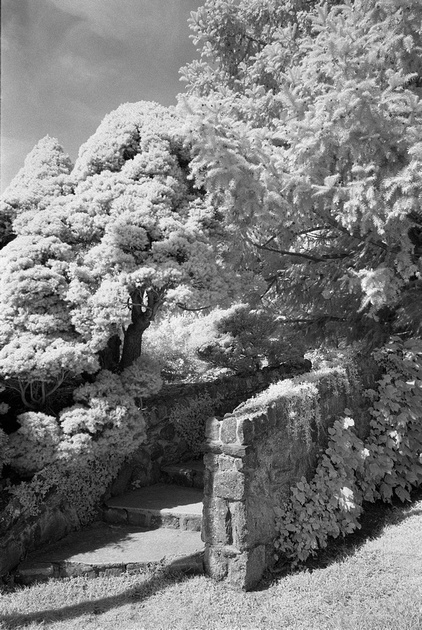
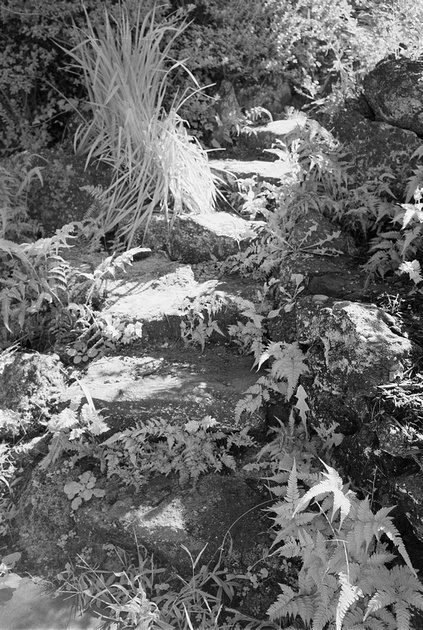
The lens performs very good optically. B&W photos turn out crisp and sharp with good contrast. Colors appear with excellent tonality. There is barely any corner vignetting wide open and certainly not at f/5.6 and smaller. Big and often overlooked benefit of this lens is its capability to perform excellent in infrared light. There is no IR hot spot seen at f/8.
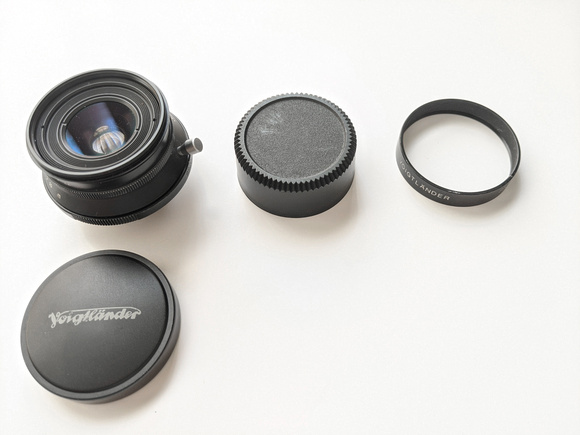

Photo above: Cosina-Voigtlander 25/4.0 Snapshot Skopar LTM lens with caps and round lens hood
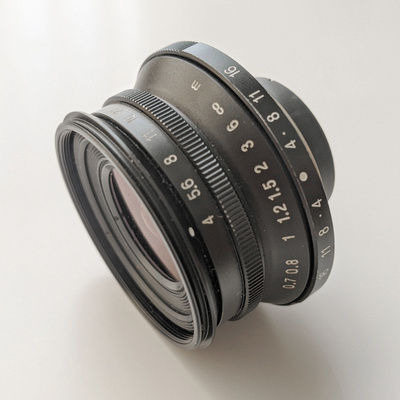

Photos above: Cosina-Voigtlander 25/4.0 Snapshot Skopar LTM lens from side and rear view
The lens was discontinued over 10 years ago but can still be found as used copy online. The name "Snapshot Skopar" likely refers to its potential usage in street photography due to its fast zone focusing capability. But the lens can be used in far more situations other than street photography. It's a perfect small and light travel companion to get the wide shot (85 grams weight). Cosina made a similar 25/4.0 M-mount lens without the click stops of the focusing ring. There is also the discontinued Cosina-Voigtlander 25/4.0 Color-Skopar M-mount lens which has rangefinder coupling and focusing. It is a bit heavier with 144 grams. Both lenses have 7 elements in 5 groups.
I haven't tested my CV 25/4.0 Snapshot Skopar in combination with my digital Leica M-E 240 yet but will add photos taken in this combination when available. I have only seen that this lens doesn't work well when attached to my Sony A7R - severe corner vignetting with purple colors.
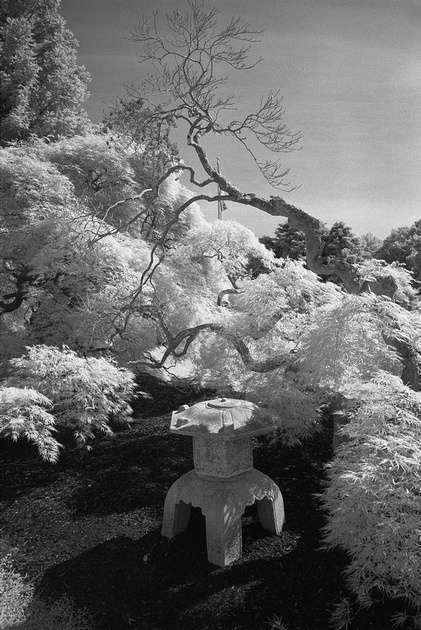
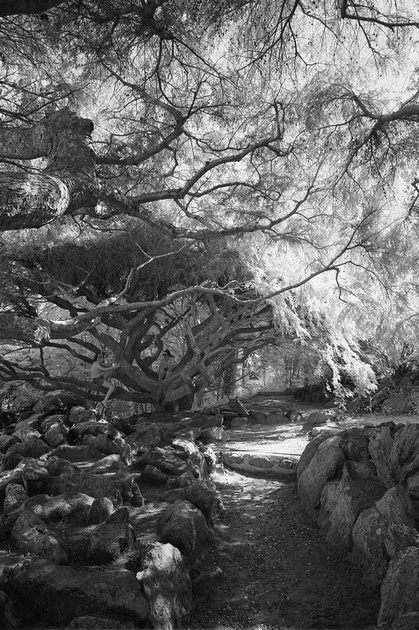
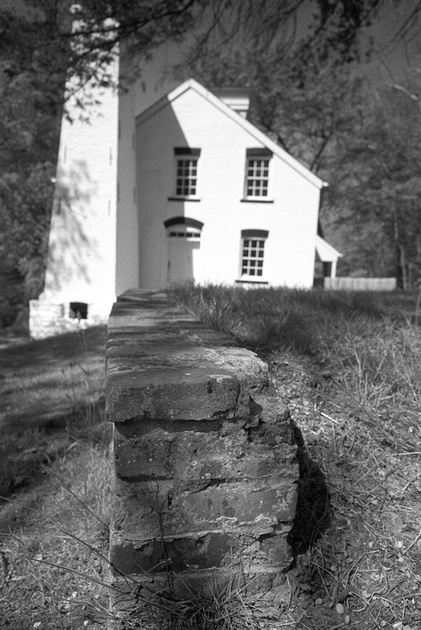
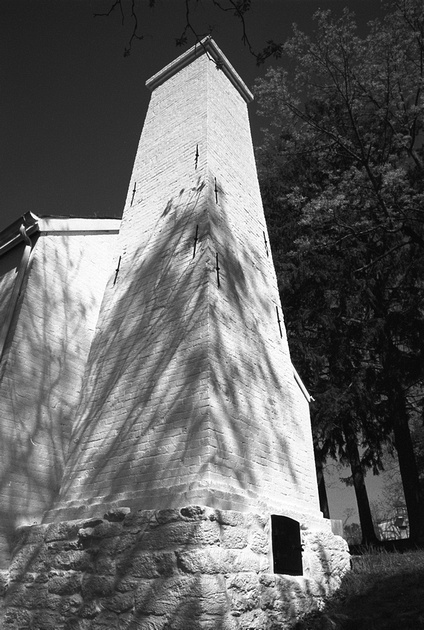
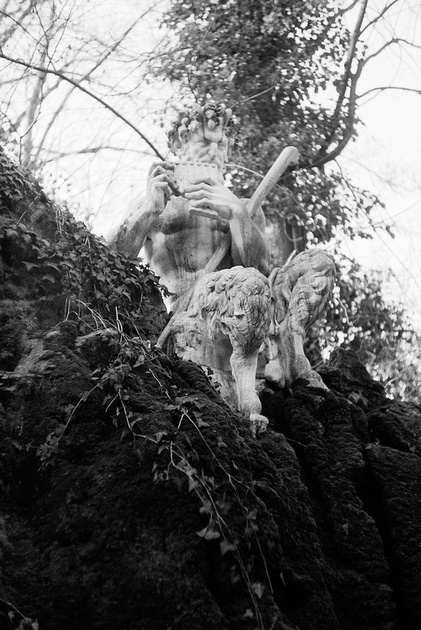
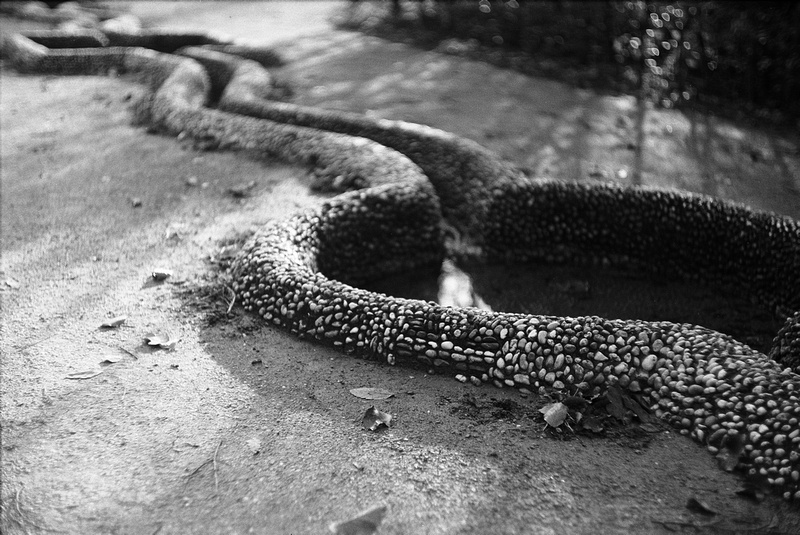
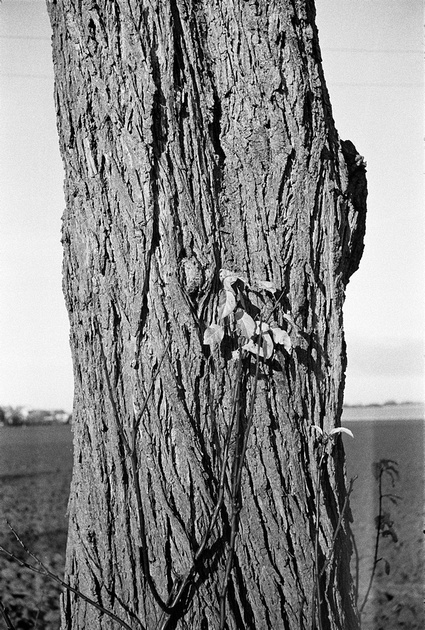
A few example photos of the CV 25/4.0 Snapshot Skopar lens mounted on my Leica M6 with LTM/M adapter and Rollei Infrared 400 film:
Taken in combination with Leica M3, LTM/M adapter, and Ilford PanF+ 50 film:
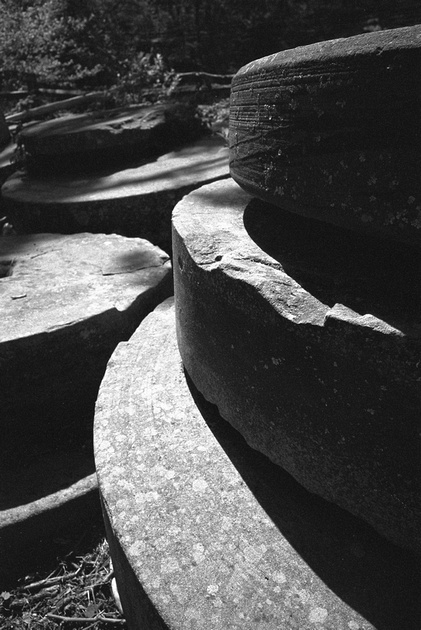

Taken in combination with Leica M6, LTM/M adapter, and Kodak Porta 160 film:
 Cliffwood Beach, NJ - Kodak Porta 160 film

Leica M-E 240 Review
After using Leica LTM and M cameras for five years, I decided to add a digital Leica M camera. Main reason for me was to use my good LTM and M lenses on a suitable digital camera without adapter - I managed it well to use my rangefinder lenses with my Sony A7R camera for many years, but especially ultra-wide rangefinder lenses caused some color fringing and blurred corners of the full-frame sensor due to the thicker sensor stack used in the A7R. Problem with Leica M cameras is of course the price - I am writing this blog shortly after the latest flagship model - the Leica M 10-R - was released for over $8K new. But even when looking for used Leica M 10 cameras, the price tag was still around $4.5-5.5K. As I learned from buying Leica M mount lenses used, patience is key to wait for a suitable offer. One day I found a Leica M-E 240 offered on a local online sales platform for a good price. The M 240 sensor has a bit lower dynamic range (DR) than its M 10 successor and the high ISO is limited to ISO 6400 but the 24 MP resolution is the same as in the M 10. Not a biggie for me since I know that I am rarely needing high ISO in my style of photography and can live with a bit less DR. I met with the seller and it turned out that the description of the camera stood up to its promise: it was a nearly brand new M-E 240 originally purchased in summer 2019 with only about 800 photo frames taken. No scratch or any kind of mark on the camera either, also the sensor appeared perfect. I bought the camera and so far have no regret of doing this purchase. Later I found out that the M-E 240 was only produced for a short period of time in 2019 - only 750 cameras were made. I believe I got a great deal regarding price/quality ratio - impossible to get with any kind of M10 camera models for a while to come. The only compromise I had to make was in regard to sensor resolution - I was originally hoping to keep a resolution similar to my Sony A7R with 36 MP full-frame, so 24 MP was pulling me back to my Canon 5D MkII shooting days I thought. But meanwhile I am glad that I made the purchase since the M 240 sensor has benefits over the older generation of Canon 5D MkII sensor from 2009 (for example the M 240 has much better DR!). I summarize my pros and cons seen in the M-E 240 in bullet points below:
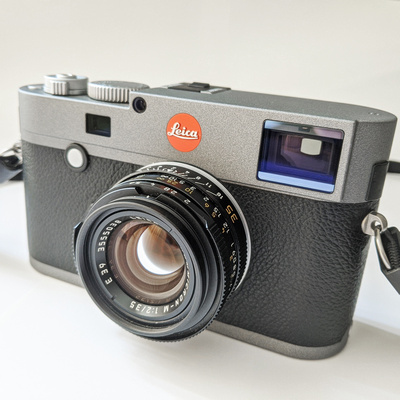
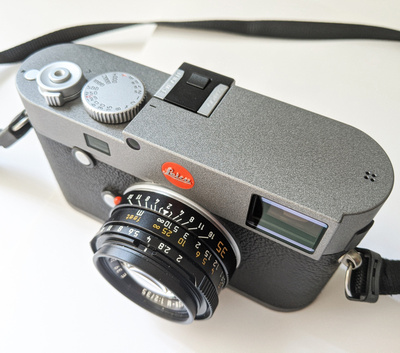
Photos above: Leica M-E 240 with Leica 35/2 Summicron-M vers. IV (pre-ASPH) lens
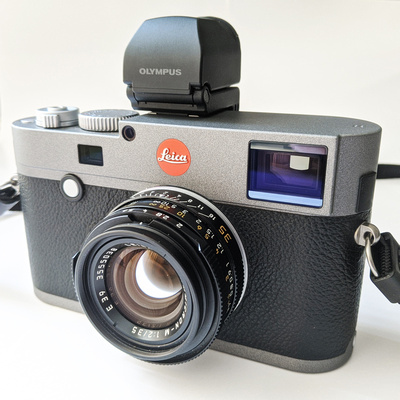

Photo above: Leica M-E 240 with optional VF-2 EVF. It can be flipped into vertical position. Olympus VF-2 and Leica Viscoflex EVF2 are exactly the same model and only different in price.
PROS:
- 99% of options as the twice as expensive M 240: The M-E 240 was sold by Leica for a very short time in 2019 as entry model likely to attract new customers and to empty stock of existing M 240 bodies before all production moved to the M 10. The original sales price of the camera was $4K and therefore 42% below the original M 240 sales tag. Leica took the original M 240 model from 2013 but doubled the image buffer size to 2 GB. The M-E 240 has no internal speaker as the M 240 series if this is of any importance (I doubt it). The M-E 240 menu and sensor/viewfinder specs are otherwise mostly the same as in the other M 240 models.
- Buffer size: The buffer size of the M-E 240 was doubled to 2 GB from 1 GB in the original M 240 series. This is helpful for long burst shooting which I rarely if ever do. But it's nice to have it as option at least.
- Weight and built: The camera is heavy - 680 g, 1.5 lb. The M 240 series including this M-E version is more bulky than the Leica rangefinder film cameras and the M 10 successor. I had to get used to the weight of the camera: you need to hold it differently than my smaller rangefinder film cameras. Best is to grab the camera with the thumb of the right hand on the protruding element next to the dial button on the upper right back of the camera and hold the right side with the rest of the hand. This avoids unwillingly touching the viewfinder window. I added the weight factor as a positive since the camera's weight allows to shoot handheld at very low shutter speed without having image stabilization. The camera is built extremely well, feels solid and of good quality. Day and night compared to my plasticky Sony camera. I also like the unique M-E body design with anthracite top plate which matches both black and chrome lenses very well.
- Sensor dynamic range: The sensor can push shadows easily 3 stops at low ISO and keeping structural elements. I found it to work similarly well as my A7R sensor in this aspect.
- Optical rangefinder viewfinder: clear and bright, better than the M 9 from experience when I once tested the M9. The frame line color can be changed in menu (I keep it white) and shows the frame lines very well. Frame line selection is done electronically and works well for M lenses but needs manually adjusted with adapter-attached lenses (see below).
- LiveView/EVF: Leica allows to attach as optional accessory an electronic viewfinder on the hotshoe. Leica didn't make this EVF on its own but had it made by a third party company (rumors claim by Epson). The exactly same EVF is available as Olympus VF-2 and Leica Viscoflex EVF2 - but with a significant difference in price. You can get the Olympus VF-2 for about $150-200 used whereas the Leica Viscoflex EVF2 costs more than twice this amount. The only difference is the brand logo on the outside of the EVF. Hint: the newer M 10 camera models rely only on a newer Leica-based external EVF which then costs even more! The EVF quality with 1.4 MP resolution is surprisingly good even it is no longer latest technology either (which is now 2.4 MP for M 10 models). The EVF allows critical focusing when needed and to see in one window exposure values of the image. One big advantage I see by using the EVF is that you don't need to move the camera away to see the LiveView image on the back screen. This is especially useful in sunny conditions. Another advantage of the EVF is that it allows to compose by looking into the flipped EVF from the top similar to vertical viewfinders in some film cameras. For example I had the camera mounted on my tripod below the height of my hip, but I composed very well by looking vertically into the EVF from above. In high contrast areas, the VF-2 EVF tends to be a bit brighter looking than the actual photo.
- Wide and ultrawide lenses: Work extremely well on the M-E 240. I tested the CV 12/5.6 II, CV 21/1.8, CV 28/2.0, and also the CV 25/4.0 LTM Snapshot Skopar lenses with great success. No color fringing in the corners of the frame nor blurriness. Now these lenses work as well for me in digital as they already did on my film rangefinder cameras! The steep incident light angles with the ultra-wide lenses is obviously not an issue with this sensor and its stack layout. This fact alone makes this camera worthwhile for me.
- Image quality: Probably the best digital camera I had so far in regard to the quality of both directly captured DNG and JPG files. There is not much post processing needed if the photo is done right straight in the camera. Colors come out very naturally like the eye sees them. The images look not at all flat - I see a big difference here compared to my Sony A7R files which require more processing when taken in the standard photo mode. B&W JPG files are often spot on and might only require some slight contrast and highlight adjustments in post processing.
- HDR: the camera offers HDR setting between 0.5 up to 3 stops. Three or five frames can be selected in the menu - a bit cumbersome to use the wheel to make changes for aperture stops and number of frames and then press the set button - I often forgot to press the latter only to be forced to redo the whole HDR setup procedure again. But once you get used to this, the HDR mode proves a very feasible and good one in this camera. It compensates for the limited dynamic range of the sensor especially in highlights. The photos are taken very quickly, I was able to capture 5-frame HDR shots handheld easily. The photos remain separate on the card depending on the file saving setup (I save them as RAW and JPG) - the camera won't process them upfront into a viewable full HDR like other cameras do, for example the Canon 5D MkIII. To get the HDR, it needs to be done in post processing with software. Especially for scenery shots, I often use this feature now. This way I am able to keep the sky blue and see details in the shadows.
- Video: All the M 240 cameras including the M-E 240 version allow for is 1080/25p video. But honestly, nobody will buy into Leica rangefinder cameras for mainly using it with video. I see it as a nice-to-have gadget which comes technically nearly for free as part of LiveView. The M 10 on the other hand has no video option anymore. I suspect it was removed in this successor model to allow a slimmer camera body without danger to potentially overheat. Other reason is differentiation in Leica's own camera market: to make video-interested customers look into the SL/SL2 camera series instead. The M 240 series is the last Leica digital rangefinder camera series which still offers video in a 2013 technology standard format (the first M 240 first came out in 2013). The later M 262 model released in 2015 excluded LiveView and video capabilities.
- Shutter: The M-E 240 shutter is one of the most silent Leica M shutters I know from own experience. You barely hear a click when releasing the shutter. It is super non-sensational, allowing the camera to be used in quiet gatherings like performances or ceremony in churches etc. It can handle up to 1/4000 sec exposure time which is 2 stops faster than my Leica M 7 with a maximum of 1/1000 sec (great when using faster lenses without ND filter!). The shutter uses a double metal blade system and is in front of the sensor. The grey bar in between is the reflective area to allow light metering. The shutter can handle a maximum of three shutter flaps per second - far below what modern cameras can do, but not really important for a rangefinder shooter.
- Battery and battery charger: The BP-SCL2 battery has a long lifetime when fully charged and used predominantly just with the rangefinder viewfinder. Without LiveView or EVF, this battery gets you through a full day of shooting. The charger comes with two cables - one for the US, the other for the German outlet standard. This is ideal for me since I travel often between both countries and don't need to worry with a 110/220 V adapter for this charger. It also comes with a plug-in car charger for the battery. Charging a totally empty battery takes about 4 hours with the Leica charger. Supposedly this battery has no memory effect.
- Light Meter: The light meter in the rangefinder viewfinder is exactly the same as in the Leica M6. You have up to three choices of metering modes: classic, center, and multi-field. The classic method is the standard metering as in the M6 for example. Center method might come useful for close-up/macro work, and the multi-field is only applicable in LiveView or optional EVF mode. I keep the metering mode mostly in classic mode since I am also comfortable with this method from my Leica M 6/M 7 cameras. Interestingly, the Leica M 7 has a few more precise metering options in its display than the M 240 series has. This has proven to be useful for slide film photography where precise metering is key. Overall the metering system of the M-E 240 works very well, too.
- Camera Menus: For me a clear positive in this camera even I heard other users saying it has too many options (coming from Sony MLC, it is easy to satisfy me with a well structured camera menu!). I had an easy time to get used to the menu structure even it took me a while to find the singled-out INFO and SET menus which contain important additional features. Some menu options appear a bit weird when first using it like setting the ISO - it only works when the ISO button remains pressed and moving the dial at the same time. Leica could have just allowed to press ISO once and then changing the value accordingly. Probably it was done as safety step that the ISO isn't changed accidentally. I don't like using Auto-ISO, therefore I am quite often using the ISO button to change the ISO value. The camera menu allows to save settings as user-specific custom file which can be loaded and applied any time. I have currently two custom settings: one for regular color-based shooting and a second one for B&W.
- Shutter release cable: The M 240 uses the same method to with cable release as in the older M film cameras. Any kind of 35 mm camera based cable release with screw-in thread will work. There is no option to use a wireless cable release.
- Tripod mount plate inlet: This is a little thing which always annoyed me when using my Leica M film cameras on a tripod - that the tripod plate is always mounted off-center on the side of the base plate instead. I have to move the tripod off center to adjust for a central camera/lens lineup with the subject. The M 240 series has taken this into account and allows now to mount the tripod plate in the middle of the base plate. The camera sits now in center on the tripod head. The tripod mount uses the newer standard male 3/4" tripod mounting plate screws (same as for example in the M 6/M 7 cameras). Only slight issue here is that you can't remove the base plate when the tripod mount plate is still attached. The screw goes directly through a hole in the base plate into the camera body. You have to remove the tripod mount plate first before being able to remove the base plate, for example if you need to change the battery.
- Camera menu and camera packaging: Simply excellent. A nice black cardboard box with magnetic flaps and drawers for manuals/cards and charger and cables. The camera menu in German and English is well written and allows to find camera options easily. Probably the best camera menu I ever had for any of my digital cameras in the past. Leica makes it clear that you buy not only the camera but an experience here. I am glad that I got all the original packaging even I bought the camera used.
CONS:
- Reduced handgrip functionality: Often overlooked in reviews, The M-E 240 is not compatible with the full electronic Leica handgrip #14495 commonly used in the rest of the M 240 series. You can attach it to the M-E 240 body, but all (or most?) electronic functions like GPS will remain disabled. This information can only be found in a little addendum sheet Leica added to the camera manual (the original manual which comes with the camera mentions #14495 as suitable handgrip option which is false). If you decide to get a handgrip for the M-E 240, you might be better off with the cheaper version without electronic features, #14496. No idea why Leica disabled this functionality in the newer M-E 240 model since the ports and software are all the same as in the M 240. I suspect it was one way to hinder professionals going with the much cheaper and newer "entry" level camera version. This is the main difference to the original M 240: not the camera itself and its functions, but in regard to compatibility with the handgrip accessory. This might or might not be a deal breaker for some (not an issue for me other than USB accessibility).
- Viewfinder: Same as in the original M 240 series, the viewfinder magnification is less than the common 0.72x and only uses 0.68x magnification. The rangefinder rectangle to focus both frames is therefore a bit smaller than in most Leica rangefinder film cameras like the M6/M7 series for example. Also the viewfinder itself is not as wide as in film-based rangefinder cameras. With a 28 mm lens, you need to use the whole viewfinder frame available, there is barely any space outside the frame left. The viewfinder window can smudge easily, always have a lens cleaning cloth available to clean the window.
- Automatic lens recognition: The camera allows for 6-bit coded M lenses and can then automatically apply an in-camera profile for a specific lens. The lens frame in the viewfinder is electronic and selected by the bayonet mount according to the M lens focal length. If you have the camera menu set up with "Automatic Lens recognition", this will apply the lens frame in the viewfinder automatically for all M lenses - no matter if coded or off-brand. It's getting a bit tricky when using older vintage LTM screw-mount lenses (or any other kind of manual focus lens) with adapter: you need to have the camera menu set to automatic lens recognition. After you attached the LTM/M adapter, the correct pair of frame lines will be displayed. In case you need to change the LTM/M adapter with a different pair of frame lines, you need to turn the camera off first - otherwise the camera remembers the former setting and doesn't change the frame lines! After you exchanged the adapter, turn on the camera again, and the different frame lines according to the used adapter will be displayed.
- High and low ISO range: this is the obvious and main limitation of the M 240 series in general, but you would only consider such camera if you don't need high ISO in the first place (otherwise you really have to go the M 10 route which is its main improvement over the M 240 series). After testing exposures at ISO 100 to 6400, I am feeling comfortable using the camera up to ISO 3200. ISO 6400 shows quite a bit of noise but which can also be significantly reduced in post processing with anti-noise filters. ISO 100 is pulled from the native minimum ISO 200 camera setting. It keeps exposure values at ISO 100 the same as the ones measured at ISO 200 without changing the registered amount of light (seen through exposure simulation at ISO 200 and 100 in the EVF).
- Sensor dynamic range: Regarding highlights (for example sky and clouds), this sensor is super sensitive and can clip highlights very easily. There is no way to rescue clipped highlight structures in post processing. I found one stop overexposure in highlights is already a culprit. Pulling even slightly overexposed highlights is impossible - here the sensor differs significantly from the Sony A7R sensor performance. Since shadows can be pushed nicely on the other hand with the M 240 sensor, make sure to better underexpose half a stop or a stop. Use a graduated ND filter for landscape photos or push shadows in post processing. When underexposing areas too much, you might observe greenish casts in the shadows which you might need to desaturate in PP.
- LiveView/EVF: the magnification area cannot be moved within the frame - the whole camera needs to be moved if an area to focus is outside the center magnification frame. This can cost time to focus and then to move the camera back to its original position on the tripod. The EVF slows down shutter release times in case this is critical. The EVF uses a lot more battery power - better have a second charged battery ready when using the EVF more often. The camera's back screen cannot be tilted - hard to go back to this when coming from a mirrorless camera with tilt screen.
- Access to battery and SD card: only possible by unscrewing the bottom plate. I guess you get used to, but I felt it was a but of a step backward when coming from DSLRs and MLC where the battery and memory card simply sit in a chamber which can be opened and closed with a lid quickly. I found that the plate can't be removed if a tripod mount is still attached to it. This can cost lots of time to change a battery for example when the camera sits on a tripod.
- Red Leica button: Nothing against the brand logo, but I am used to tape Leica name and button on my Leica film cameras to be less conspicuous. The anthrazite M-E 240 camera color of the top plate looks actually very nice, but any kind of black or silver tape will stand out against the grey background. So far I haven't found a solution and keep the red Leica button visible.
- Optional battery: The M 240 series BP-SCL2 battery is much thicker than its successor in the M 10 and lasts also a lot longer when fully charged. But there is visible drain of battery power when using LiveView or optional EVF. A second battery is a good idea to keep going especially when using the optional VF-2 EVF. 50% remaining battery charge was used up in combination with the VF-2 in two hours. Problem is the price - a new one costs still about $200, and no third party company offers a replica. Used batteries go for $150 - not cheap either, and you don't know what you might be getting and how much the battery was used before. I had to bite the bullet and bought a new BP-SCL2 battery as spare one.
- No ultrasonic sensor cleaning: Standard feature in most digital cameras now, but not in the M 240. I have mixed feelings about having this option - I didn't see much benefit of ultrasonic sensor cleaning in my Canon 5D MkII and only a bit with my Sony A7R. In fact it can delay turning the camera on or off. On the other hand I need to dry-clean the M 240 sensor with my arctic butterfly swap quite regularly.
- Strap: Do not use this strap! After a couple weeks of walking around with this strap, I realized that the plastic fixing on the strap for the metal ring holders gives indents on the side of the camera in the black leather. The metal is protected for this reason with plastic parts on both sides of the camera which helps, but the lower end below the strap mounts isn't protected. I still need to find a camera which comes with a well suited and easily adjustable neck/shoulder strap. Same here with the Leica M-E 240: First I had to find an online YouTube video to figure out how to connect and disconnect the strap from the camera - it is not intuitive. When using the Leica strap, it also became a hassle with curled strap all the time - no fun. Simply purchase another strap and forget about this one - IMO it is unusable. The strap is really nothing special either other than the Leica brand name on the shoulder/neck plastic cushion.
What do I miss in the M-E 240?
- Easy accessible USB port on the camera. The port is only available with the optional handgrip I mentioned earlier. It's not a must-have for me since I normally simply unplug the SD card to upload the photos on my hard drive, but it would be nice to have to allow for example battery charging inside the camera. Due to the limitation of the handgrip functions on the M-E version as mentioned earlier, I am not sure if the USB port is accessible in the first place.
- Mentioned above, not being able to move the zoom magnification window in LiveView or EVF is a disadvantage. This alone will likely stop me to use the M-E 240 for macro photography and using my Sony A7R MLC instead which is much better suited here with movable zoom magnification window.
- I wish the M 240 sensor would allow highlight capture and pulling like my Sony A7R does. The M 240 behaves more like the M 9 regarding highlights. I am spoiled here with the bit better dynamic range of the A7R, but going back a step feels hard after getting used to the highlight post-processing capability of the Sony sensor. But shadows can be pushed nicely with the M-E 240, I just need to make sure that I always underexpose instead of overexposing highlights. The other option is to use the HDR function of this camera.
Overall I am very happy with this camera purchase. Leica is and remains an expensive brand, but getting a used (and nearly mint) camera for a good deal limits value depreciation significantly and allows me to actually use the camera in the wild without being afraid to carry a big jewel around my neck or shoulder. The M 240 was its first and last hybrid camera series made by Leica combining rangefinder, LiveView/EVF capability, and video. The M-E "entry" version has the same capabilities as any other professional M 240 series mostly just compromising in electronic handgrip accessory functionality. Leica currently doesn't make entry-level cameras or Summarit-lenses anymore, they also removed video capability from the M camera series fully. I believe therefore the M 240 series is and will remain in demand for many who accept the camera's lower ISO limitation compared to expensive current M systems. I will use the M-E 240 for years to come in combination with my Leica LTM and M film cameras. The M-E 240 won't replace my track-proven Sony A7R camera either - both will be used in different shooting situations.
The Reciprocity Factor for Film Photography
Recently I was shooting my Hasselblad 500 C/M with Fuji Velvia 50 slide film which I really like due to its color tonality. I found myself in a situation where I had to take long exposure shots with this kind of film - anticipating that this could be the case before heading out to shoot, I looked up online how much time needed to be added to the measured external light meter reading to compensate for lower light sensitivity of film with exposures often above 2 to 4 seconds. This factor is specific for every kind of film, and is named "reciprocity" failure or factor.
This factor is not needed in digital photography since a digital sensor receives and reacts to light in a linear way from dark to bright. This means that even long exposures are measured correctly by an external or internal camera-based light meter for digital photography. Since the majority of photographers is shooting digital, most have never come across the term "reciprocity" factor. It plays a huge role when taking photos with film - light is not received in a linear way like in digital. Film is less sensitive at both ends of the dark/bright histogram ends - it can be shown as a double-S-curve with turning point in the center. You might know that you can overexpose film quite a bit - it depends on the film, but 3-4 stops can be handled by most negative films quite well for overexposure without losing detail (this is different with slide film which can only handle a maximum of one stop overexposure before blowing out highlights - similar to digital where beginners often overexposure highlights instead of pushing shadows in PP). The same goes for dark areas with longer exposures needed - you actually need to increase exposure to avoid getting pitch dark shadows without detail using film. This is valid both for negative and positive (slide) films! Only that the amount how much more light is needed depends on a) the film, and b) the situation/scenery.
Best is to explain this with examples. As I mentioned in the beginning, Fuji Velvia slide film is not a beginner's film to be used since it does not allow a wide margin for wrong exposure - both at dark and in the bright. Rule of thumb is to avoid overexposure at all cost and rather underexpose this film half or one stop to avoid clipping highlights when present. The film is great to use during regular daylight in colorful scenes - what I like a lot is that it does not require any PP with color saturation after digitization/scanning. Kodak Ektar 100 negative film is also giving great colors but always annoyed me with its tendency to show shadows in blue/magenta cast. Fuji slide film fully avoids this issue and looks very natural in darker areas instead.
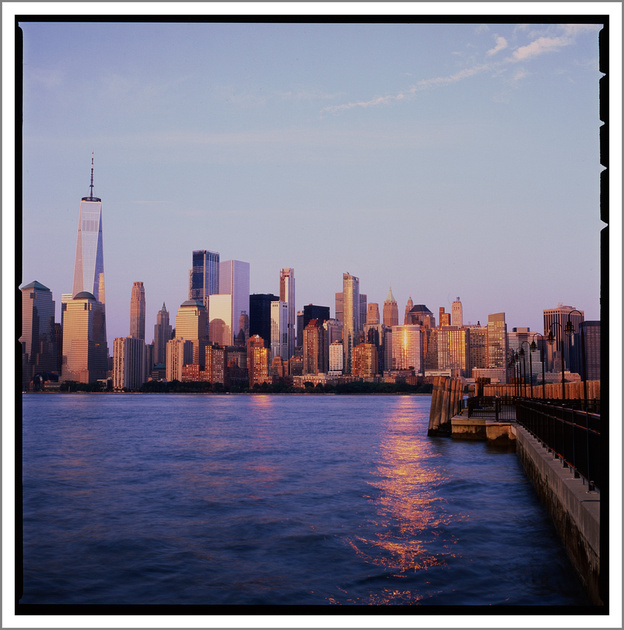
I have never tested Fuji Velvia 50 for low light photography - I only found few examples of night shooting with this film online. This time I gave it a try - it was sort of a gamble since I only had three frames of my 120 film left to hit it. I wanted to cover the sunset and the night scene of NYC from Liberty State Park across the river. How did I get to the results shown below?
First, I had to keep in mind the extension or reciprocity factor of this film above 4 seconds. It states to add an extra stop between 4-8 seconds, and multiply the exposure with factor 1.5x between 8-12 seconds. Above 16 seconds, the reciprocity factor increases to 2x. The first shot with this scene was taken before sunset at f/11 with 2-stop ND filter to blur the water a bit. The exposure here was 1 second - no need yet to use the reciprocity factor:
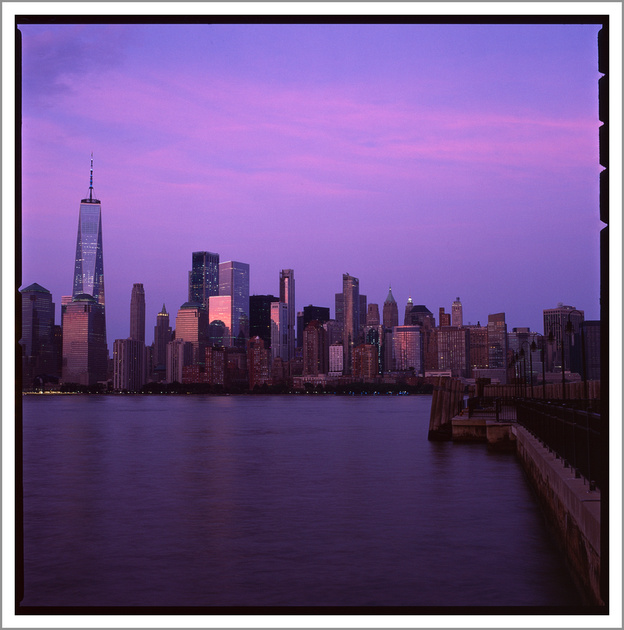
The sun was setting soon after, and quickly the light intensity dropped. I was still at f/11 but now without ND filter since there was no more need to extend the exposure time with less available light. My external light meter showed for ISO 50 an EV-value of 6 which corresponds to 2 seconds at f/11. Now I am hitting the range where the reciprocity factor comes in play - using the scale shown above, I would need to apply 2+1 = 3 seconds instead of the measured 2 seconds. But the situation/scenery also comes in play - I wanted to have the scenery darker to bring out the blue/magenta sky better. I estimated that 2 seconds should be sufficient and ignored the additional second. The result turned out exactly as I anticipated just with more saturation than expected:
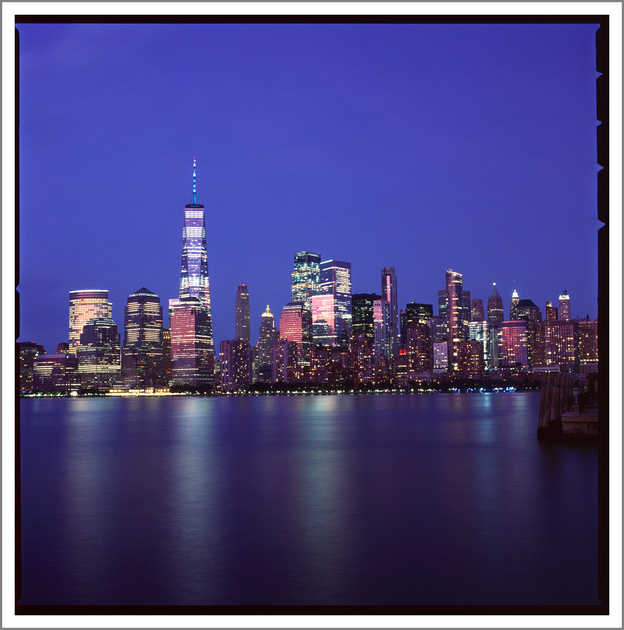
The light quickly vanished after the sun disappeared, and the city became alive with artificial light. Now my light meter showed me an EV value of 2 which corresponds to 30 seconds at f/11 and ISO 50 film. Using the required reciprocity factor of 2x, I would need 60 seconds to accommodate for the lower film sensitivity. But I wanted to avoid overexposure at all cost for my frame #12 - the last frame I had. I simply estimated that 45 seconds instead should bring me in the right range (taking the average of 30 seconds from my meter and 60 seconds with applied reciprocity factor). I released the shutter with my cable release and held the leaf shutter open in bulb mode for roughly 45 seconds (I counted in my head). The result was again very pleasing - showing all detail but avoiding underexposure:
I might actually use this slide film more often for dim/dark light photography after this first experience with it in low light. I really love the bluish cast in the water and the sky which digital would not have brought out in the same way.
Konica-Minolta Super Rokkor Chiyoko 45/2.8 Lens
Welcome to another LTM lens review on my photo blog! This time we focus on a lesser known lens, the Konica-Minolta Super Rokkor Chiyoko 45 mm f/2.8 lens. The lens was introduced in 1954 and comes in different versions with slight exterior modifications. The lens consists of a 5 element in 3 groups as Heliar/Tessar hybrid design and was highly praised at the time. In Japanese the lens is sometimes associated with the word "Umebachi" which stands for a chrysanthemum flower with originally 16 petals represented by 8 aperture blades in this lens. The lens came with the Minolta 35 Model D camera as standard lens. Older lens versions contain a front bezel aperture window which was omitted in later lens versions (mine is a newer lens version from 1957 and doesn't have this little circular window).
The price for this lens tends to vary a lot and isn't available online too often. I got mine for $160 in November 2019, but I also see prices in the $300-400 range. It is often regarded and sold as lens collector item.
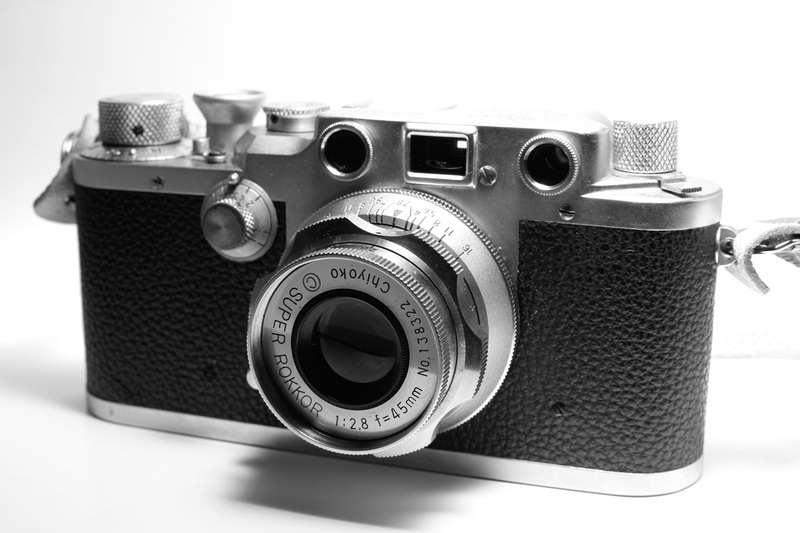
Photo above: Konica-Minolta Super-Rokkor Chiyoko 45/2.8 LTM lens mounted on my Leica IIIc camera.
The lens is very well built and comes in a brass lens housing with interesting looking focus ring which appears resembling a gear. It is very small and compact for a standard focal length rangefinder lens which makes it ideal for travel. The aperture ring is at the front of the lens. The aperture ring moves smoothly without any clicks at the aperture numbers - so any kind of intermediate f-stop can be selected between the full aperture numbers. When turning the aperture ring, the focus ring tends to move, too which can be an issue when quickly making adjustments with this lens. Moving the focus ring also changes the position of the aperture markings - probably the reason why the aperture window in older lens versions made it a bit easier reading the f-stop by looking to the front of the lens. This is especially true in closer focus position around 5 feet where the f-stop can't be easily read. Newer lens versions like mine have two black dots on opposite sides of the focus ring and two two aperture scales to minimize the range of the dot being moved outside the view by looking on the top of the lens to adjust the f-stop.
The lens also has a little focus tab made of metal attached to the focus ring. Depending on personal preference, you can either focus with this focus tab or use the focus ring itself. Closest focusing distance is 1 meter (3.3 feet). The lens tube is fixed and doesn't need to be pulled out for focusing. The 50 mm viewfinder of my Leica IIIc camera can be easily used to compose with this 45 mm lens.
The lens is very sharp and fully coated on all glass-to-air lens surfaces corrected for optical aberration. It delivers excellent color and B&W photographs. I still recommend getting a generic 34 mm screw-in hood and a 34 mm snap-on lens cap.
Pros:
+ Tank-like built and compact pancake size
+ Very appealing look with the gear-like focusing ring
+ Ideal standard focal length travel lens; fits easily in any pocket to carry separate from the camera
+ Smooth aperture rotation to allow intermittent f-stops
+ Very sharp lens with good contrast
Cons:
- Focus ring moves aperture ring
- Aperture stop hard to read when focusing closer at 5 feet
- Heavy for the size of the lens
- Often lens caps have to be purchased separately and don't come with the purchased lens
- Uncommon 34 mm filter diameter
- Collector lens item can drive used prices up
Examples with Konica-Minolta Super-Rokkor Chiyoko 45/2.8 LTM lens on film: (Hover over image to see the technical info)
 Ilford FP4+ 125 film developed in Xtol (1:1). Lens aperture f/5.6
 Ilford FP4+ 125 film developed in Xtol (1:1). Lens aperture f/8.0
 Ilford HP5+ 400 film developed in Xtol (1:1). Lens aperture f/8.0
 Ilford HP5+ 400 film developed in Xtol (1:1). Lens aperture f/5.6
Leica 50/1.5 Summarit Lens Review
A new decade has just begun, and never before photographers had so many choices in digital cameras and lenses. Mirrorless cameras are now the forefront making DSLRs not obsolete but putting them in the second row. Some other niches in photography started attracting momentum like film photography in general. Many lenses in different mounts can both effectively be used on film and with adapter on mirrorless digital cameras. This blog starts a series of vintage lens reviews which I tested both on film and digital camera gear. I consider these "gems" because they are either under-represented and might offer unique advantages hard to find elsewhere for a very good price/quality ratio.
Personally I find vintage lenses from the 1940s to 1960s very interesting since some of them exhibit qualities irreproducible with new digital lenses. Why is this? Because > 60 years ago lenses were much more simply built to accommodate lower resolving 35 mm films. Also lens coating technology and very accurate robotic lens element manufacturing did not yet exist or was just at the beginning. Lens bodies were much smaller as nowadays lenses due to much less lens groups used and lack of auto-focus plus other electronic features like in-lens image stabilization. Floating lens elements were introduced first in the late 1970s. Less lens elements and none or minimal lens coating gave many lenses of this era a unique character. Modern lenses purposely removed these characteristics to improve corner-to-corner sharpness of the frame, have less chromatic aberration, minimal halo effects, and higher micro contrast. Good example for this are modern Leica Summilux (f/1.4) lenses which are aspherically corrected and go for a minimum of $4K in M-mount.
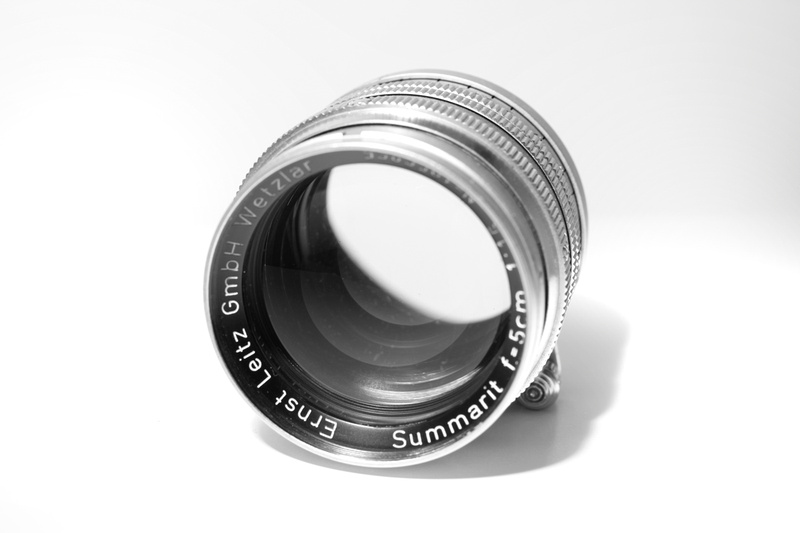
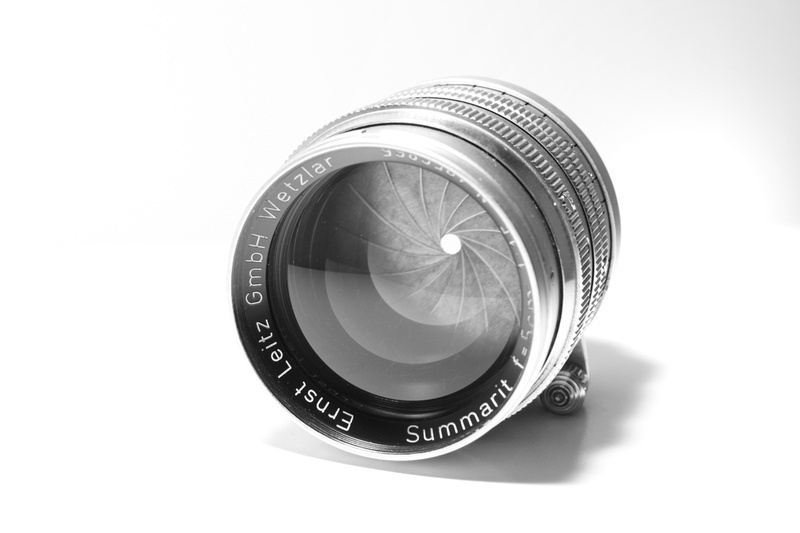
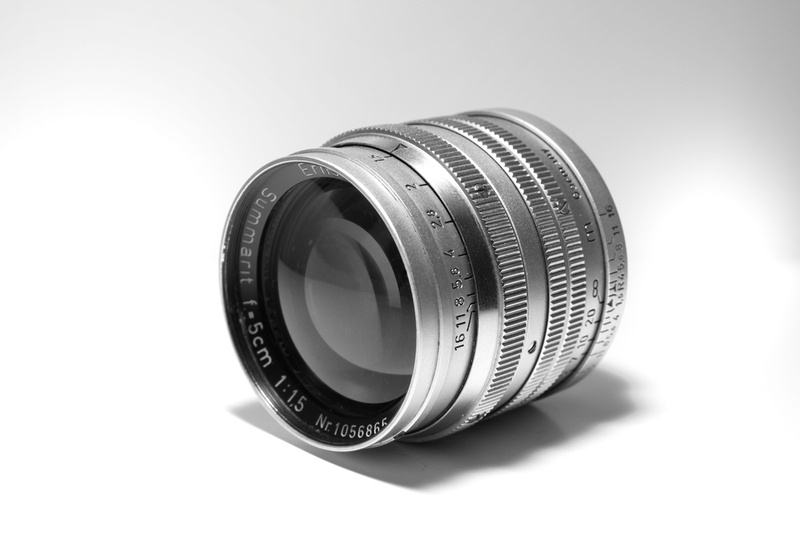
Lesser known but very interesting for those considering vintage character lenses is the often overlooked Summilux predecessor, the Leica 50/1.5 Summarit lens which was made first in LTM screw-mount and later in M bayonet mount. In comparison, this lens if found in very good condition with low amount of scratches on outer lens elements goes between $500-800 as used copy. The name Summarit is now a bit misleading after Leica introduced a novel f/2.4-based Summarit lens line in 2007. Those are seen as entry-level M-mount options for a much cheaper value compared to their f/2 Summicron counterparts. The new Summarit lens designs have nothing in common with the old 50/1.5 design first released in 1949. This 50/1.5 lens design relates to the predecessor which is the Leica 50/1.5 Xenon lens licensed by Taylor Hobson but now came with additional lens coatings for 7 lens elements in 5 groups. The lens is an oddball in the Leica line, and exhibits one property of only few in the history of LTM/M lenses: it transmits UV light, therefore it is highly recommended to use an E41-filter thread based UV filter for film photos (it could be very interesting to be used on a full-spectrum converted mirrorless digital camera for UV-photography!). The lens is beautifully made from brass with chrome finish and weighs 300 grams. The aperture ring has full stops between f/1.5 and f/16. The last stops between f/8 to f/16 are very close to each other on the ring - caution is needed not to accidentally jump over one stop here. Often the minimum focus distance of one meter is mentioned as con of this lens - but for film rangefinder focusing one meter was the minimum distance accessible with the rangefinder path anyway. When adapting this lens to a modern digital mirrorless camera with electronic viewfinder (EVF), close-up adapters can be easily used between adapter and lens mount to allow closer focusing as shown in a few examples below. The lens has a focus tab which locks into infinity position. The lock can be sometimes a bit of a hassle when trying to quickly achieve focusing between infinity (locked) and > 50 meters (unlocked).
I found a very good nearly mint copy of the 50/1.5 Summarit lens in LTM mount on FB Marketplace sold by a fellow photographer. Since I own LTM and M-mount film cameras, I preferred the older LTM mount since I am now able to use this lens on my Leica IIIc and as well on my M-mount cameras with cheap LTM/M-adapter from China. The Summitar lens mounted on my M-cameras is well balanced but attached to my IIIc it leans forward. Focusing works well even on my IIIc - wider open the focus was still spot on!
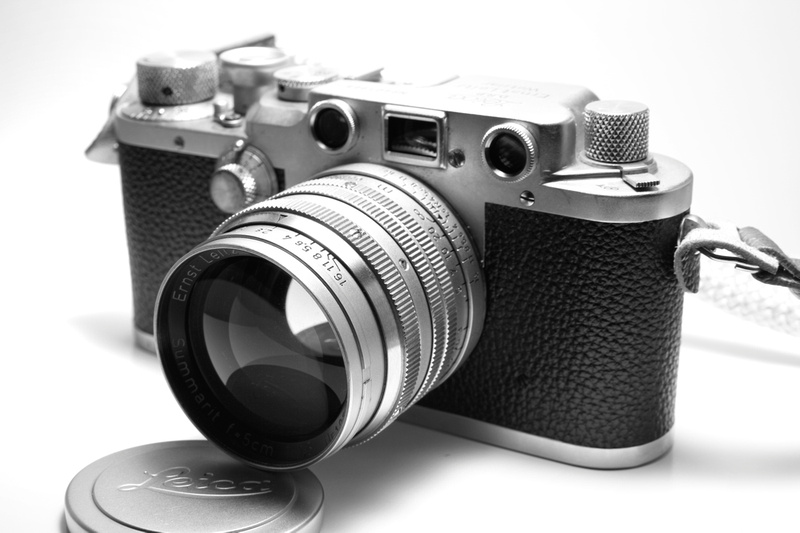
Photo above: Leica 50/1.5 Summarit LTM lens mounted on my Leica IIIc camera.
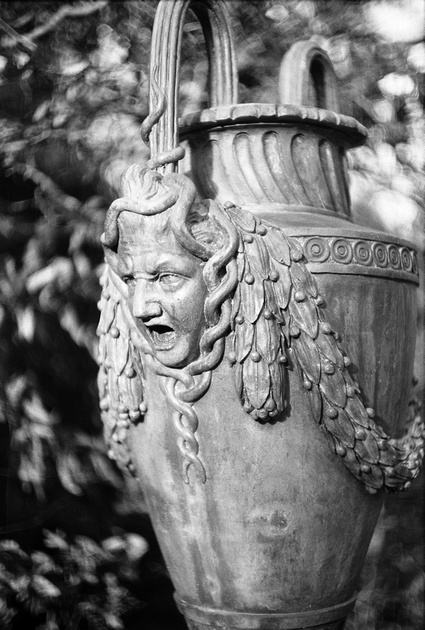
The lens exhibits a dreamy-like bokeh wide open at f/1.5 and f/2.0. You might need to use an additional ND filter to be able to shoot wide open at 1/1000 sec or less in bright weather conditions. In this fast aperture range the center focus is reasonably sharp but very low in contrast - less visible on film but certainly on a modern digital FF sensor (slightly increasing the contrast in post-processing is needed here). The bokeh balls are nothing like doughnut-like structures often seen with lenses made around the same time like the Leica 50/2.0 Summitar lens (will be reviewed in a future blog) but nicely circular without pattern. Sometimes they can be distorted creating very unique effects in the background - even with some triangular shapes. When closing down the lens aperture to f/4.0 and higher aperture number, the Summarit properties merge into those of a standard vintage Summicron 50 mm lens: sharp from corner-to-corner without distortions. The lens seems to be sharpest in the center at f/8.0 as expected with most vintage lenses. But even closed down, the image keeps a softer look with yellowish tint in coloration.
Even mentioned often as an issue in earlier lens reviews, I didn't see lens flaring as a biggie even when shooting against the diffused sun. I still would recommend using a 41 mm generic lens hood to avoid the clumsy and expensive Leica hood for this lens.
Pros:
+ Excellent portrait look to reveal soft skin without needed digital post-processing
+ Very good built quality: you don't find this quality with modern lenses!
+ Smooth 15 metal aperture blades which close in a full circular way
+ Unique and beautiful bokeh wide open at f/1.5 and f/2.0
+ Good for low light photography
+ Most affordable fast 50 mm Leica lens!
CONS:
- Low contrast wide open
- Minimum focus distance of 1 meter (adjustable with close-up adapters on digital cameras)
- UV filter needed for film photography since lens elements are UV-transparent
- Extraordinary expensive and super bulky Leica lens hoods for this Summarit lens. Better get a cheap generic 41 mm Summarit lens hood!
Examples with Leica 50/1.5 Summitar lens on film: (Hover over image to see the technical info)
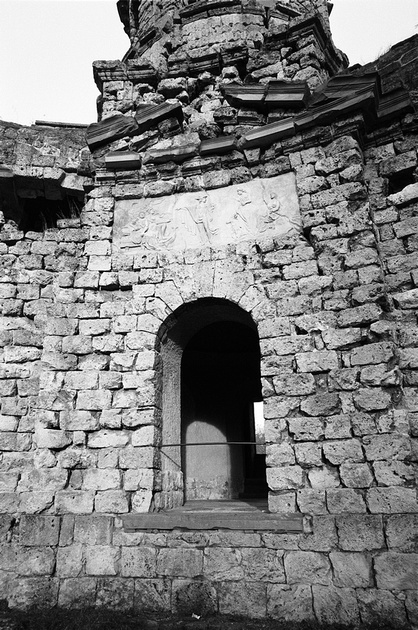
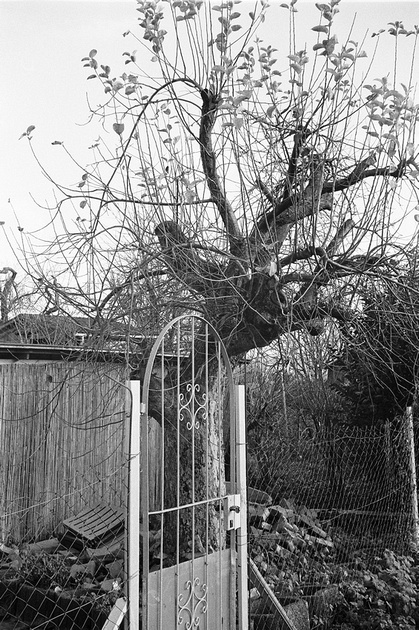
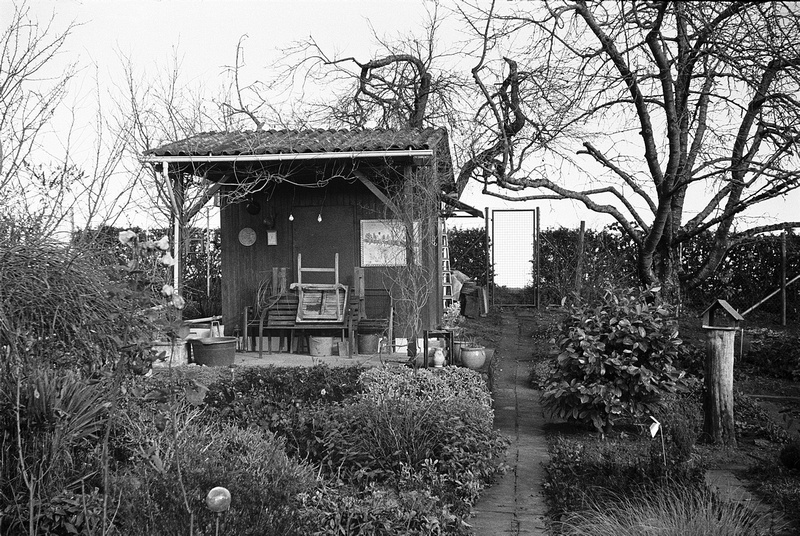
 Ilford FP4+ 125 film developed in Xtol (1:1). Lens aperture f/2.0
 Ilford FP4+ 125 film developed in Xtol (1:1). Lens aperture f/1.5
 Ilford FP4+ 125 film developed in Xtol (1:1). Lens aperture f/2.8
 Ilford FP4+ 125 film developed in Xtol (1:1). Lens aperture f/1.5
 Ilford HP5+ 400 film developed in Xtol (1:1). Lens aperture f/2.8
Examples with Leica 50/1.5 Summarit lens adapted on Sony A7R with LTM/E-mount adapter: (Hover over image to see the technical info)